Dynamic Duos #44

This week’s colours can be used in a lovely subtle, pretty way, or used in a bold or modern way.  I have chosen pretty and subtle this time, but I am loving some of the bold ideas I have seen.

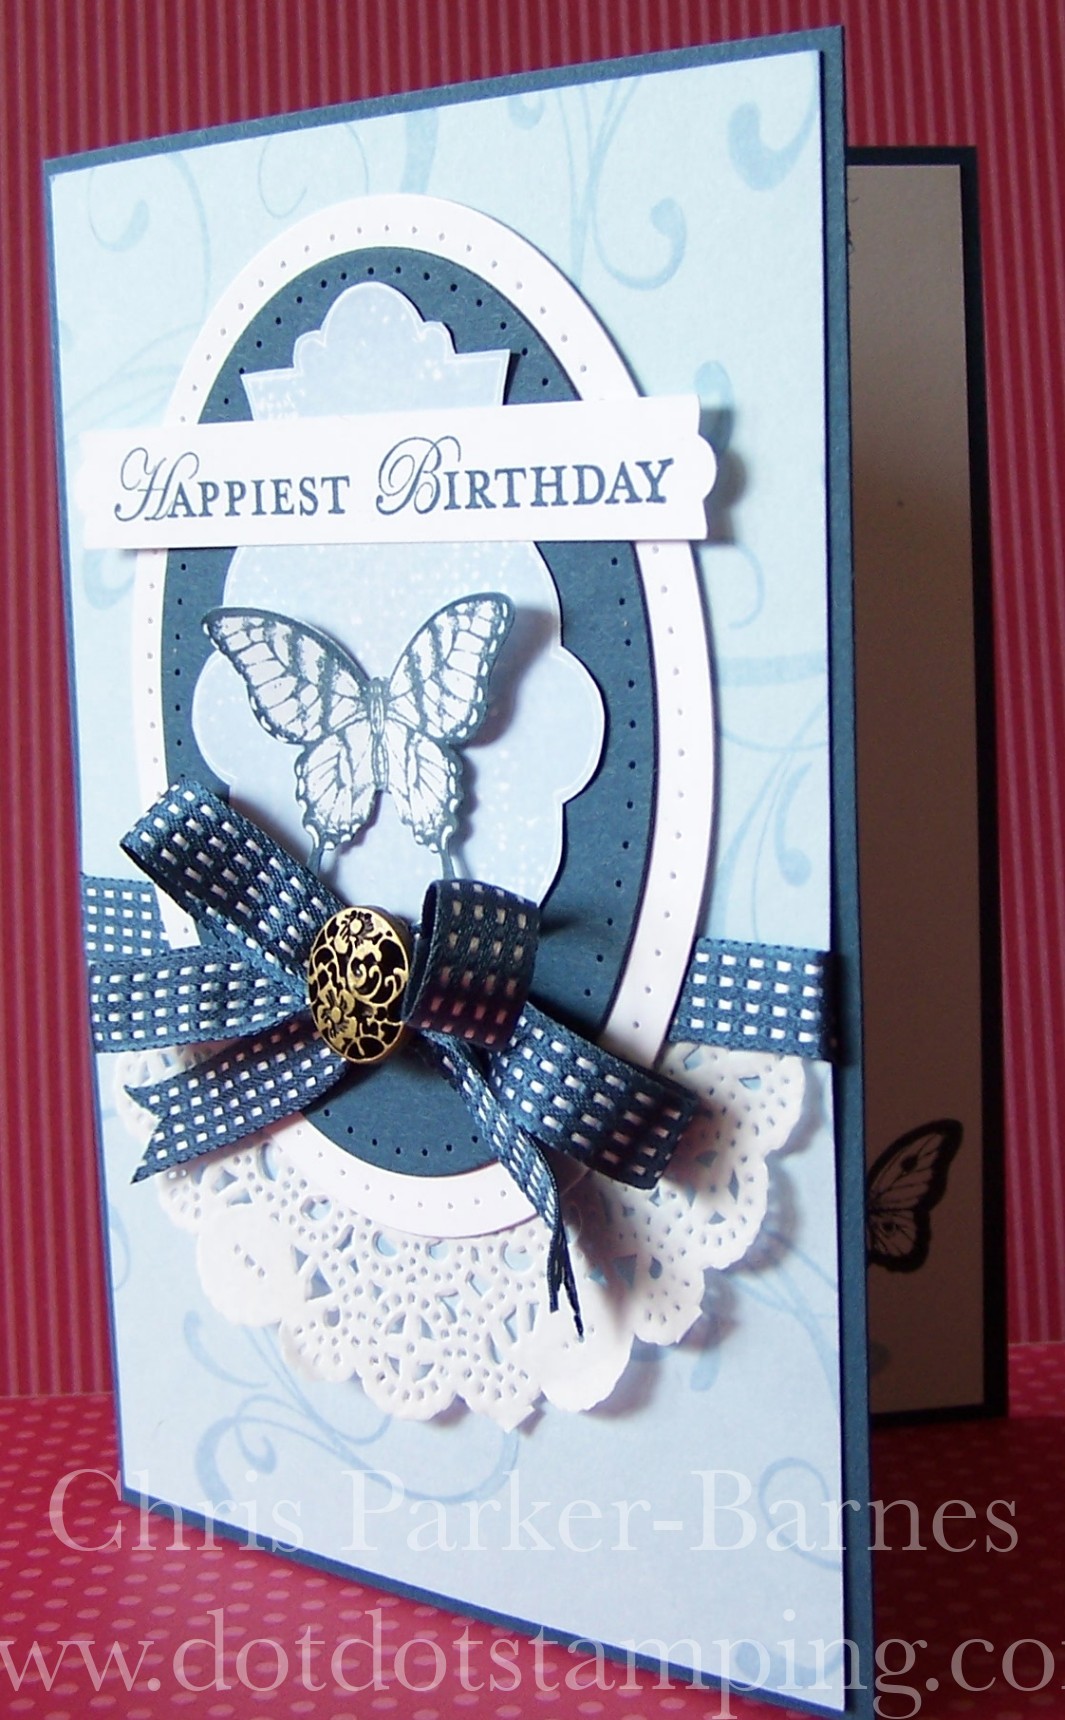
My card uses the Bordering on Romance stamp set again, the images have been stamped in black Stazon ink, and then I have used So Saffron and Sahara Sand markers and drawn around the inside of the stamped image, giving a very subtle colour to each area.

The pretty flowery brad is one of the new Designer Builder Brads in the Seasonal Catalogue (Page 12) and the gorgeous ribbon is unfortunately a retired one.

Make sure you check out the inspiration from the rest of the Design Team, and feel free to send me an email if you have any questions about my card.

Happy Stamping!
Chris


Direct Ink meets Triple Stamping….

… actually in this case I think it is Double stamping.  I am not sure of the correct name for this technique, I have seen it called a number of different things, but whatever it is called, it is a great technique.

This first card I am going to enter into this week’s Retro Sketches challenge since it was their sketch that inspired me 🙂

I have used the Direct Ink onto cardstock technique using the colours Pool Party and Old Olive, and then I have used the Triple stamping technique for the silhouette in Basic Grey.  The silhouette image comes from one of my all time favourite stamp sets Serene Silhouettes.

The second card uses similar techniques only this time I have used the ink directly onto the clear block and then stamped that onto the cardstock.  It is just a little more subtle, but still very effective.  The colours are the same, only this time it is the French Foliage stamp set (another favourite!)


If you like the Triple Stamping technique, live in the Canberra area, and would like to learn more about how to use this technique, I will be running classes on Tuesday 26th March at 1pm and Wednesday 27th March at 7.30pm.  Bookings are essential as places are limited, so contact me asap to book your seat.  I will also organise a class on the Direct Ink techniques, probably in late April or early May, details coming soon.

Happy stamping!
Chris

Dynamic Duos #43

More gorgeous colours for this week’s Dynamic Duos challenge:

And as always, so many ideas came to mind!  This time I chose to use them to make a card for a colleague who is having a baby boy soon.

I think the “peek-a-baby” image is just too cute, it comes from the Hostess stamp set called “Happy You” and the greeting is from Baby Prints.  The patterned papers come from the gorgeous Sycamore Street DSP which is available from the Sale-a-Bration catalogue but only until the 22nd March.
For some reason the photo has made the card look a little lop-sided, but I assure it isn’t really.
Lots of inspiration from the rest of the Design Team as always, and we look forward to seeing all your wonderful creations.
Happy Stamping!
Chris

Pop-up Posies


I love the colours in this card, so pretty!
This particular card was inspired by a very talented fellow Stampin’ Up! demonstrator Christine Blain from Happy Heart Cards.  As usual, I have changed things around to what works for me, but the basic idea is similar to Christine’s card.
The beautiful papers are from the Tea for Two DSP, and I have used Needlepoint Border embossing folders to create the little scallop and stitch feature through the middle.  The flower, tag and the stamp all come from the Pop-Up Posies Designer Kit, which is very versatile, and makes it so easy to create a gorgeous gift tag, or add the tag to a card as I have done here.
Send me an email if you would like to purchase one of these kits, they make creating soooooo easy! 🙂
Happy stamping!
Chris

Dynamic Duos #42


The first thing I thought of when I saw these colours was yellow flowers and green leaves, and then decided that was a pretty obvious choice so wanted to do something different, and decided I would continue with my masculine themed cards, although this particular technique could definitely be used on any cards.

The different pieces of cardstock have been punched or cut out and then stuck onto the base piece using either glue or double sided tape, and then the whole piece has been run through the Big Shot using the Square Lattice Embossing Folder.  It looks like the pieces are embedded into the background piece, a little like patchwork.
I have used the Teeny Tiny Sentiments stamp set for the greeting on each card as I wanted them to be small and insignificant in relation to the geometric shapes.
Here are the cards individually:


Lots of inspiration for you from the rest of the Design Team again this week.
Happy Stamping!
Chris

Easter Bunny is coming…..

….so I thought I had better get on and make some Easter cards.
Again, I have used the Oval Framelits along with the very cute Everybunny stamp set – too cute!
I am a bit addicted to banners and flags on my cards at the moment, so I have used the gorgeous Tea For Two Designer Series Papers to create them here, and some brads to “secure” them at the top.  Little bunny has been heat embossed using black embossing powder and then coloured using inks and a blender pen.
You can contact me if you would like more information about any of the products I have used for this card, and since Easter is less than a month away, contact me also to order your Easter stamps and papers now so that you have some time to create something special for someone special! 🙂
Hope you have a crafty weekend.  Happy Stamping!
Chris

Oval Framelits

I have to apologise for my lack of posts recently, things have been rather busy in our household.  I have been doing a little crafting so I will try to catch up and share some of them with you.
Today I will share a card that I made using the new Oval Framelits.  I just love oval shapes, especially on cards, but have only just had the chance to try them out.  Need a few more hours in the day, I feel.  Or perhaps I just need to sleep less 🙂

This card uses the Everything Eleanor, Papillon Potpourri and Apothecary Art stamp sets, along with the colours Bashful Blue and Midnight Muse and a half of one of the pretty doilies.

Promise to be back soon with more of my creations.
Happy stamping!
Chris

Dynamic Duos #41

This week’s Dynamic Duo‘s colours are:

Yum… another gorgeous combination!
The colour reminds of a beautiful clear ocean, so I made my card using the new By The Tide stamp set.

I have also used the French Foliage set to add some “bubbles” in the background along with the Square Lattice embossing folder and some sponging around the edges, and paper piercing and faux stitching of course! 🙂

You can see what the rest of the Design Team have done with these colours here.  Please join us and share your wonderful creations.
Happy stamping!
Chris


Swallowtail

Have you noticed that I like butterflies?
Well, I do, and Stampin’ Up! keep bringing out such beautiful butterfly stamps.

What do you think?  Isn’t he just the most beautiful butterfly?
Trust me, you will be seeing quite a lot more of this stamp, it’s called Swallowtail.  Despite that it is quite large, and actually slightly bigger than our standard card size, it still looks gorgeous slightly off-set or just using half as I have done here.

I have heat embossed the butterfly using black embossing powder onto white cardstock and then coloured inside the embossed areas using So Saffron ink and a blender pen, and just gently going over and over the areas so as not to rough up the cardstock.
I have to say that Mr Butterfly looks much more stunning in real life.
Hope you are having a crafty Tuesday.  Happy Stamping!
Chris

More Masculine Cards

In some of my previous posts, here and here, I started giving you some tips on making masculine cards, and I wanted to keep going with those and show you a few more that I have made recently.
In my previous posts I spoke about using Textured Embossing Folders, and also patterned papers on your masculine cards, and today I am going to look at torn paper or cardstock.

I have two cards to share with you today.

With this first one, I have stamped the image first and then torn around both the stamped piece of cardstock and then separately torn the Early Espresso layer.  I have made the two layers about half a centimeter different in size  so that the bottom layer does show underneath.  This card also uses some patterned papers from the Comfort Cafe DSP and a button from the Artisan Embellishment Kit.

The second card has a torn edge at the bottom of the Cherry Cobbler layer.  Both times, the torn edges give the cards a nice vintage feel to them, and adds some texture and interest to the card.

Both cards make use of the fantastic Feeling Sentimental stamp set, which is an exclusive Sale-a-Bration set, so make sure you order it while you can! It’s a great set for masculine cards, but I have seen some really nice feminine cards made with it too.

I have heaps more to share with you, there has been lots of crafting in our house recently, so stay tuned!
Happy stamping!
Chris