I’ve been enjoying some quiet time recently while I recover from a nasty flu that took hold a few weeks ago. Sitting and colouring has helped to keep me occupied and creative. So now I’m putting together some cards and notebooks using the coloured images.
Well… any month is a good month to join really. But April is extra good!
Why?
Because if you join in April you can choose some of the brand new pre-order products that are in the new Annual catalogue but not available to customers until May.
That means you know that for a minimum of the next 12 months, those products are going to be current products, making it easier to organise classes or demonstrations if you are inclined to do them.
Of course, being a Stampin’ Up! Demonstrator doesn’t mean you have to run classes. You can just enjoy the benefits and amazing, supportive community.
So if you live anywhere in Australia and feel you would like to join my team, you can do so by clicking this link:
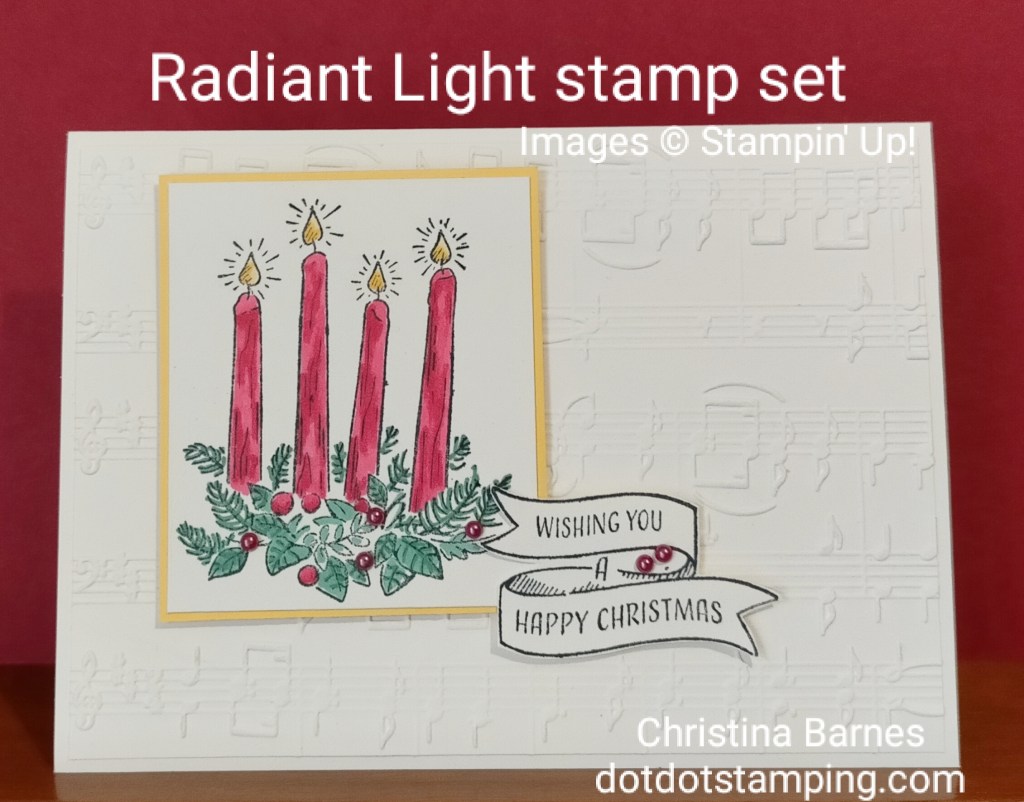
Today I get to share a sneak peek at a gorgeous stamp set which will be available in September, a beautiful Christmas set called Radiant Light.
I love candles at the best of times, the flicker of the flames and the soft light. And I especially love them at Christmas.
I have used the Merry Melody Embossing Folder with Very Vanilla cardstock to create the background. The candle image has been stamped with black Memento ink, then coloured with Stampin’ Blends (alcohol markers). The sentiment is also stamped in black and then fussy cut. I’ve also added some Wink of Stella to the flames but it doesn’t show up well in the photo.
This week is a celebration for me, it is my birthday week. And because I am a musician, this week you will see a lot of music themed projects. I am also celebrating my birthday by giving away gifts to anyone who places an order, whether that is directly with me, or through my online store. And I love giving away gifts!
And there is one other thing that I am hoping to celebrate this week – I am only a few subscribers away from 100 on my YouTube Channel, so I am hoping to hit that milestone this week. I would love it if you would help me out.
The beautiful Radiant Light Stamp Set is only available to demonstrators at the moment – just one of many benefits of being a Stampin’ Up! Demonstrator, but it will be available to you from the 6th September.
The Crafty Addicts is back again this month with an open challenge, meaning we want to see any and all of your cards, there’s no restriction as to what you can use, just craft away and share with us. My card for this month is one that was a bit of an experiment, I’m not too sure that I am happy with the colours, they are for a colour challenge, and I’m not sure I would normally put them together. But it’s always fun to play with colour.
I have used the Foursquare Decorative Masks and some Masking Paper. Each section has been masked, then coloured with ink and blending brushes. Then the masks removed and replaced to create a new area to sponge in a different colour. The circle mask I left there during that process of colouring the background. I’ve then simply used a ruler and black marker to draw the lines in between each colour. It looks a whole lot more complicated that it really is. Masking is one of my favourite stamping techniques. And just to add to all the masking going on, I decided to mask the sentiment which comes from the Sending Smiles stamp set, they are two different stamps, I’ve masked half of the strip of cardstock and stamped the word birthday, then masked over the stamped word, and stamped the word hugs. The colours used are Azure Afternoon, Granny Apple Green, Lemon Lolly, Crushed Curry, and Flirty Flamingo.
Come on over to The Crafty Addicts challenge site where you can see what the rest of the Design Team have made this month. And do share your creations, we love to see what you’ve been crafting. Happy stamping Chris
You can click on the images below to go to my online store or click here, or if you prefer to use your device with the QR Code, you can find it below. Don’t forget about the amazing joining offer, if you live in Australia I would love to welcome you to my team, feel free to email or leave a comment if you would like more information.
A simple card can have just as much impact as one that we have spent hours creating, and can give the receiver just as much joy.
This particular card took me quite literally five minutes to make from scratch.
Admittedly, Stampin’ Up! does make this very easy. My card features a strip of the beautiful Masterfully Made Designer Series, mounted it onto a piece of Pretty Peacock cardstock, and then onto a Basic White cardbase. So simple.
This is one of the Designer Series Papers that you can get at 15% off in June, so make the most of that.
Just a quick post tonight, to share a card I made this afternoon after a long day outside on a cold and gloomy winter’s day.
I have CASEd (remember what CASE stands for…. Copy And Share Everything) the card on Page 14 of the Annual Catalogue, but because I don’t have the Beautiful Balloons stamp set or Dies, I’ve used flowers instead.
Still beautiful, with bright and cheerful colours.
That’s all from me for today. Don’t forget the amazing deal if you are interested in joining Stampin’ Up! as a demonstrator, and the awesome DSP special, both happening right now!
I have no idea what the name of the technique is, but it was a lot of fun!
My card features the Elegant Eucalyptus Embossing Folder and I’m enjoying playing with the returning colour Berry Burst, which is just soooo yummy!
Here’s the inside of my card…
And below are some other embossed panels that haven’t been used yet but you can see how the technique shows up. Check out Lisa’s vid, it’s a lot of fun playing with this technique.
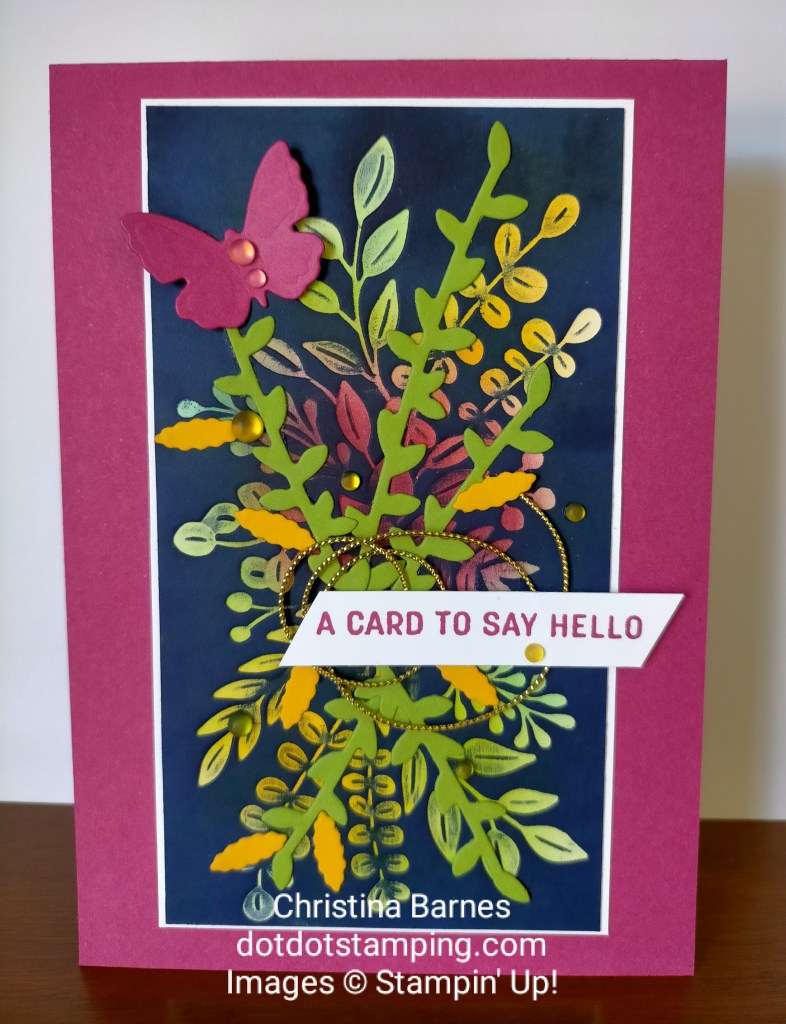
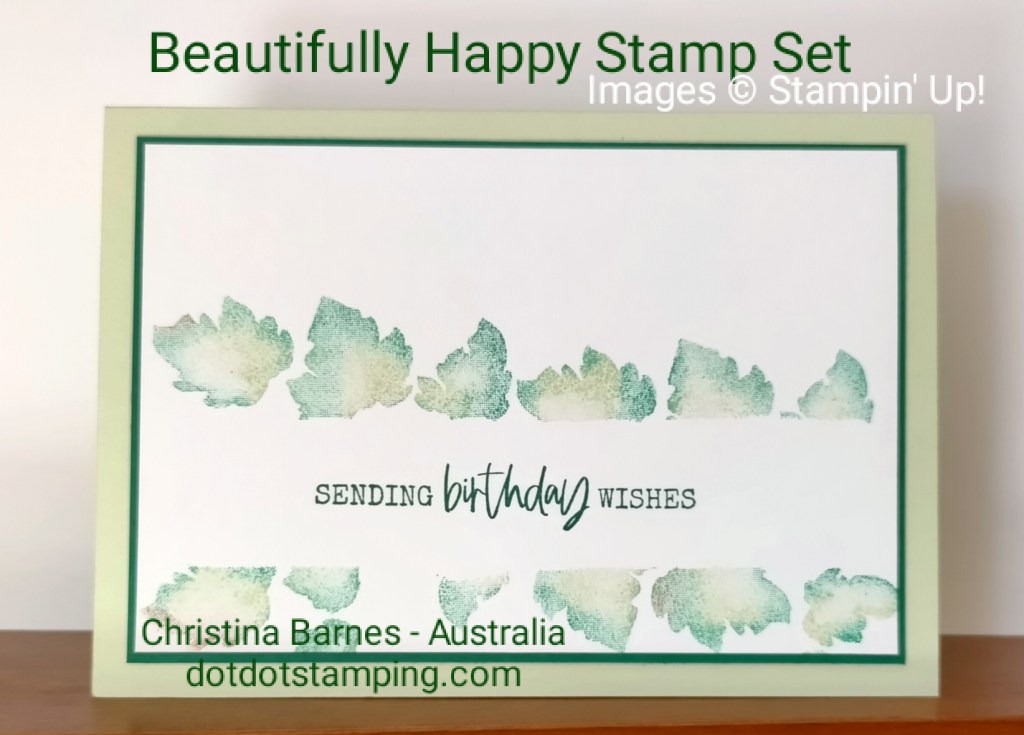
I am starting to get back into some group crafting and sharing, which is exciting, and a bit confronting, after such a long time of crafting on my own. My first Blog Hop today, is with the Crafty Collaborations group, and we are focusing on the technique of Masking, one of my all time favourite techniques because it can be done in so many ways. Today, I have decided to keep my card very simple, and I’ve featured the leaf stamp from the Sale-a-Bration set Beautifully Happy.
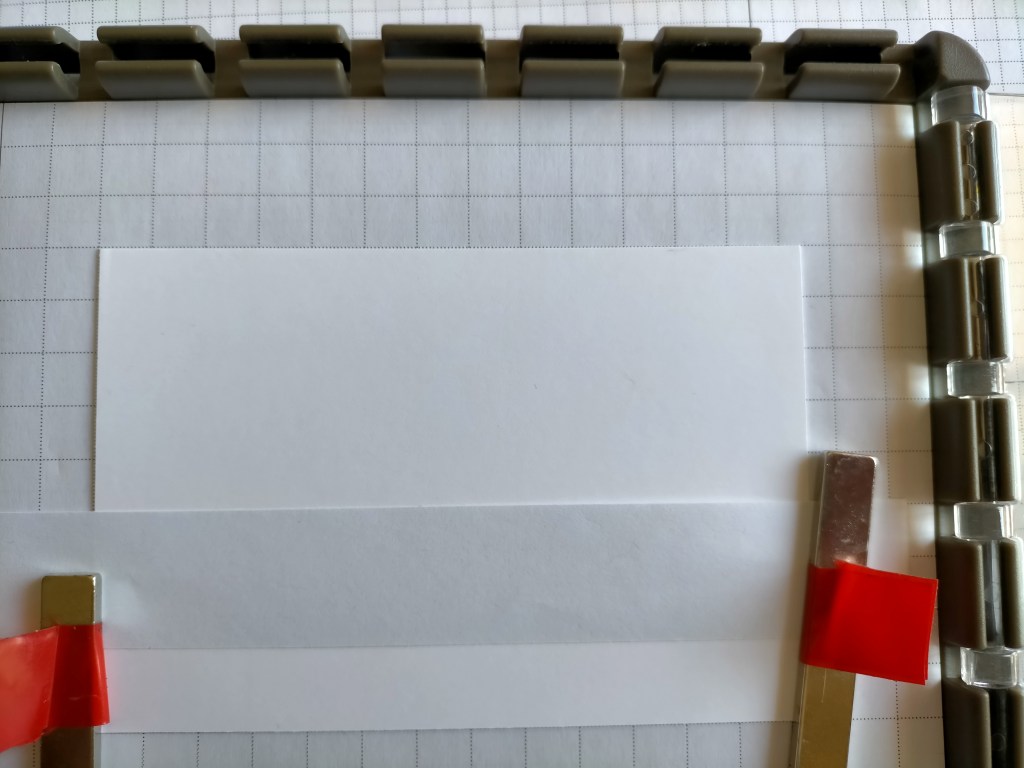
I have used my Stamparatus to keep everything lined up, and used a one inch strip of scrap paper across a piece of Basic White cardstock, as a mask.
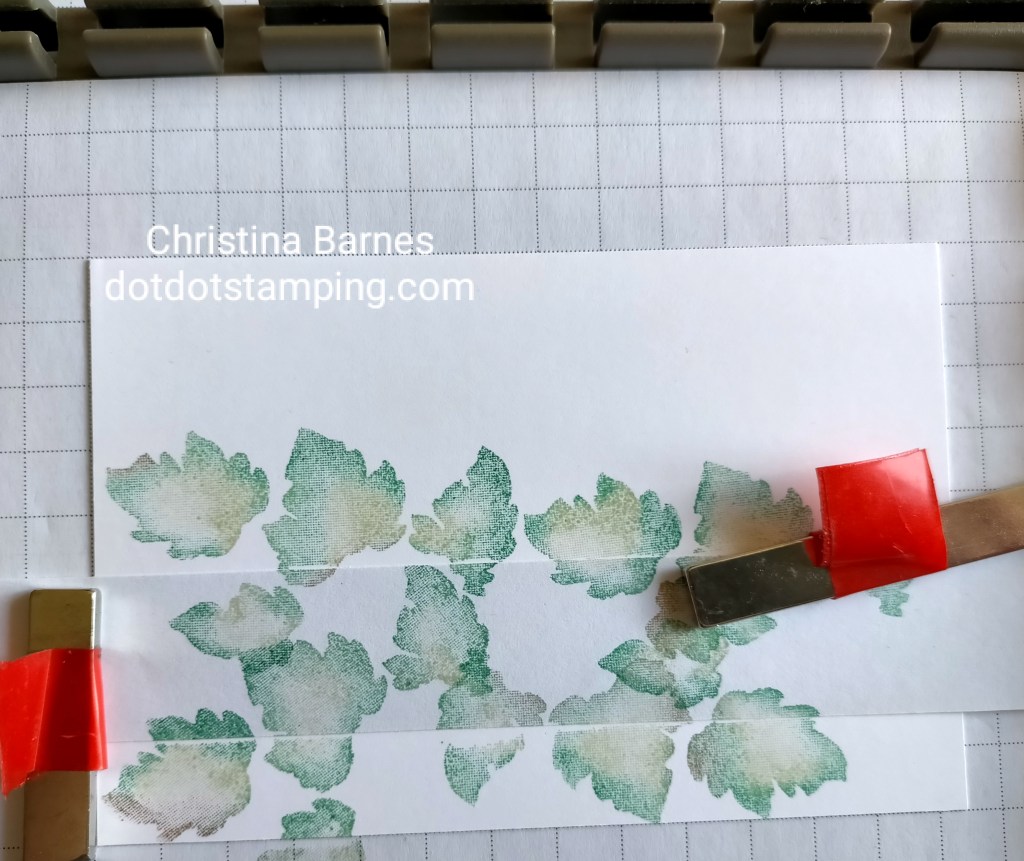
I’ve then inked up my stamps with Soft Seafoam Ink, and using a Sponge Dauber, added some Shaded Spruce and a tiny touch of Cajun Craze ink around the edge of the leaves.
Once I felt I was happy with the leaves, I removed the mask, and stamped a sentiment from the Wildlife Wonder stamp set.
This is such a simple technique, but so effective. I’ve layered this onto some Shaded Spruce to frame the main layer, and then onto a Soft Seafoam card base.
I hoping to make a regular time to go live on my Facebook page, and eventually to link it up to my YouTube channel as well, but one step at a time.
And I’m calling it Tea and Cards. I’m hoping you will make yourself a cup of tea and join me. Here’s what I will be making live on my Facebook business page.
I plan to go Live tomorrow morning, Monday 30th January at 10am Sydney time, for the first of my version of Tea and Cards. Make yourself a cup of tea (or coffee) and join me for some crafting fun. You can choose to just sit back and watch, or have all your materials ready, and create along with me. Here are the measurements and materials you will need to create this easy fun fold card. I hope I have the Imperial conversion correct. The card I am making tomorrow will be in different colours to the one pictured. I would love to have you join me for some crafting time together. See you then, Chris
One piece of Designer Series Paper or other patterned paper of your choice: 30cm x 14.4cm (12 in x 5 3/4in) – I’ll be using the Dandy Designs DSP from the Sale-aBration catalogue.
One piece of matching cardstock: 14.9 x 10.5cm. (5.5 x 4.25 inches), plus two more pieces of cardctock in the same colour: 11.5 X 8.5cm (4.5 X 3 3/8 inch), these two pieces are to layer under the white Die cut pieces.
Two pieces of white cardstock diecut using the Scallop Contours Dies, using the second largest of those Dies. Plus some large scraps of white cardstock to fussy cut the flowers.
Beautifully Happy Stamp Set (from the Sale-aBration catalogue, or stamp set of your choice.
Ink pads in colours of your choice, to match or contrast with your patterned paper.
Glue, Dimensionals, scissors, clear blocks and other tools as needed.
Embellishments if your choice.
I hope you will come and join me, so that we can craft together. Here’s the link to my Facebook page, and there’s also a link in the side bar.
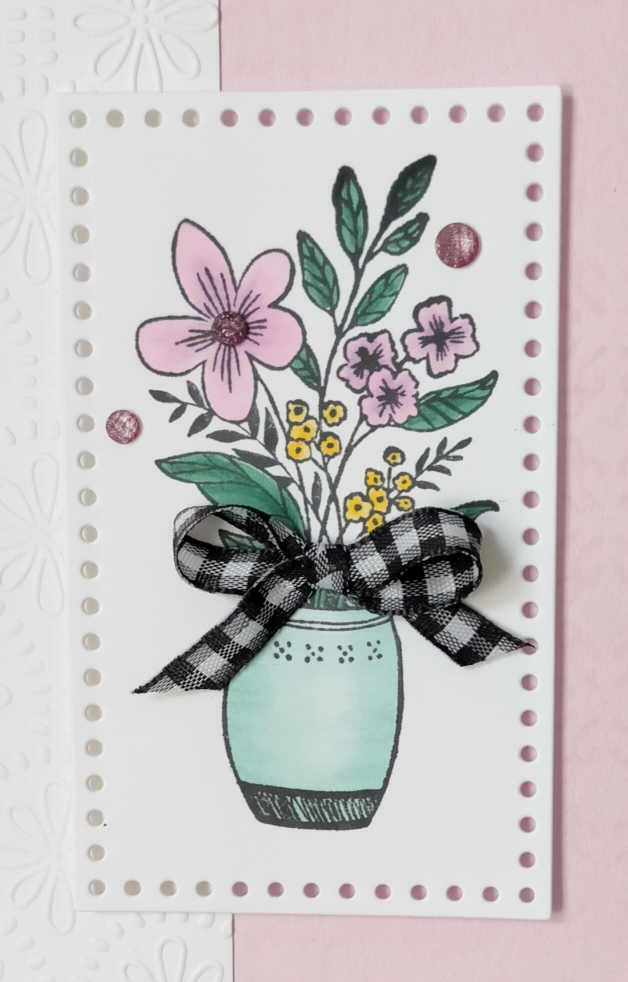
Today’s card is inspired by the current colour challenge at TGIF.
I’ve used the Sit Stay Relax Host set and kept the layout nice and simple.
Little kitty has been stamped separately with Memento ink and coloured with blenders, then fussy cut and adhere to the chair. It reminds me of just how one of our own kitties often sits, with one leg hanging over the edge. So cute!
It’s quite a hot day here in my part of Australia, so with all the curtains and blinds drawn against the heat and glare, the Early Espresso looks almost black.
Hope you are having a crafty day. And staying cool!! Happy stamping,


")
")