Something for Spring

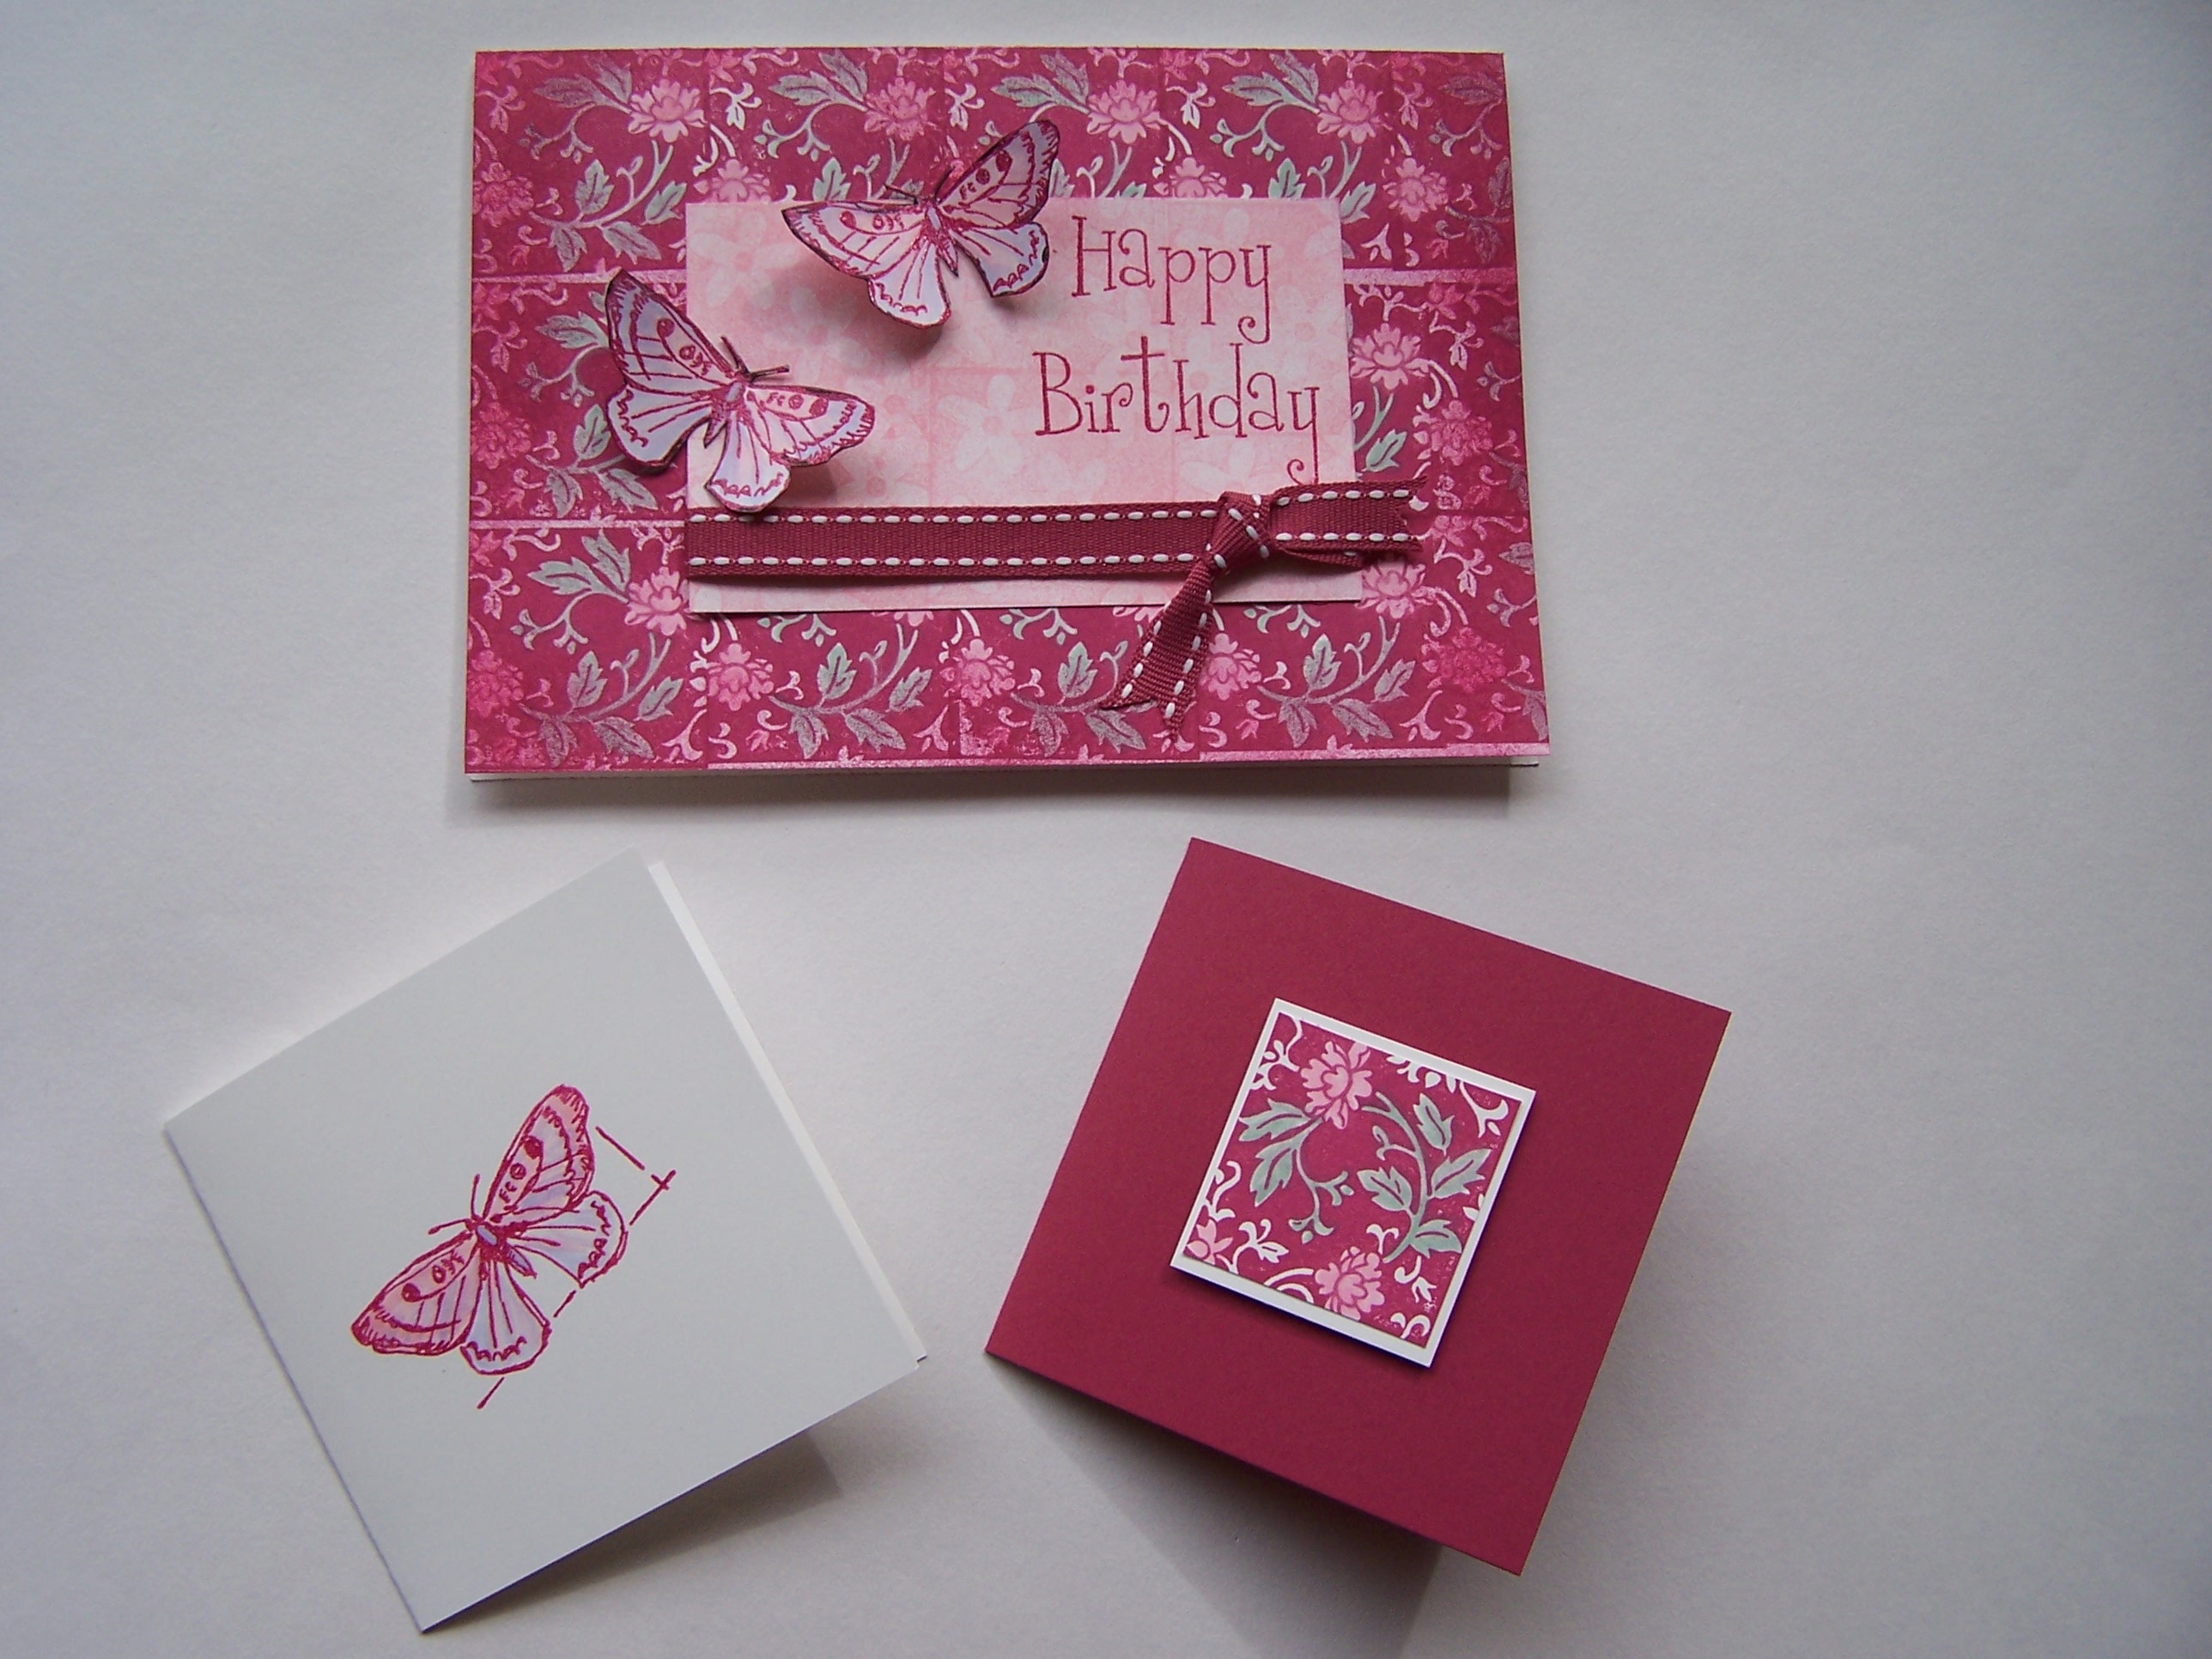
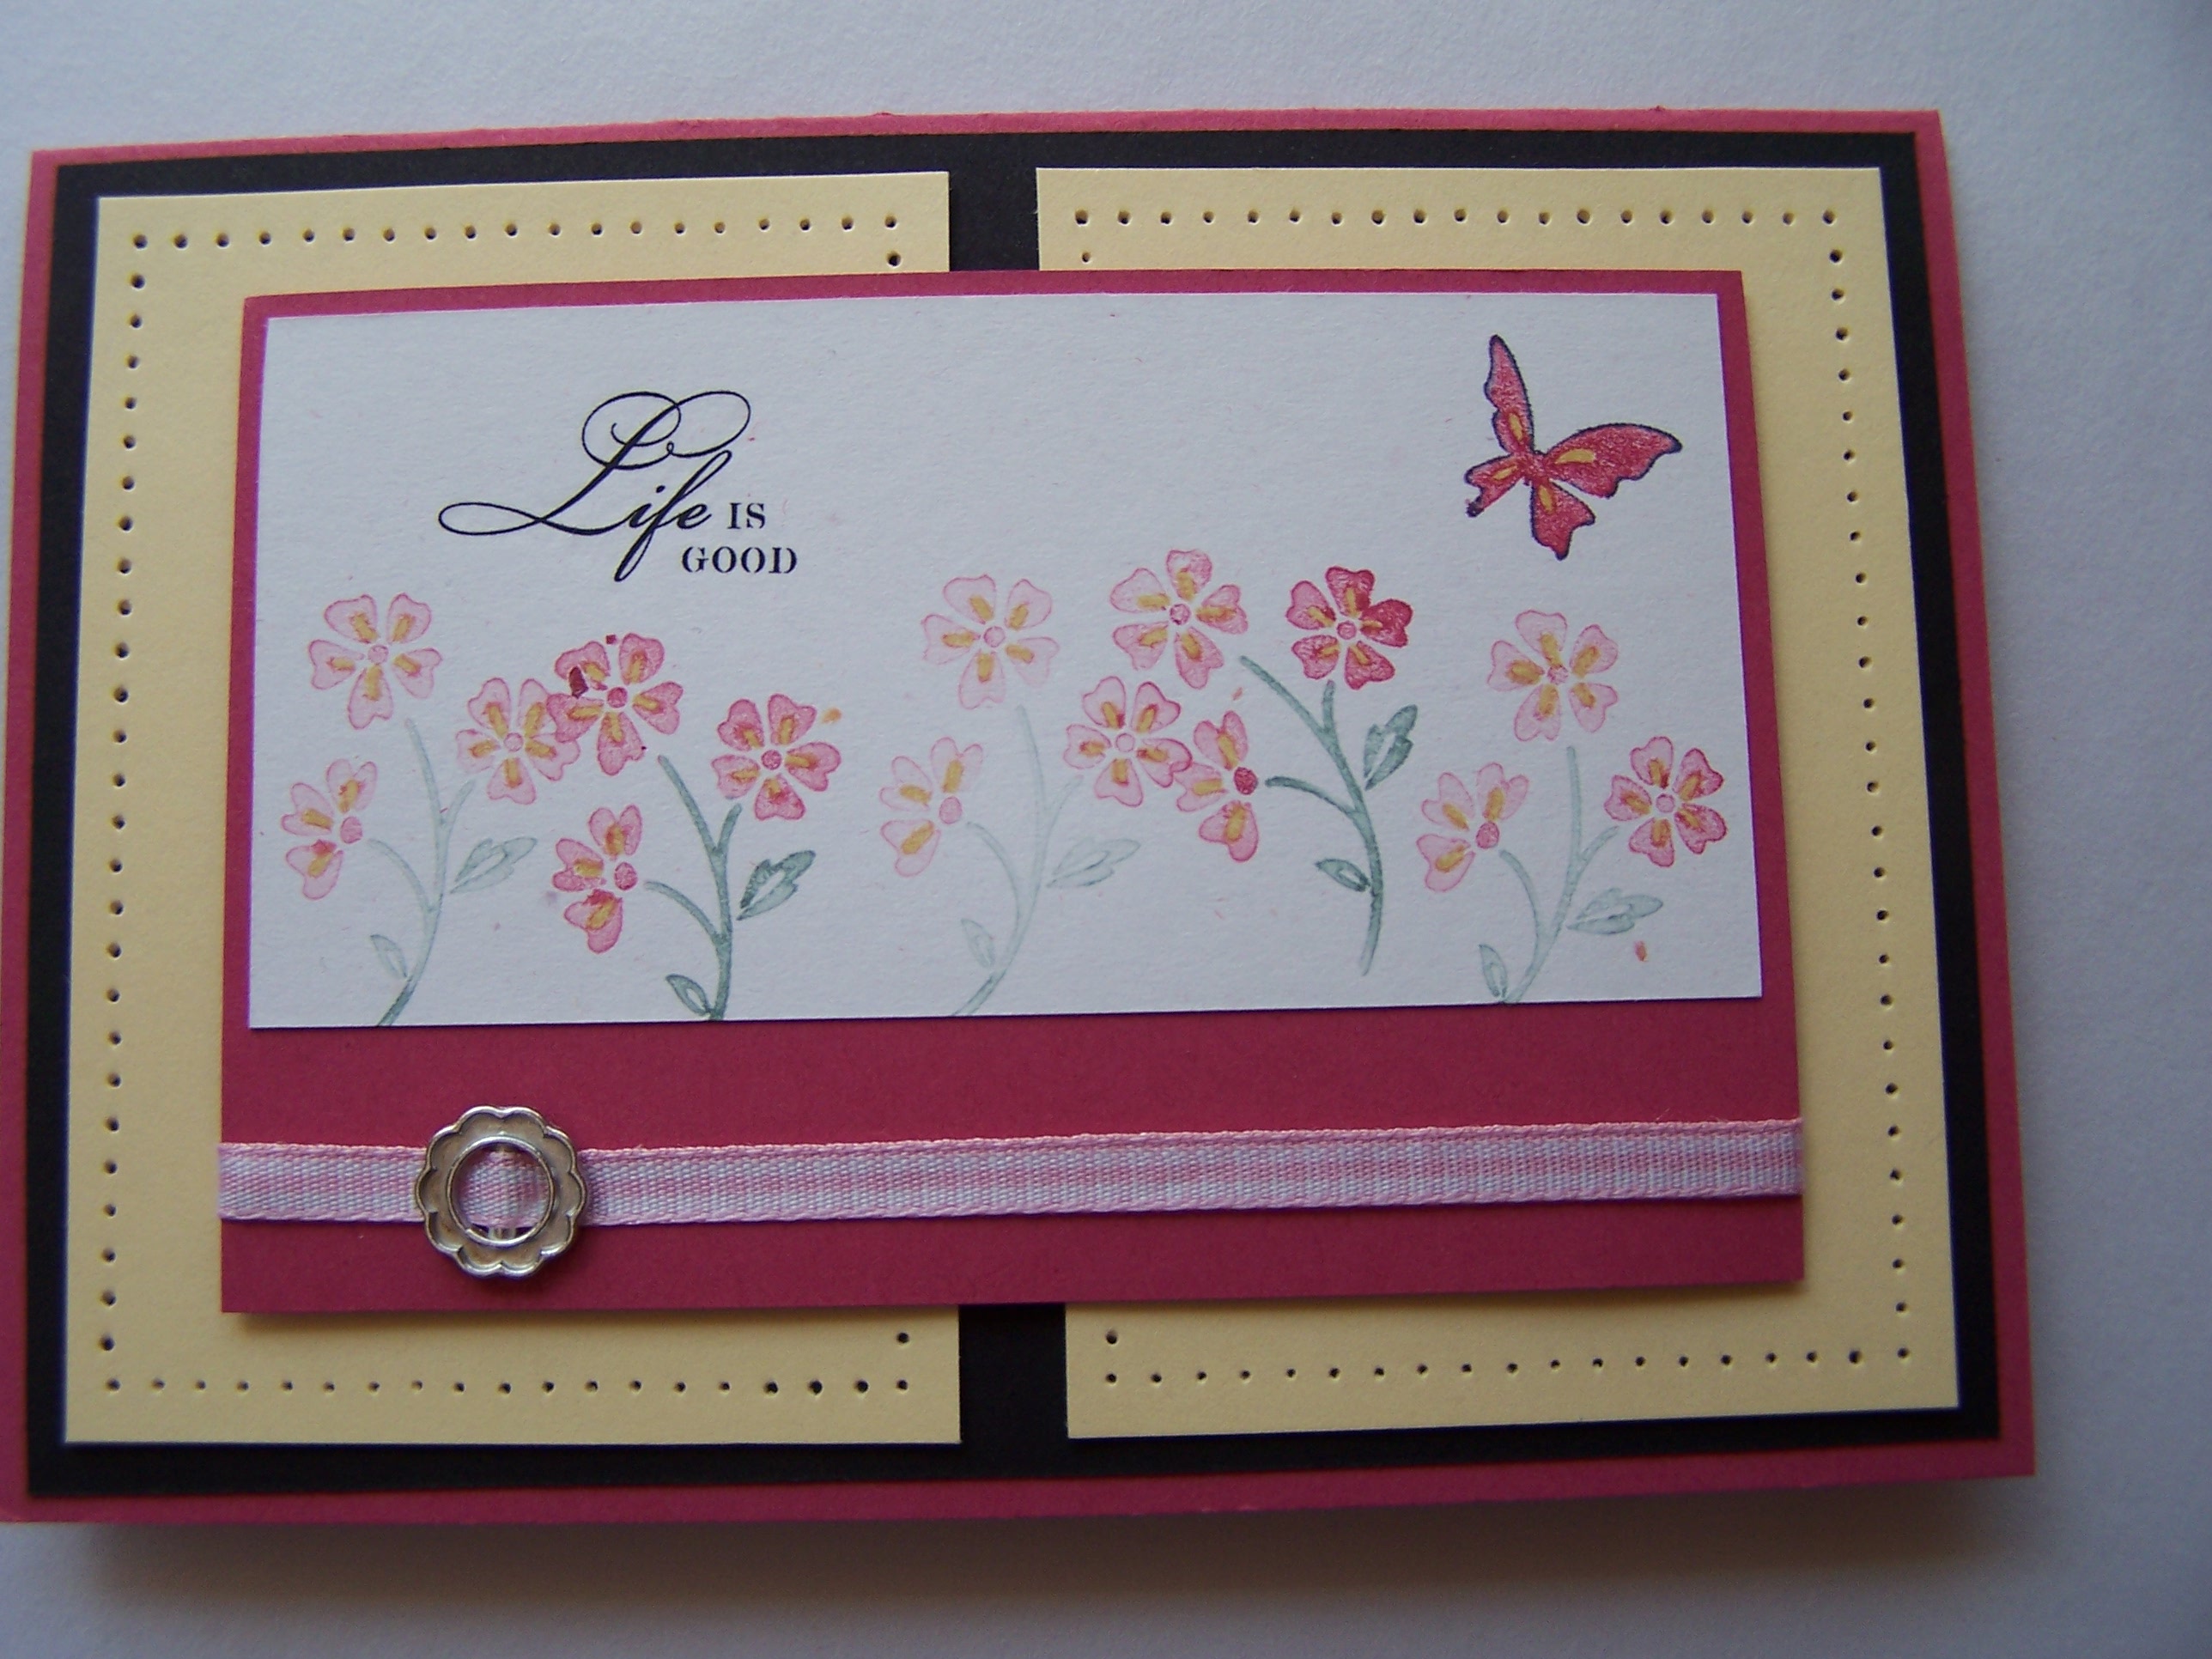
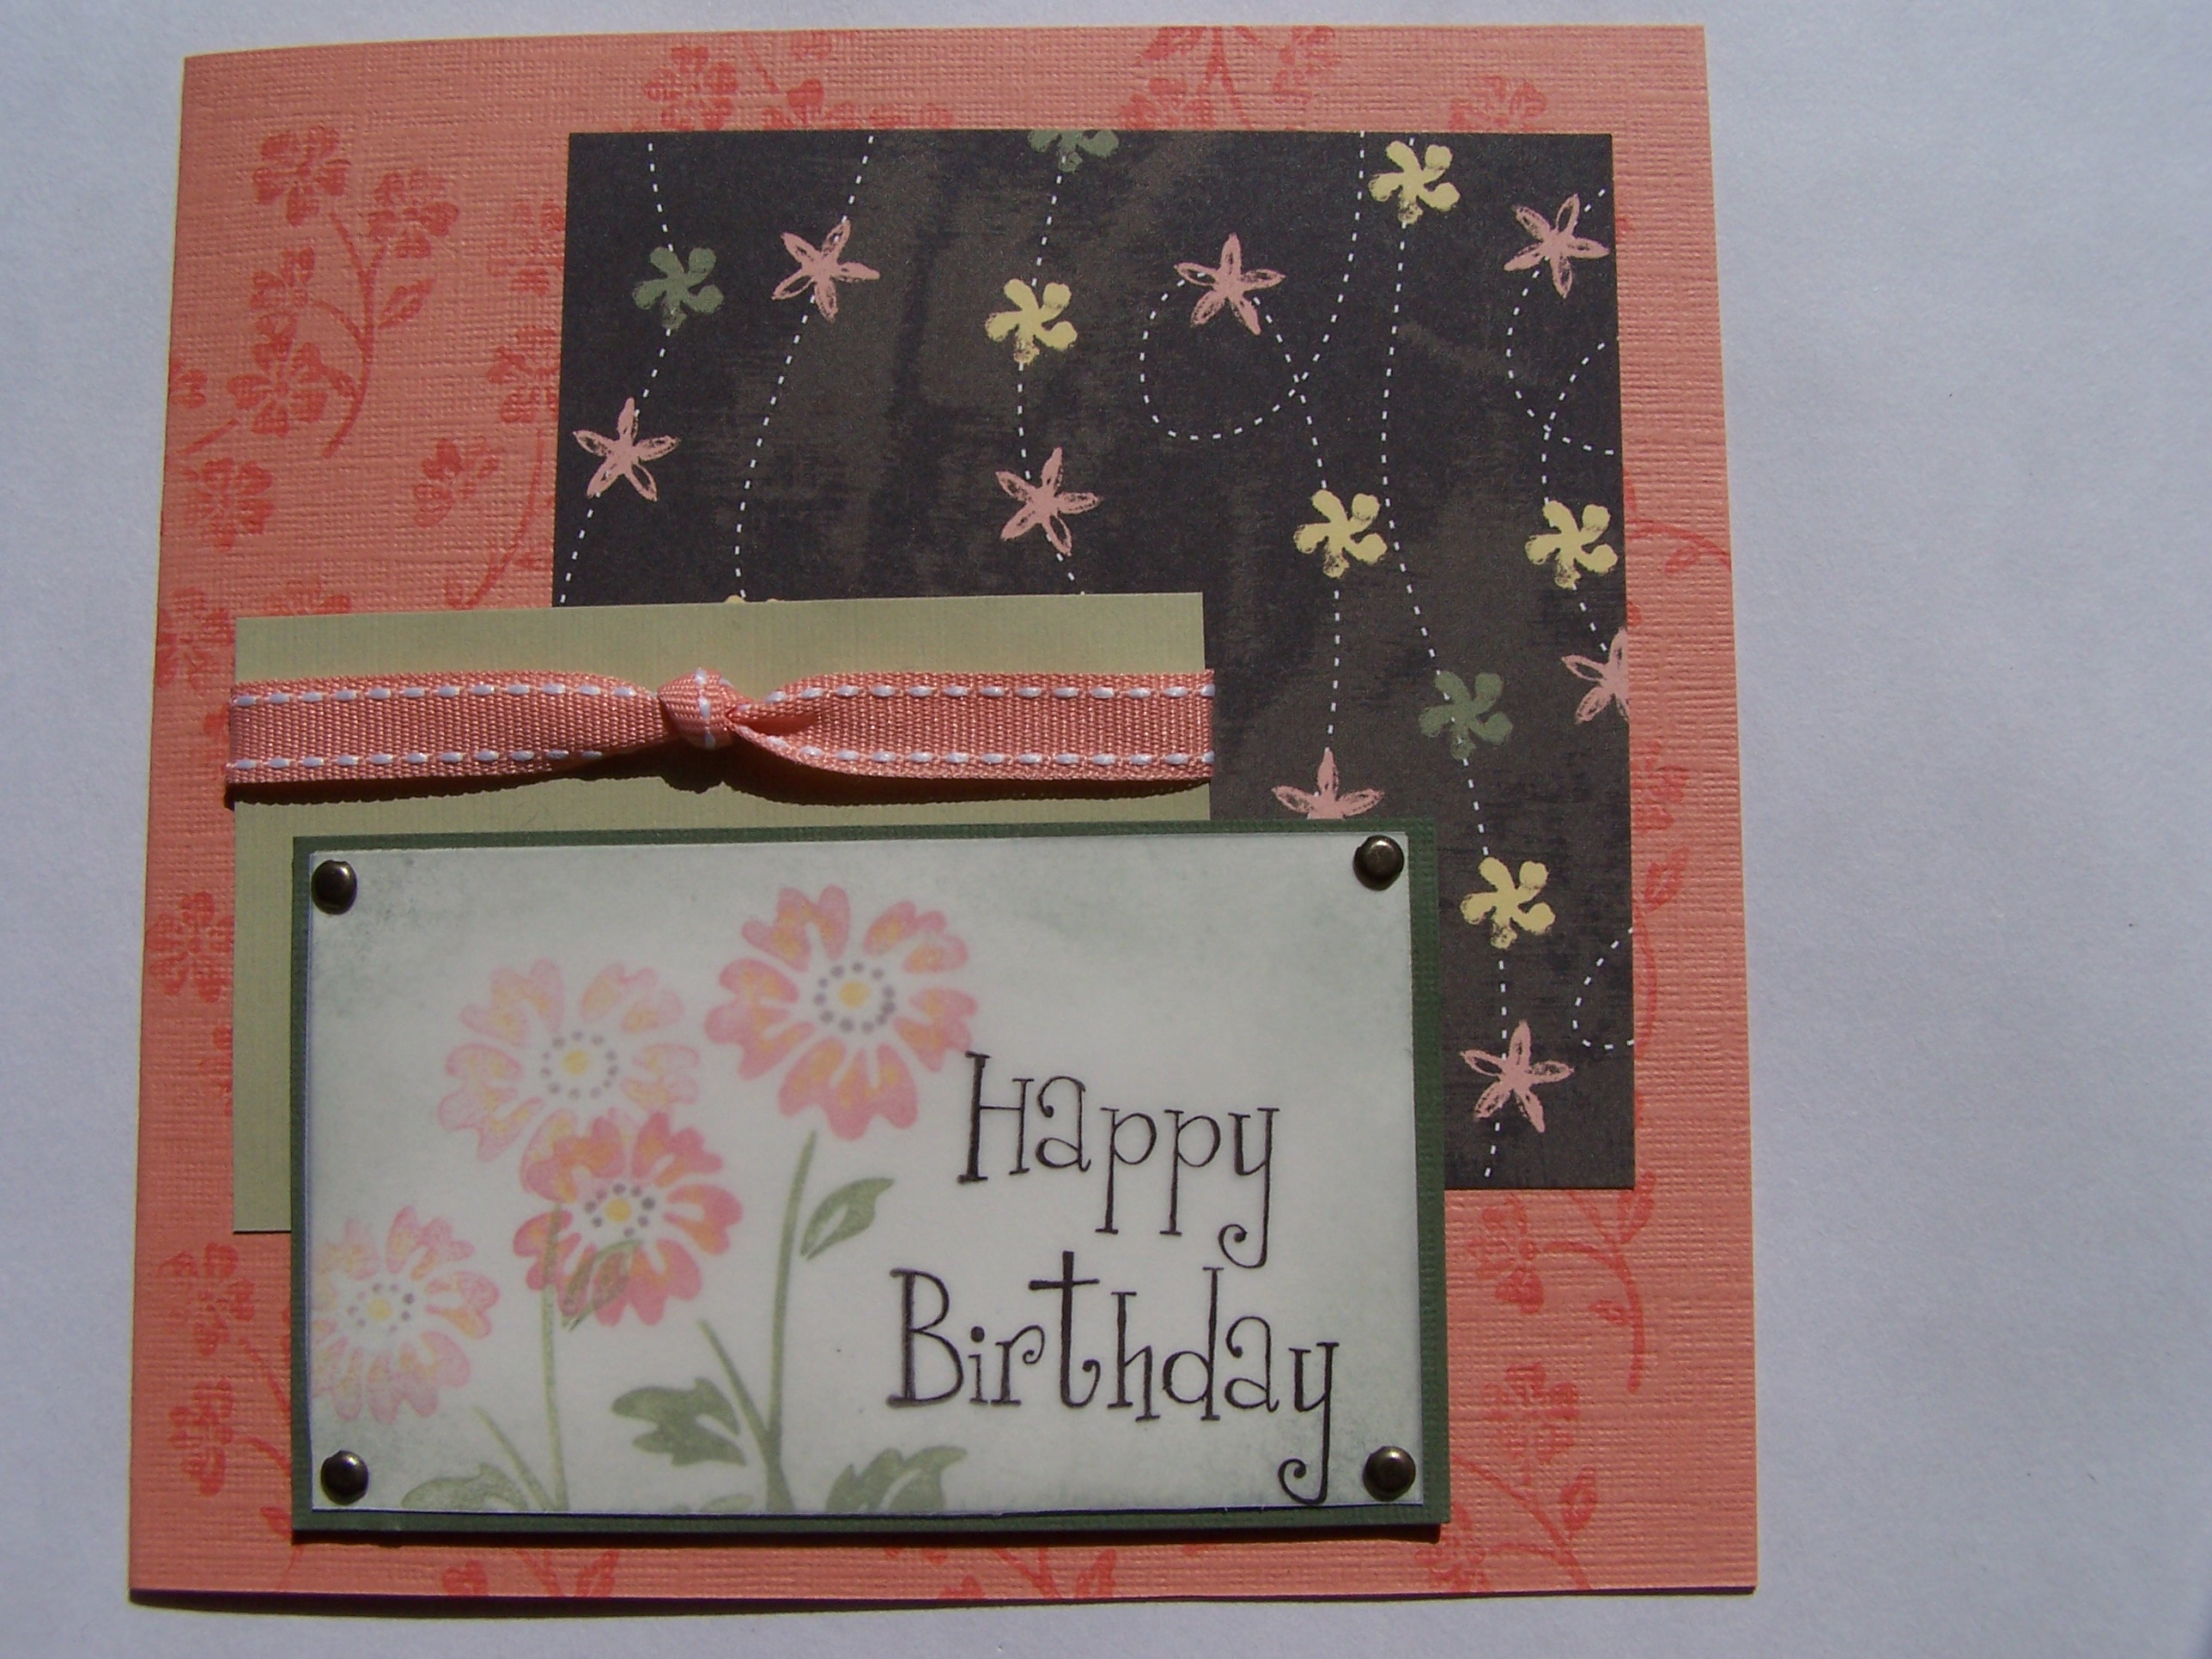
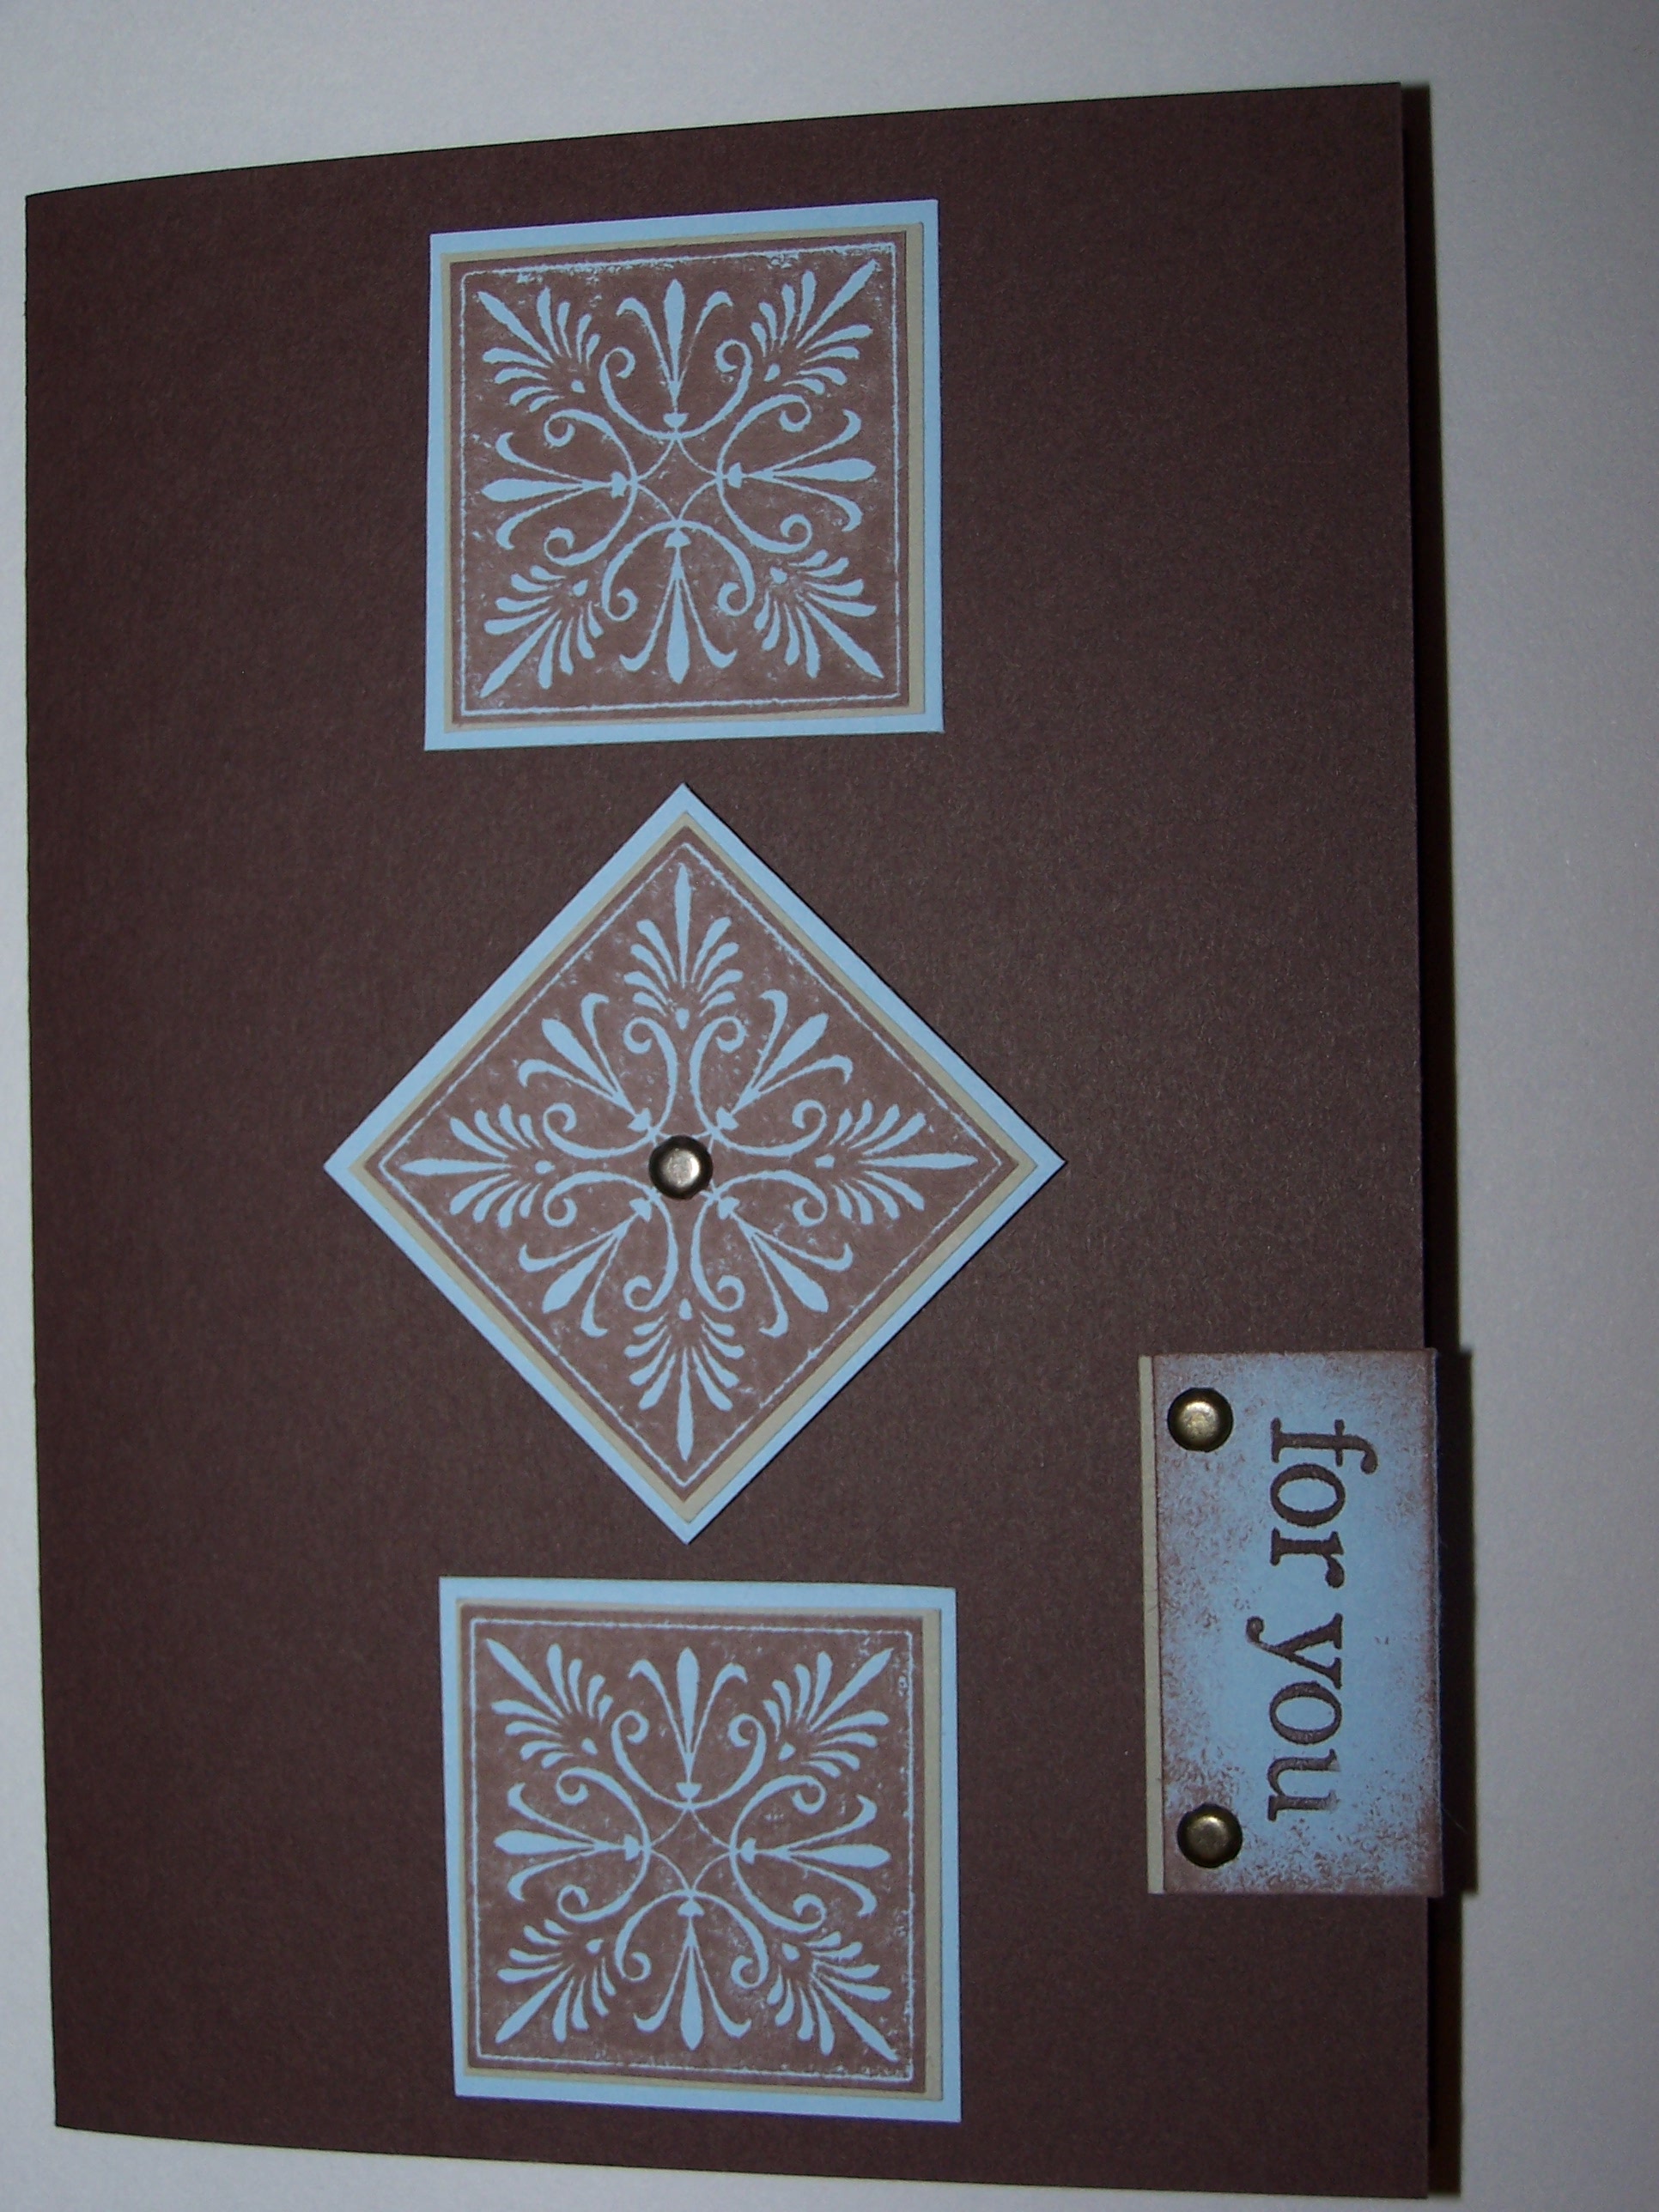
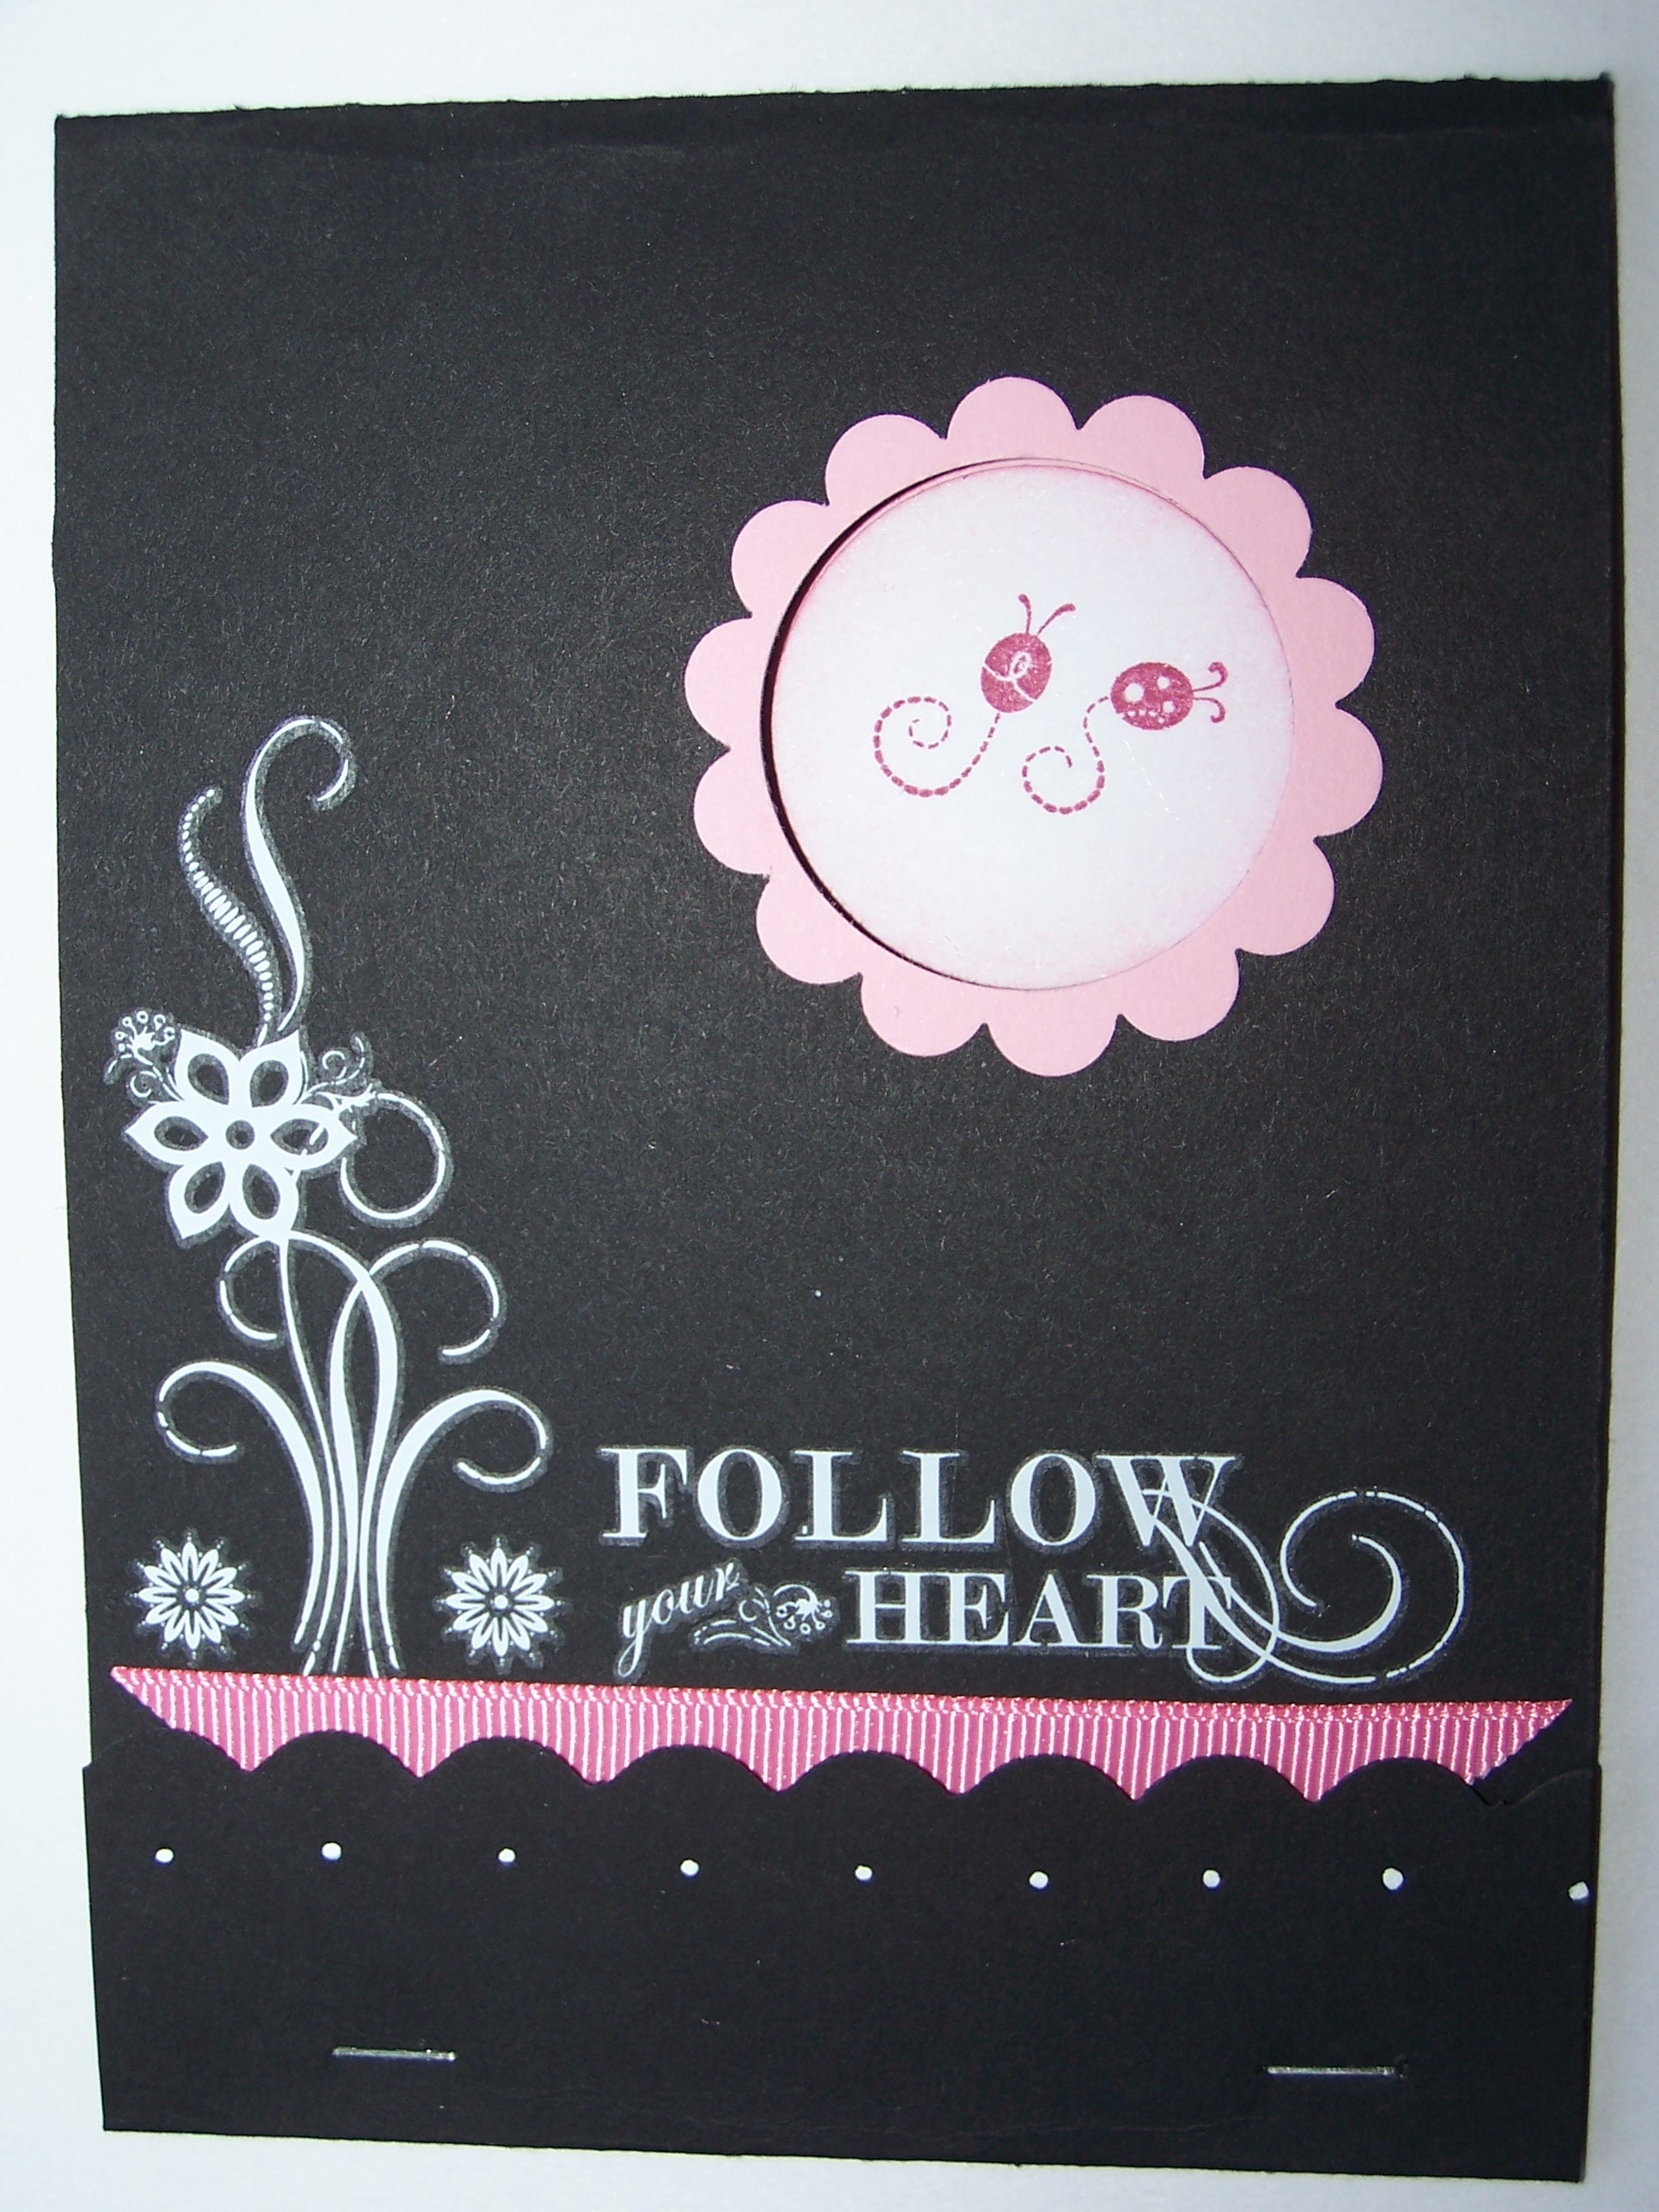
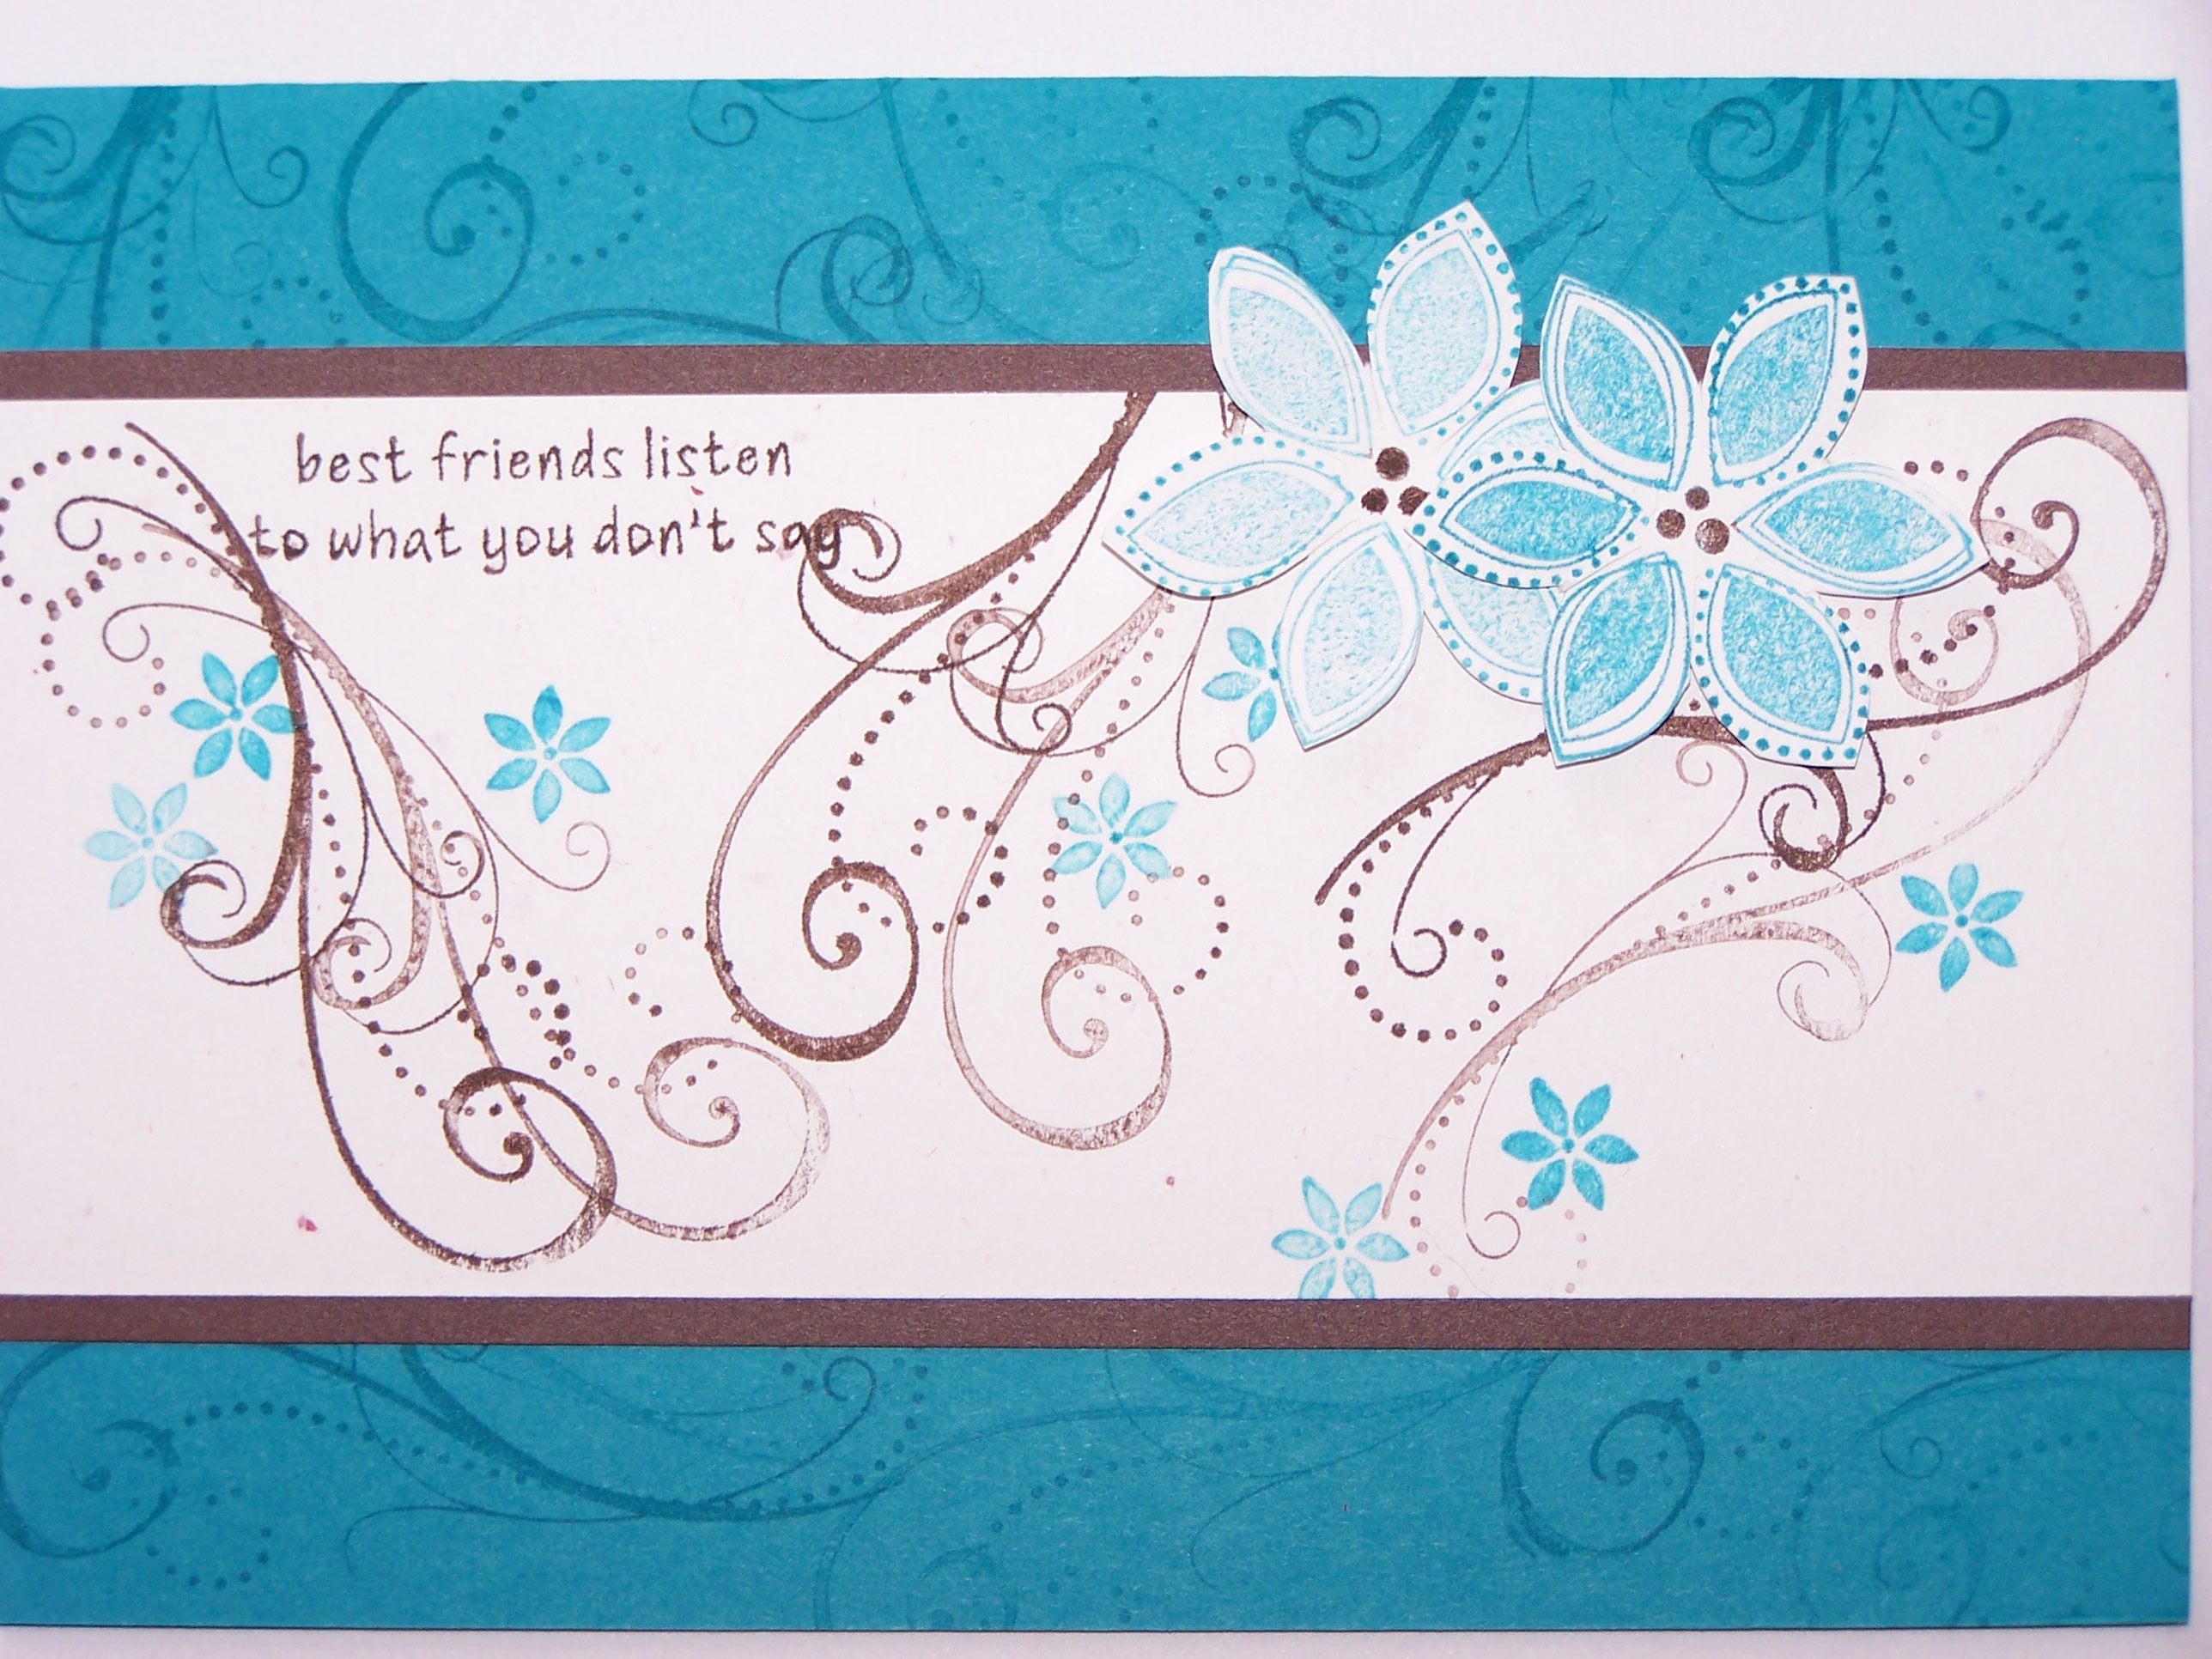
Today’s post is a card I made for a friend of the family.  I also made a matching box with some little love notes inside.  The colours just remind me of the beautiful blossoms that are out at the moment.  This was a bit of an experiment in something different but I like the way it has turned out.  I hope you do too.

If you are interested in learning how I did this card, then just contact me at dotdotstamping@tpg.com.au    I would be happy to demonstrate this at a workshop or I can organise a class to include something similar.

Stamp Sets: Natural Beauty, Mostly Flowers,  Cheery Chat.

Cardstock: Whisper White, Purely Pomegranate

Inks: Purely Pomegranate, Pretty in Pink, Sage Shadow, Almost Amethyst, Versamark

Accessories: Purely Pomegranate Double Stitched

Ribbon, Light Pink Gingham Ribbon, Clear Embossing Powder, Heat Tool, Black Marker, Dimensionals, Corner Rounder, Horizontal Slot Punch.

Artwork by Chris Parker-Barnes

Images copyright 1990 – 2008 Stampin’ Up!


Like the layout!

I really liked the layout from my previous post so decided to make a set of cards using basically the same layout, just using some different colour combinations.  I have made two and have a third one half made so I will share that one with you later.  So, here they are….  I hope they inspire you to do some stamping and experiment with colour.

Stamp Set: Live Your Dream

Cardstock: Almost Amethyst, Wild Wasabi, So Saffron, Confetti White

Inks: Almost Amethyst, Wild Wasabi, So Saffron

Accessories: Styled Silver Hodgepodge Hardware (from the Spring Mini Catalogue), Matt Pack and Piercing Tool, Dimensionals.

Artwork by Chris Parker-Barnes

Images copyright 1990 – 2008 Stampin’ Up!


Stamp Set: Live Your Dream

Cardstock: Basic Black, Rose Red, Barely Banana, Confetti White

Inks: Rose Red, Regal Rose, Barely Banana, Sage Shadow

Accessories: Styled Silver Hodgepodge Hardware, Light Pink Gingham Ribbon, Urban West Rub Ons, Matt Pack and Piercing Tool, Dimensionals.

Artwork by Chris Parker-Barnes

Images copyright 1990 – 2008 Stampin’ Up!

One of a Kind

Today has been a nice day spent at home with Jamie, which doesn’t necessarily mean it has been a relaxing day, relaxing with a 2 year old just doesn’t really happen, but he is happy for Mummy to do some dot dot (stamping) – sometimes, just as long as he still has my attention most of the time!

So I thought I would take the opportunity and share a card that I CASEd from one of my favourite stamping artists, Silke Ledlow .  I have used the same layout and colours but changed a few things around.

This stamp set is one that I just love from the Spring Mini Catalogue – actually I like just about everything in the Spring Mini, I just haven’t got it all yet 🙂  soon, I promise, one at a time 🙂

Stamps Set: One of a Kind

Cardstock: Chocolate Chip, Close to Cocoa, Barely Banana, Confetti White

Inks: Chocolate Chip, Close to Cocoa, Barely Banana

Accessories: Vintage Brads, Chocolate Chip Grosgrain Ribbon, Matt Pack and Piercing tool, Dimensionals.

Images copyright 1990 – 2008 Stampin’ Up!

Something Simple

Some of you might recognise the layout of this card.  I was browsing through the Idea Book & Catalogue last night and decided I would like to copy one of the cards I saw on page 129.  Except I didn’t have any red cardstock so had to adapt it slighly.  It is a nice simple, easy card but still effective. 

If you would like to learn how to make this card or one similar, why not get in touch with me and we can book a workshop so that I can show you and your friends how easy it is to make beautiful handmade cards.

Stamp Set: For a Friend (Level 1 Hostess Set)

Cardstock: Basic Black, Soft Sky, Whisper White

Ink: Basic Black

Accessories: Corner Rounder, Black Brad, Markers in Real Red, Garden Green and Black, Sponge, Mat Pack and Piercing Tool, Dimensionals, Red Gingham Ribbon.

Images copyright 1990 – 2008 Stampin’ Up!

Uninspired….

I did do some stamping over the weekend and made some cards, but nothing really seemed to be working.  I thought I would do some experimenting and try some different things to what I usually make, but nothing seemed to turn out quite right.  Maybe it is because I am a little weary.  We had a thunderstorm on Saturday night and Jamie was really scared.  I think it is the first time he has been really aware of the thunder and he just wanted me to hold him while we sat on his bed… for two hours in the middle of the night.  I then had to work all day on Sunday so I came home with aching feet and feeling very worn out.

So, now that I have had my complain for the day…

I have made a birthday card today for a special lady by the name of Mary.  Mary is my Mum’s carer.  Mum had a fall about 12 months ago and broke her hip.  Mary goes to Mum’s place every morning to help her with her shower.  I actually think that Mum is quite capable of having a shower on her own now but just enjoys Mary’s company!! 🙂 So this is the card I made for Mary to go with a bottle of bubbly!  Hope you enjoy it Mary 🙂


Stamp Sets: Cheery Chat, Live Your Dream

Card Stock: Very Vanilla, Textured Cardstock in Cameo Coral, Always Artichoke, Mellow Moss, and Designer series Paper Spring Flowers.

Inks: Cameo Coral, Summer Sun, Old Olive, Always Artichoke.

Accessories: Groovy Guava Double Stitched Ribbon, Vellum, Sponge, Vintage Brads. 

Artwork by Chris Parker-Barnes

Images copyright 1990 – 2008 Stampin’ Up!

Beautiful Butterflies – Colour Inspiration #22

Today’s card is inspired by the latest Colour Inspiration (#22) from the very talented Kristina Werner

It certainly isn’t a combination I would have thought of putting together but now that I have used it I quite like it.


I enjoyed making a previous card with a window so thought I would do it again 🙂

Stamp Set: Garden Whimsy

Cardstock: Bravo Burgundy, Rose Red, Regal Rose, Soft Sky, Whisper White

Inks: Soft Sky, Rose Red, Regal Rose, Bravo Burgundy

Accessories: Scallop Circle Punch, Corner Rounder, Circle Punch, Sponge, Mat Pack and Piercing Tool, Paper Snips.

Artwork by Chris Parker-Barnes

Images copyright 1990–2008 Stampin’ Up!

Sneak Peak

For those of you who didn’t get to the Regional Training Seminar in Sydney last weekend, here is one of the make and take projects we got to make using our brand new stamp set Live Your Dream.  This set won’t be available until December so try not to get too impatient.  But I love it, it is a really versatile stamp set (like so many of Stampin’ Up!s stamps) and I can’t wait to see what else will be in the new Mini Catalogue. 

I just had to put this on my blog and show you what a gorgeous little boy I have, and yep, you guessed it, he is cheeky as well as cute!

Stamp Set: Live Your Dream

Cardstock: Wild Wasabi, Chocolate Chip, Groovy Guava, Whisper White

Ink: Chocolate Chip, Wild Wasabi, Groovy Guava

Accessories: Soft Sky double-stitched ribbon, Chocolate Chip grosgrain ribbon.

Images copyright 1990–2008 Stampin’ Up!

One For the Boys!

I recently received some cash as a birthday present from both my Mum and my sister, they wanted me to buy some new stamp sets with it.  It was such a lovely thought but oh what to buy?  Which stamp sets?  They said, just choose your favourites.  Sounds logical, problem is, they are all my favourites!!  Anyway, this card is made using one of those stamp sets that I bought, called Mostly Flowers.  The other was Garden Whimsy, and I suspect you will be seeing quite a few cards using these stamps 🙂

I also wanted to do a card for the men and boys in our lives since we have just recently celebrated Father’s Day, and also because I find that so many stampers make lovely girly cards etc but I very rarely see really nice male cards.  So it is one of my personal challenges to make more of them.  I hope you like it.

Sorry about the photo, it has turned out a bit dark, but you get the idea.

Stamps Sets: Mostly Flowers, One of a Kind

Cardstock: Chocolate Chip, Sahara Sand, Bashful Blue

Ink: Basic Brown

Accessories: Vintage Brads, Dimensionals

Artwork by Chris Parker-Barnes

Images copyright 1990–2008 Stampin’ Up!

A Card for Me!

Ok so I am inspired by what I saw and learnt on Saturday at the seminar, and just couldn’t help myself but make another card 🙂   Jamie has been really good today, and was happy to play outside, I guess he is just happy to have all his toys back after a weekend away from them 🙂 So I made the most of that time and put this card together.

Although I have only been a Stampin’ Up! demonstrator since May, I have really been struggling to get my business up and running and have started to question my ability to earn enough from it to let me stay at home with Jamie while he is still little.  As a family, we have many things that we want to achieve including a new house which we have bought and will be moving to in October, and many others things as well.  Going to the Stampin’ Up! seminar on Saturday has given me many new ideas about my business but has also inspired me in other ways too.  But I made this card because it is what I have been telling myself recently, it is what I need to do to for myself and for my family – I need to Follow My Heart!

At the seminar we had a fantastic tutorial on making Window Cards, so I thought I would give it a go.  The layout for this card is similar to one we did in the Make and Takes in Sydney, and I liked that as well so, may as well add the two things together and……………..

Stamp Sets: Garden Whimsy

Cardstock: Basic Black, Pretty in Pink, Whisper White

Ink: Purely Pomegranate, Pretty in Pink

Accessories: Pretty in Pink Ribbon, White Gel Pen, Urban West Rub Ons, Scallop Circle Punch, Circle Punch, Stapler, Sponge.


Artwork by Chris Parker-Barnes

Images copyright 1990–2008 Stampin’ Up!


Sydney Regional Seminar

Wow, what a fantastic weekend!!  On Saturday I took the opportunity to go to my first Stampin’ Up! seminar and I had such a great time.  There was just so much information, new techniques and ideas, new inspiration, new business ideas, and to top all of that off we got a new stamp set (which hasn’t been released yet), did four different make and take projects which were just fantastic, met lots of new stampers and got lots of swaps 🙂

This was the swap I made, I wasn’t all that pleased with it, but I really wanted to use some of the beautiful Designer Papers and tried to do something a little different with them.

Stamps: Itty Bitty Backgrounds, One of a Kind

Cardstock: Soft Sky, Blue Bayou, Ruby Red, Very Vanilla

Designer Series Paper: Fall Flowers, Spring Break

Inks: Soft Sky, Blue Bayou

Accessories: Scallop Circle Punch, White Gel Pen

Artwork by Chris Parker-Barnes

Images copyright 1990–2008 Stampin’ Up!


One of the many things I really enjoyed about the seminar was the opportunity to meet some of the amazingly talented demonstrators who live in the region, and whose blogs I visit on a regular basis.  One of these people was Jayne Mercer, and today’s card is based on one that she has on her blog. I had not thought of combining these colours and was trying to work out what to do with Taken with Teal as it is a beautiful colour just not one that I have used very much.  I have used a similar design but different stamp sets to the one Jayne uses.  It is a nice simple layout, and quite an easy card to make, which is just as well as I think the rest of the day will need to be a recovery day from the weekend 🙂

 Stamp Sets: Season of Joy, Garden Whimsy

Cardstock: Taken with Teal, Chocolate Chip, Confetti White

Inks: Taken with Teal, Chocolate Chip, Tempting Turquoise

Accessories: Dimensionals

Images copyright 1990–2008 Stampin’ Up!