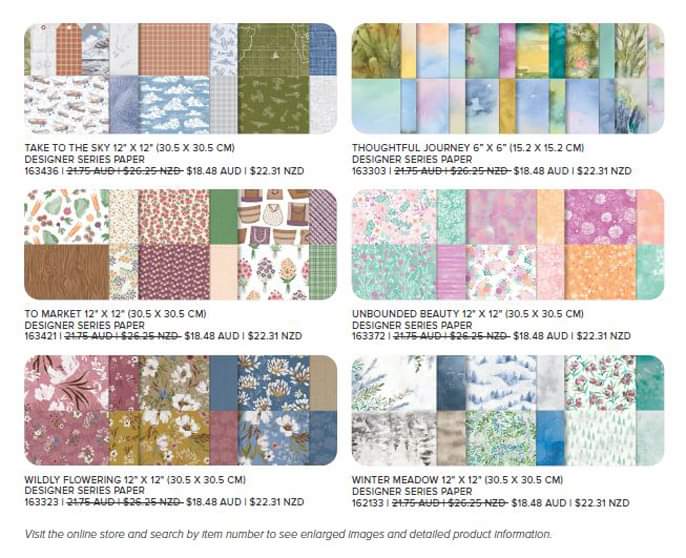
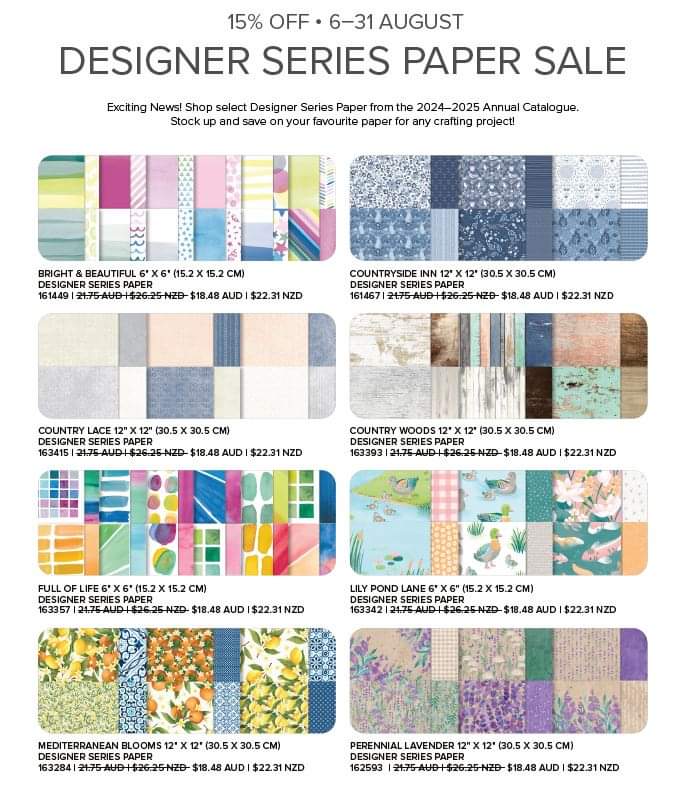
Starting tomorrow, 6th August, the always popular 15% off Designer Series Papers. If you are a papercrafter, you will love this promotion, whether it’s for cardmaking, scrapbooking or any other kind of papercrafting. Stock up here on your favourites, but make sure you get in early in case they sell out.
Have you got some favourites that you need to get? I have a couple that I don’t have yet, so it might be time to invest in something different. If you would like to do the same, you can go right to my Online Store anytime that suits you. Happy shopping, Chris
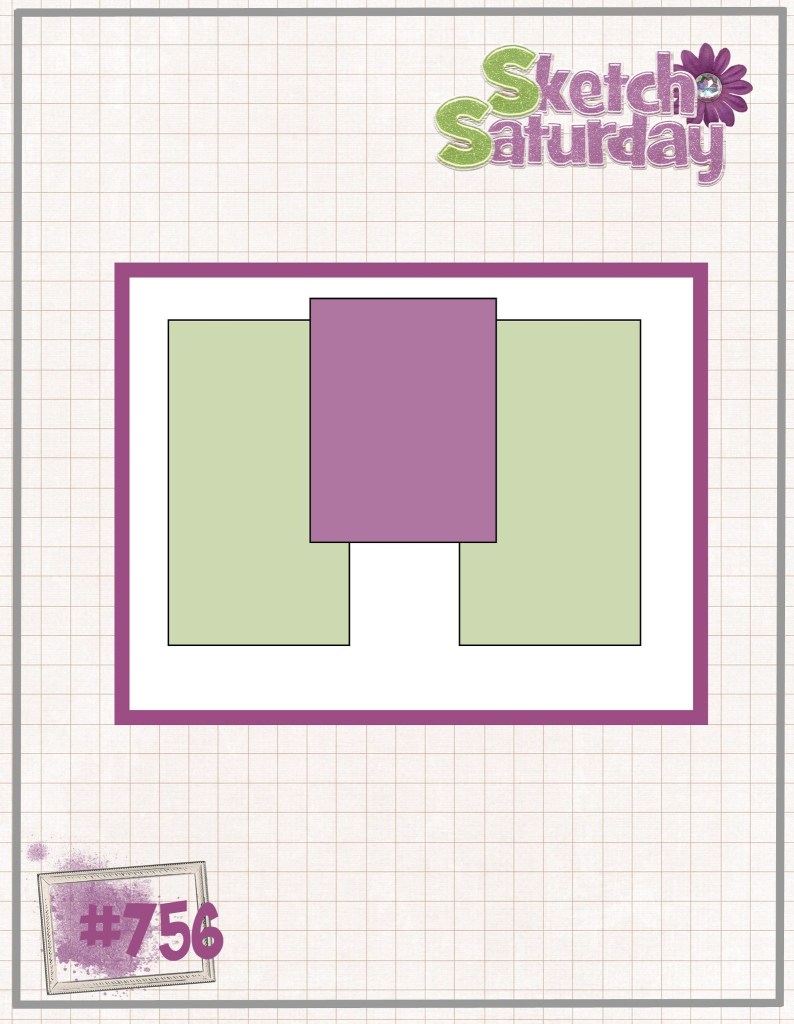
Hi and welcome back. Today we have Sketch #5 from the Stampin’ Up! Annual Catalogue.
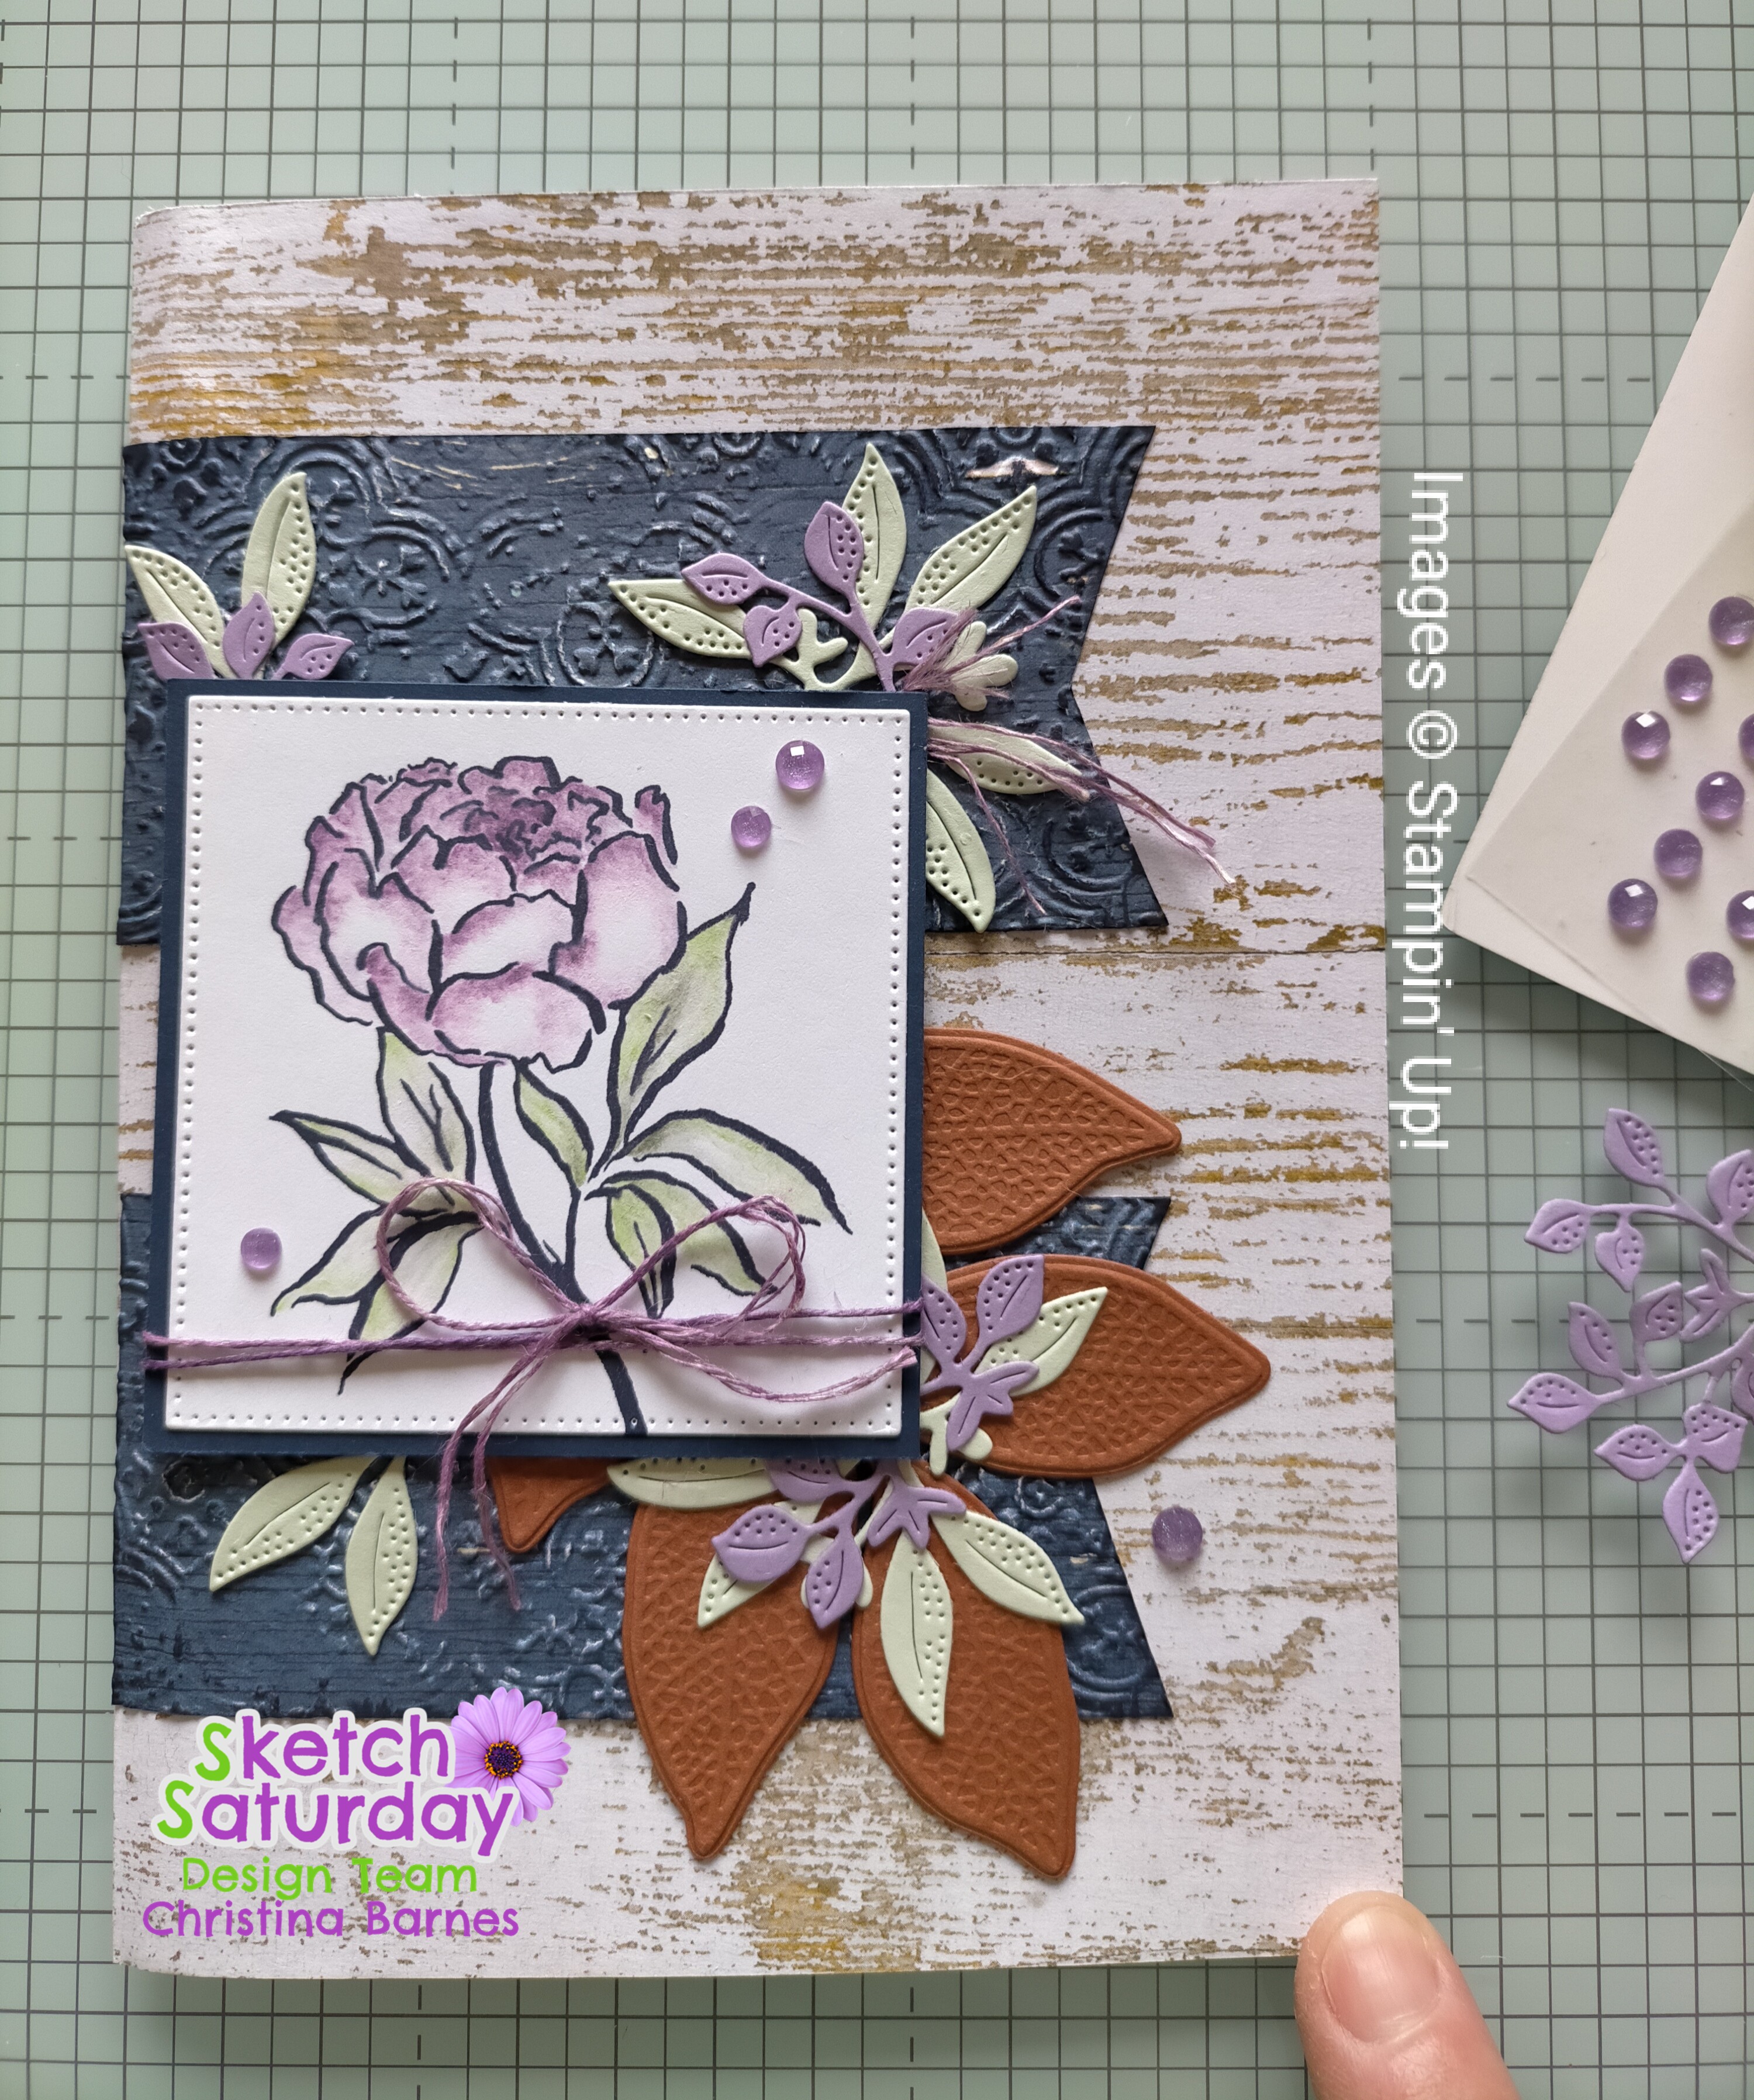
Today’s card has a black card base, again measuring 21cm x 14.5cm, which is then scored at 10.5cm on the long side and folded, so when it’s folded, your card front will be 10.5cm x 14.5cm. The next layer is a Basic White layer measuring 14cm x 10cm which I have run through the Stampin’ Cut and Emboss Machine using the Distressed Tile 3D Embossing Folder. I have then added some ink to the cardstock by dabbing the ink pad lightly across the raised areas, I have used a touch of Poppy Parade ink and some black Memento ink.
The next layer is flagged at both ends. I have taken a piece of Poppy Parade cardstock cut to 6.5cm x 12 cm, cut approximately 1cm up the centre of the short ends and then cut from the corners into the top of the cut to create the flag ends. Once that was done I have run that through with the Distressed Tile Embossing Folder and this time I have turned it over to use the debossed side.
I have been busy on Canva recreating the sketches from the catalogue, so they are not exact copies of what is in the catalogue but close enough. And since I have put my time and effort into creating these I would appreciate acknowledgement of where you got them from if you plan on using them.
I would love to know if these posts are helping to inspire anyone, so please leave me a comment if you are liking what I am sharing.
The card base is 21cm x 14.5cm, which is then scored at 10.5cm on the long side and folded, so when it’s folded, your card front will be 10.5cm x 14.5cm.
I have used some of the Stampin’ Up! Masking Paper to mask off the areas where I didn’t want colour. I didn’t measure it but just worked out approximately how big I want the area to be coloured. It’s approximately 1cm up from the bottom and down from the top and just over 3cm from the left hand side, but you can adjust to what looks right for you. A quick tip when it comes to using the Masking Paper – it is VERY sticky and can pull up the cardstock when you pull it off. So I stick it onto fabric before I put it onto the cardstock, usually a sleeve of the top I am wearing or jeans. This pulls up some fibres off the cloth onto the masking paper making it less sticky but still sticky enough to be effective.
Once I had the Masking Paper in place, I used a Blending Brush to put down some ink directly onto the card base. I started with some Crushed Curry ink at the bottom, then Peach Pie ink and lastly Pumpkin Pie ink. I then stamped the leaf image from the Changing Leaves stamp set using Memento Black ink, onto the blended area. The sentiment is again from the Changing Leaves stamp set, and the two sentiment panels were die cut from the Changing Leaves Dies in Basic White and Pumpkin Pie.
The black brads are some of the retired Classic Matt Dots, but I had some left over and they felt just right to add a little extra touch to my card.
I have been busy on Canva recreating the sketches from the catalogue, so they are not exact copies of what is in the catalogue but close enough. And since I have put my time and effort into creating these I would appreciate acknowledgement of where you got them from if you plan on using them.
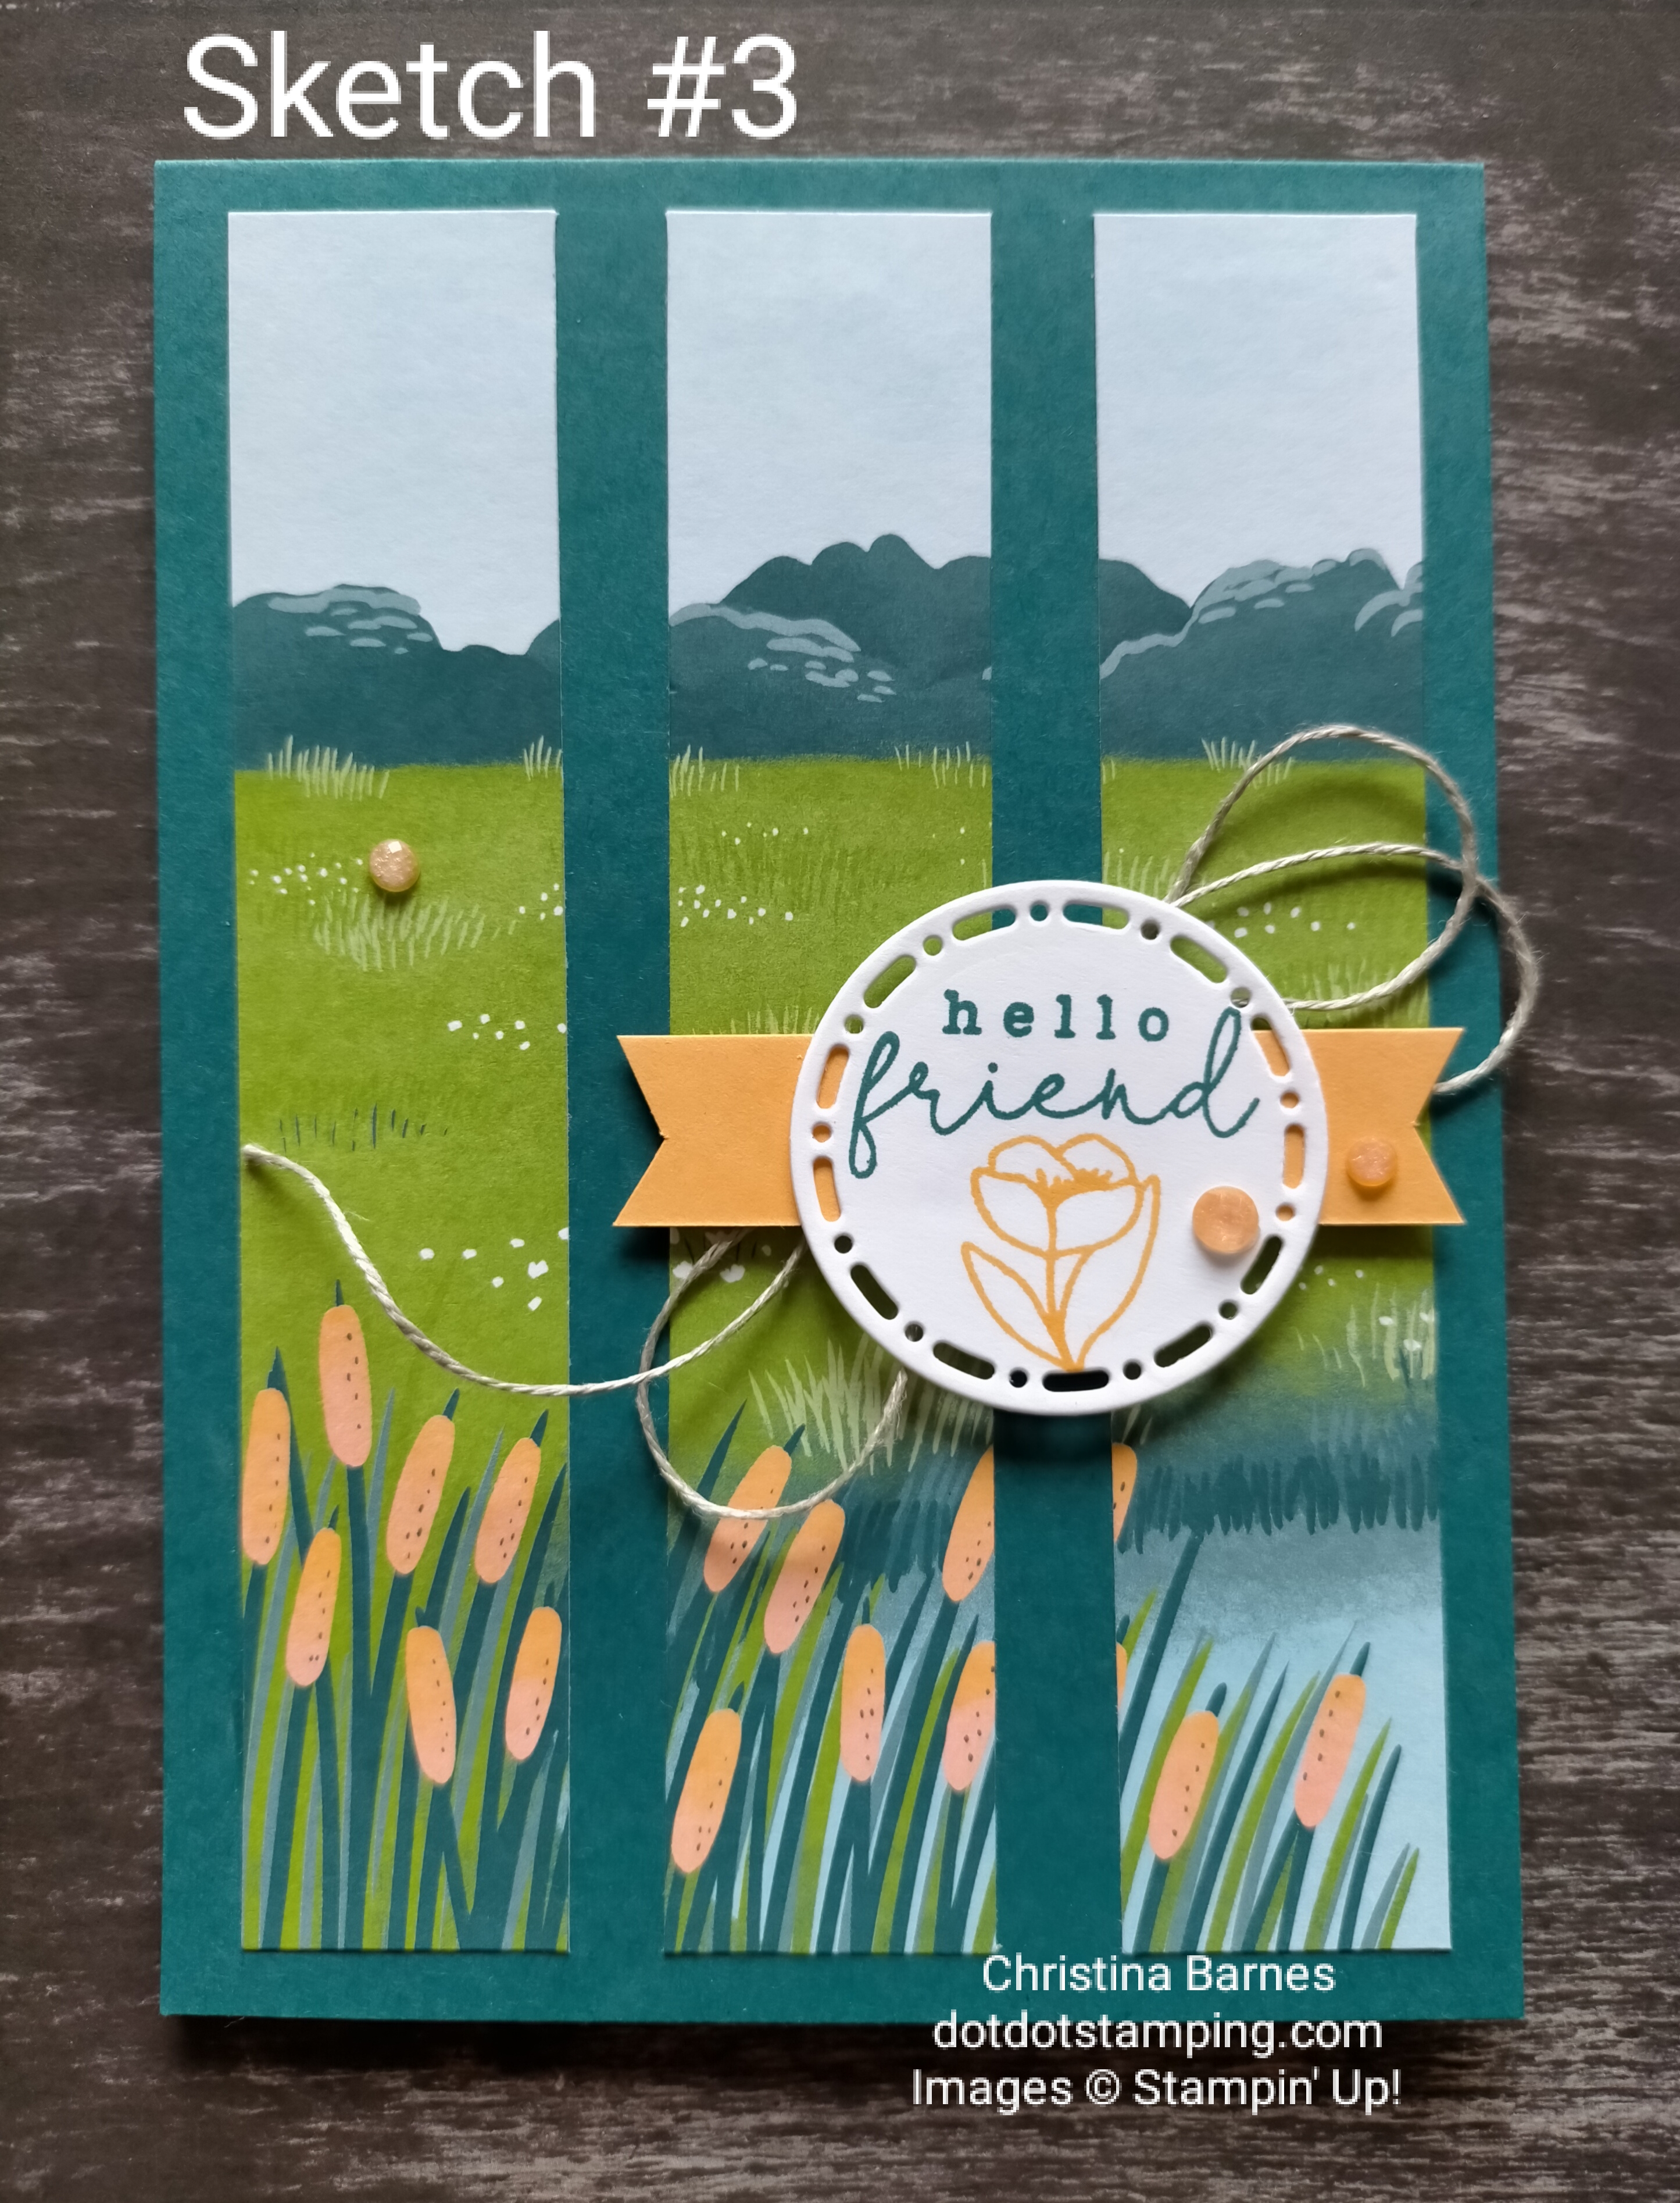
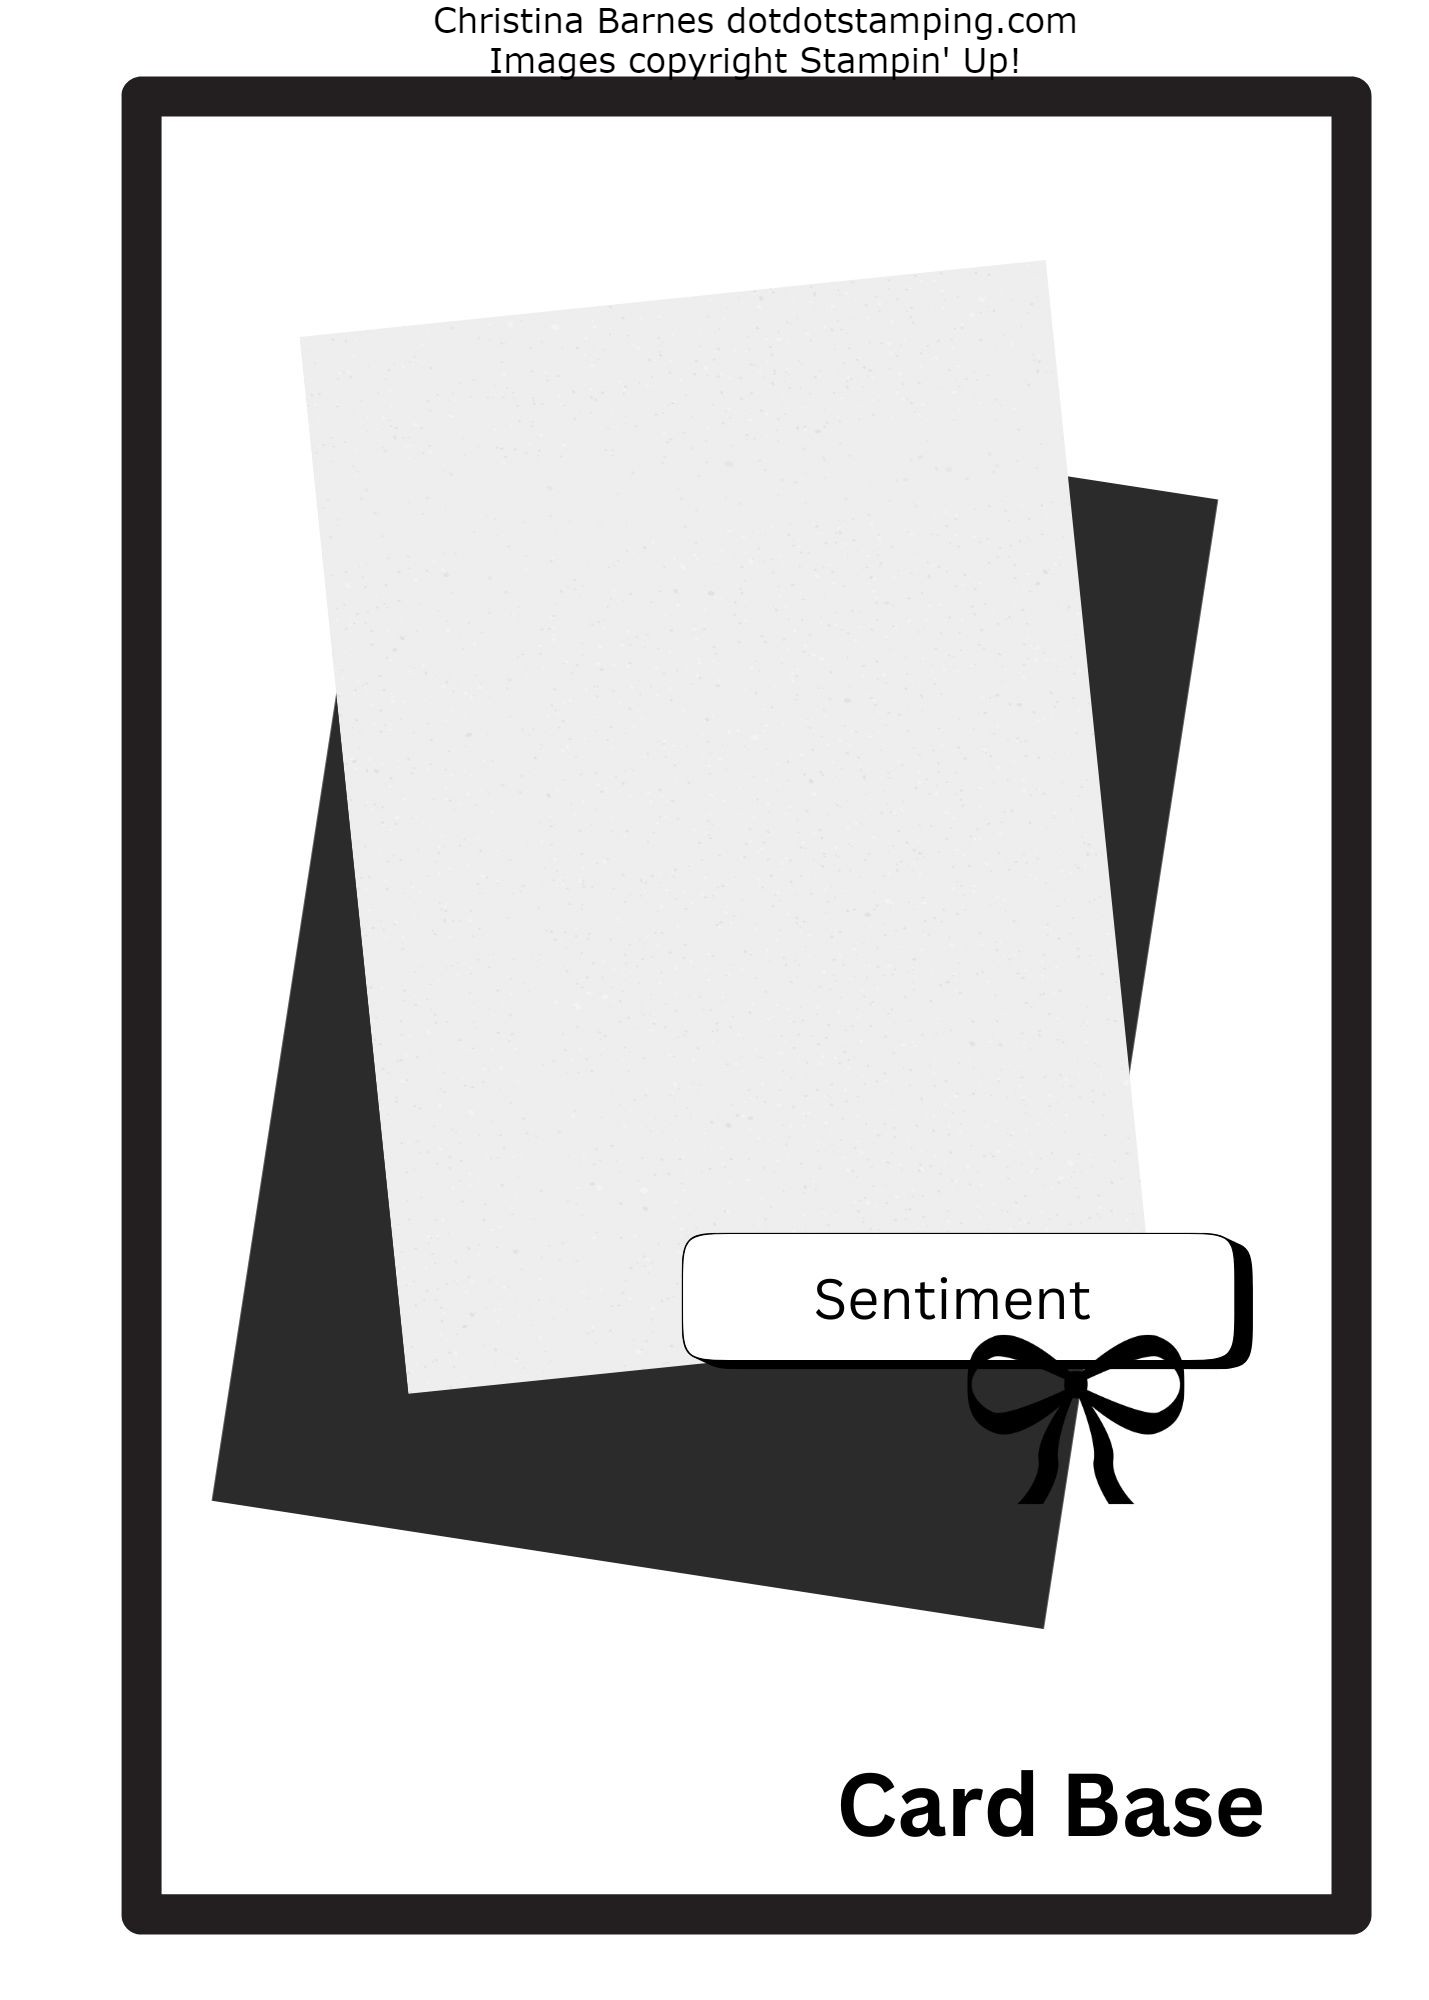
Hi and welcome back to the August month of sketches, where I am sharing my inspiration on the sketches on Page 22 of the Stampin’ Up! Annual Catalogue. Here is Sketch # 3.
Make sure you keep an eye out for tomorrow’s sketch #4. Did you know that you can sign up to receive my blog posts by email? If you look on the far right hand side and scroll down until you see “Follow Blog via Email”. Just pop your email address in there and follow the instructions and you will receive all of my posts in your inbox.
Welcome back to day 2 of our month of Stampin’ Up! Annual Catalogue sketches. Below is today’s sketch. You can find Day 1 of the month of sketches here.
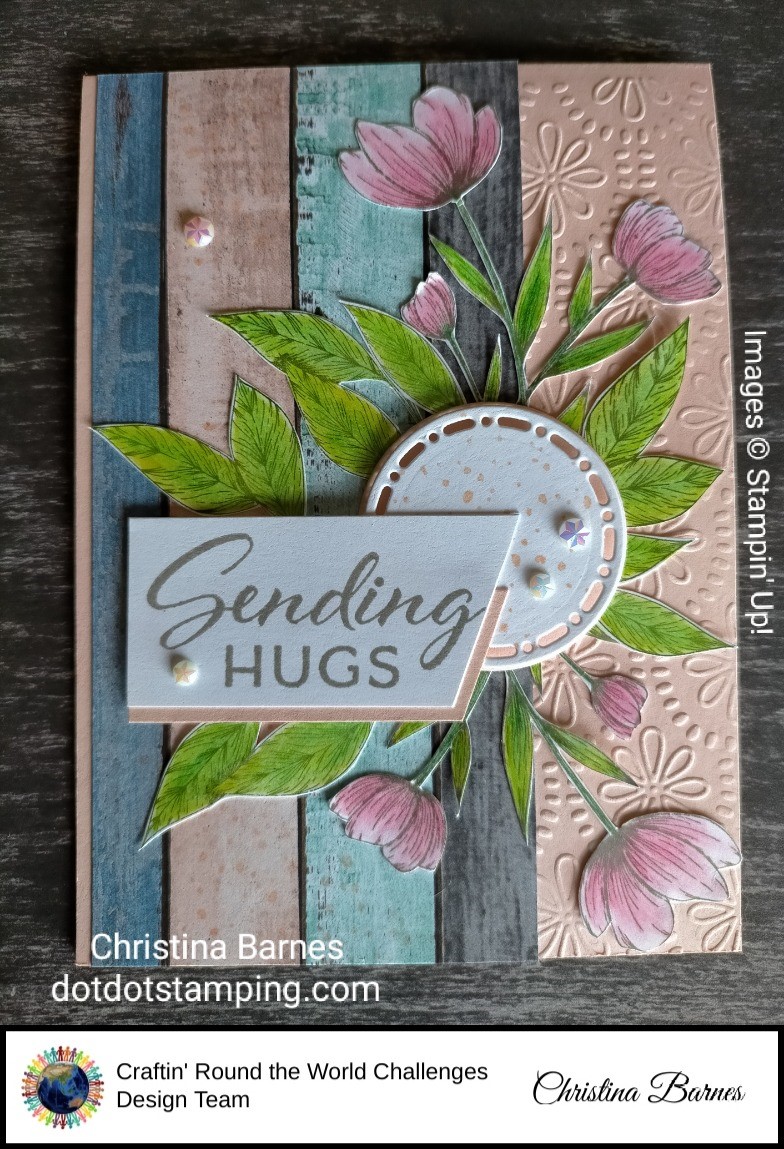
This could be a very simple card or it could be more complex as I have made mine today. My card features the Changing Leaves bundle which is an Online Exclusive, and a very versatile bundle.
For my card base, I cut a piece of Lost Lagoon cardstock at 21cm x 14.5cm – you should be able to get two card fronts from one full piece of cardstock. Then along the long side, score at 10.5cm and fold, so when it’s folded, your card front will be 10.5cm x 14.5cm. I have then used some Pretty Peacock cardstock which is 9cm x 13cm, and have run that through the Changing Leaves embossing folder. The basic white sentiment has been cut with one of the Changing Leaves Dies and the sentiment itself, also from the Changing Leaves stamp set is stamped in Pretty Peacock ink. The leaves are in Lost Lagoon, Moody Mauve and Copper Clay cardstock. And of course some Linen Thread tied into a large bow and adhered to the back of the sentiment. If you wanted to keep it simple though, you could leave off all the leaves, and just use the embossed panel with a sentiment and bow.
Hi and welcome back. If you have seen the Stampin’ Up! Annual Catalogue, you may have seen that there are quite a number of card sketches through the catalogue, and on Page 22 there are 22 sketches to use as inspiration for cards. So I am challenging myself! I plan to share a blog post every day with the sketches in the order they are in the catalogue, along with a sample of how I made that sketch PLUS the measurements I have used. I have seen a few different people sharing PDFs of the sketches with measurements in Imperial, but I am in Australia, and we use different size card fronts here. So my measurements will be in centimeters and based on our card size.
I have been busy on Canva recreating the sketches from the catalogue, so they are not exact copies of what is in the catalogue but close enough. And since I have put my time and effort into creating these I would appreciate acknowledgement of where you got them from if you plan on using them.
I hope you enjoy them. Here is the first one!
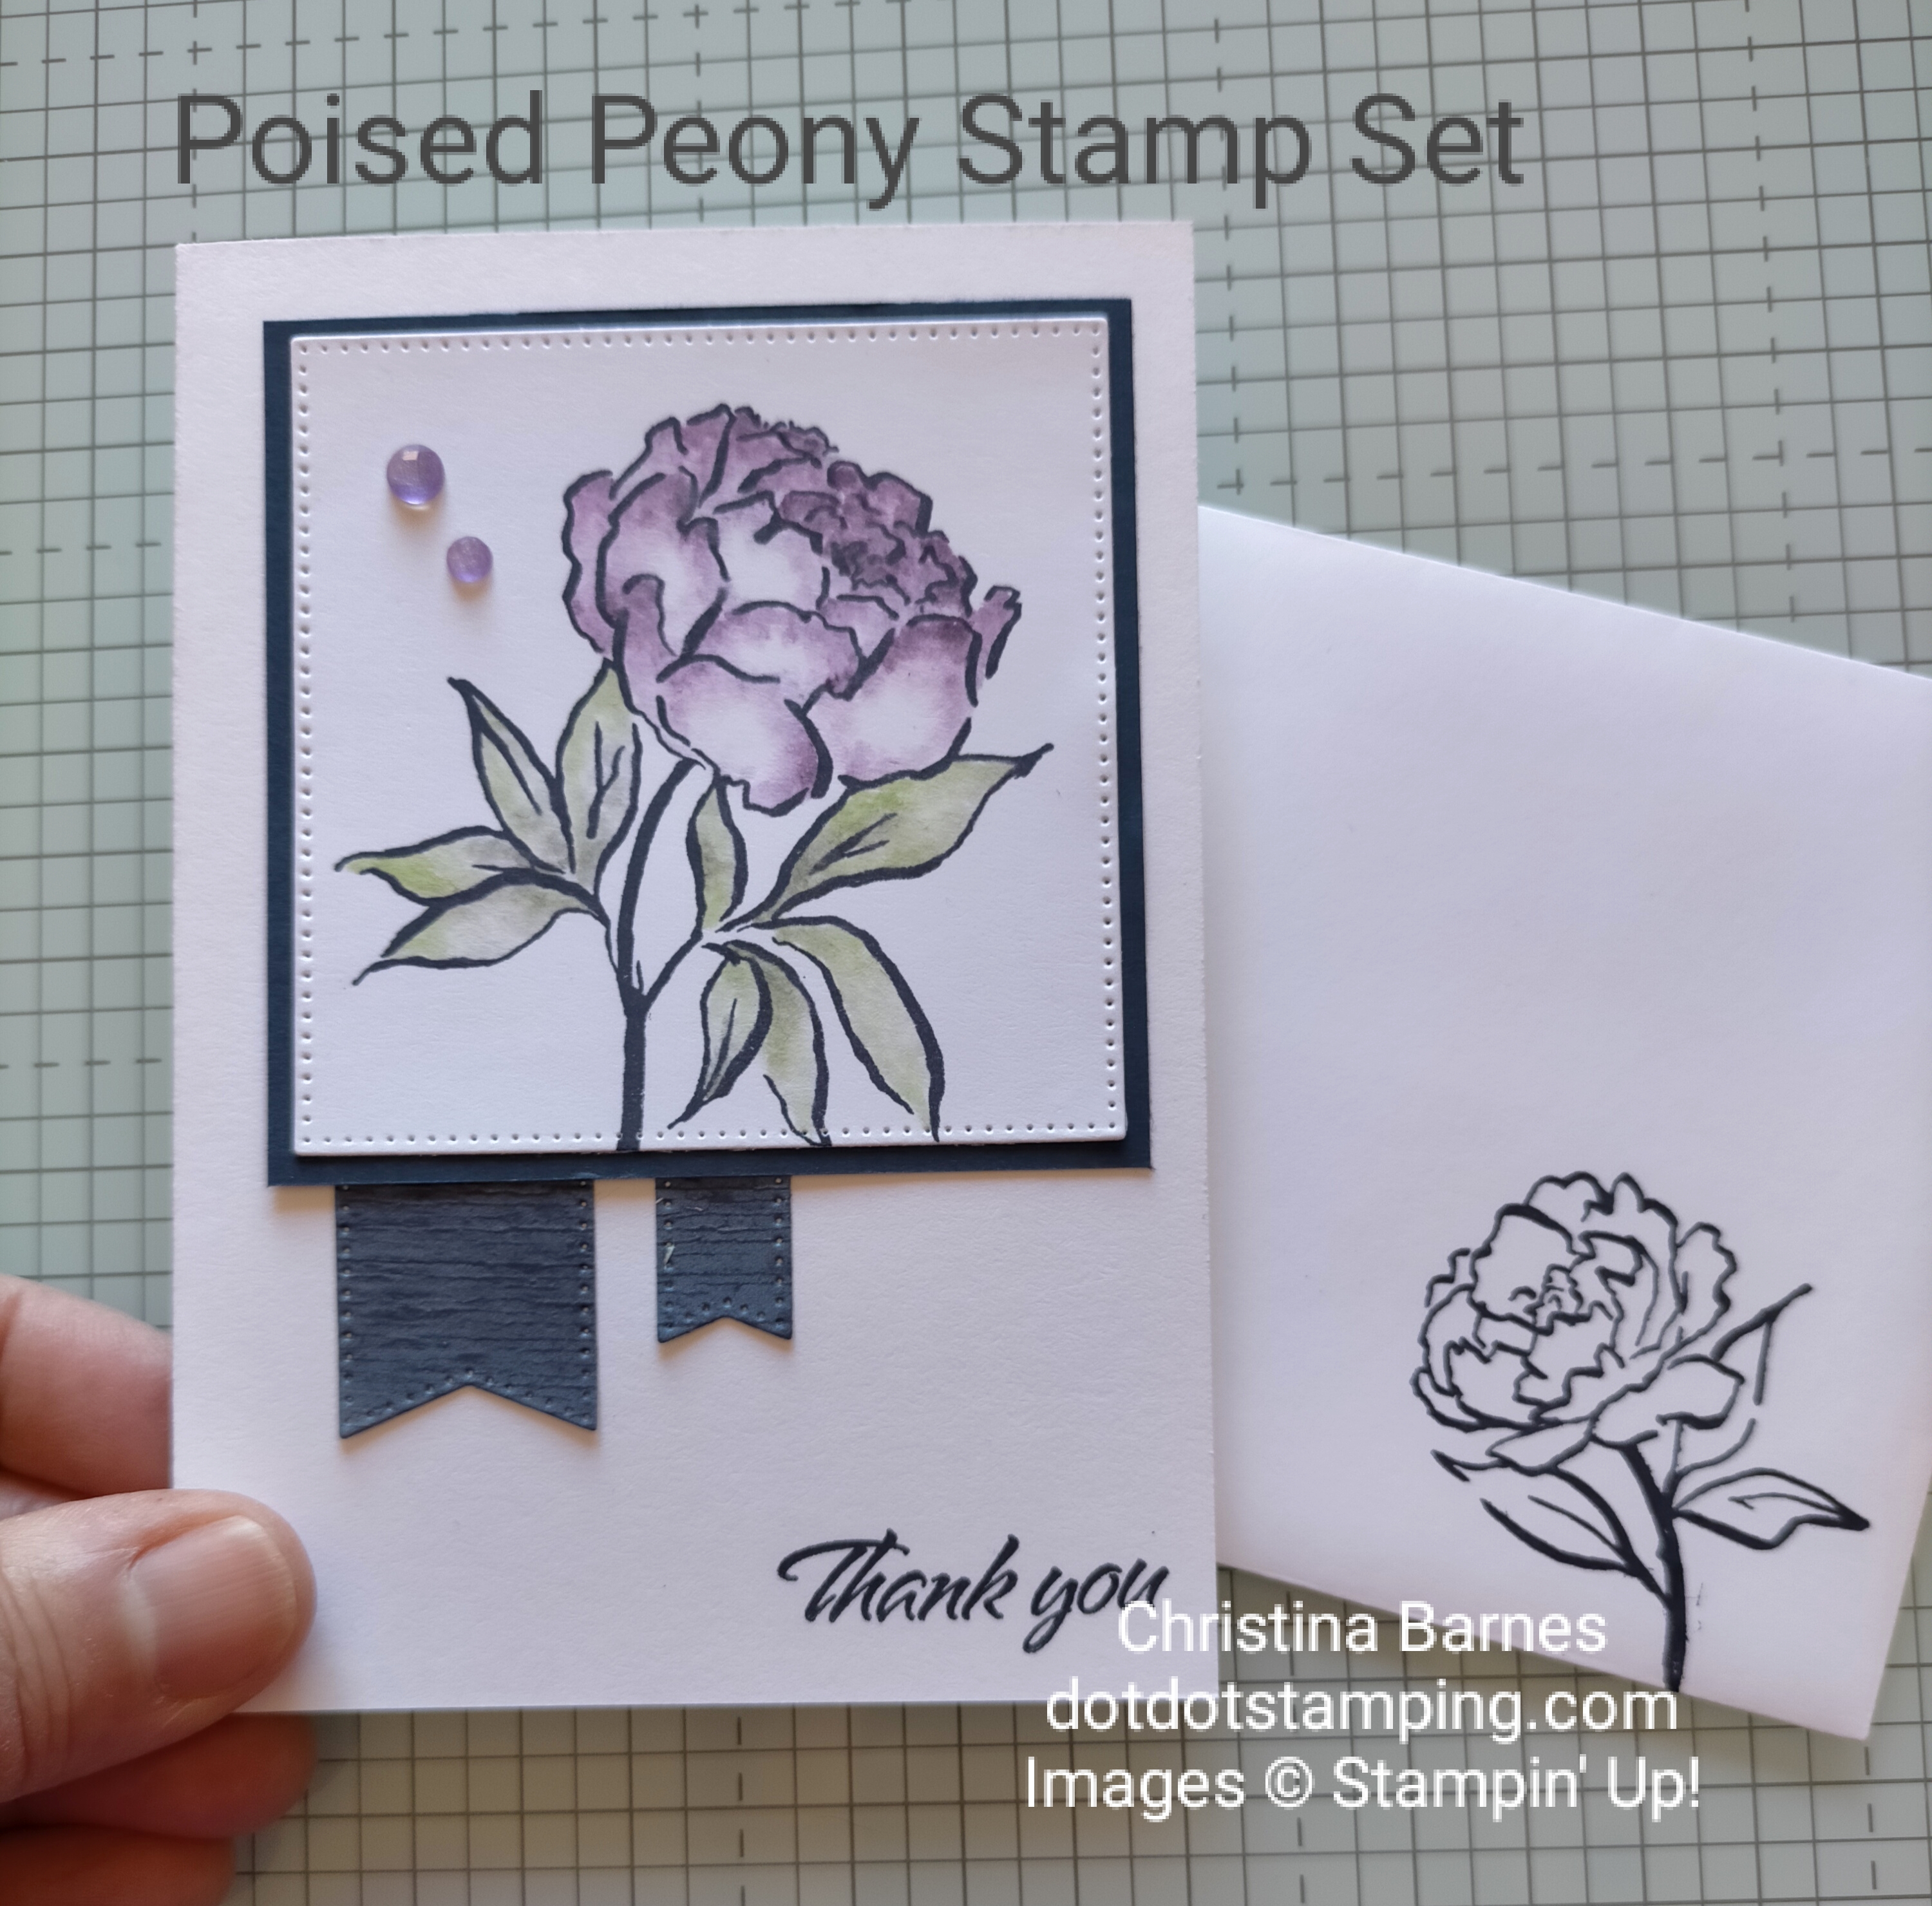
My card using this sketch features some of the beautiful Designer Series Paper which was only available to Stampin’ Up! demonstrators (but is too beautiful not to share) along with the Poised Peony stamp set.
In Australia our card bases are basically half of an A4 sheet of cardstock. However, I have found that it is much easier, especially for beginners to measure it slightly differently, and have a small strip left over. So for my card base, I cut 21cm x 14.5cm – you should be able to get two card fronts from one piece of cardstock. Then along the long side, score at 10.5cm and fold, so when it’s folded, your card front will be 10.5cm x 14.5cm. I have used some Pretty in Pink cardstock for my card base. I have then taken a piece of Designer Series Paper (patterned paper) the same size – 10.5cm x 14.5cm and adhered it onto the card front. The next layer of Designer Series Paper (the darker pink) is 8.5cm wide x 9.5cm. The Basic White focal layer is 7cm x 9.5cm. I decided not to put my sentiment onto a separate piece but rather to stamp it directly onto the panel with the main image, and also to add some Linen Thread, and some Purple Fine Shimmer Gems.
I hope that these will be helpful to someone, and hopefully I can get through all of them for you. Please feel free to leave a comment or reach out to me if you have any questions. Happy stamping, Chris
The flowers and leaves have all been coloured with watercolour pencils and then fussy cut. Yes, there’s a lot of fussy cutting there. So what’s the trick to fussy cutting? (fussing cutting is cutting around an image using scissors rather than using a die to cut). The trick is to move the piece you are cutting, rather than moving your hand around the piece, so keep your scissors in one direction as much as possible, and move the piece of cardstock, paper or whatever else it might be. I’ve found that to do this successfully I need to keep the piece of cardstock as small as possible, so I usually do two cuts, one to reduce the size and then one around the image. The other trick is to make sure your Paper Snips (scissors) are nice and sharp. And I enjoy fussing cutting, I find it quite relaxing, a little like meditation.
I’ve had the Translucent Florals stamp set and dies for quite some time now, and for whatever reason, it hasn’t had a lot of use, so I decided to give it some love.
My card is inspired by design of the card on the bottom left of Page 124 of the Annual Catalogue, and I have used a circle of flowers intead of an actual round shape. My background was sponged using Azure Afternoon ink, and each flower petal was sponged with Crushed Curry ink around the outside edges, and Poppy Parade ink in the centres. There are four die cut flowers layered over each other for each complete flower. The other colours used are Lemon Lime Twist for the leaves, and the sprigs of greenery are stamped in Summer Splash ink.
For each flower, I have die cut two large and two small flowers from Basic White cardstock, sponged the ink colour onto each one, and then used the Bone Folder gently to the the petals a little shaping. I have used Glue Dots to adhere the layers together and popped a Poppy Parade die cut centre and Iridescent Faceted Gem in the centre of each flower.
I hope you are having a crafty weekend. Don’t forget the Earn and Redeem promotion that is on until the end of the month. Grab the Translucent Florals Bundle and you will be emailed a voucher to redeem in August. Happy stamping, Chris
The idea for my card today was to create a summer scene. It’s the middle of a cold winter here in Australia, and I needed a reminder that summer will be here before we know it, and with that, time at the beach and swimming in our beautiful ocean. Does anyone else love swimming in the ocean? It’s something I love to do, it makes me feel so energised and refreshed.
The truck with the surf board in the back, and the palm trees are from the Trucking Along bundle, which is an Online Exclusive from a while back but still available here in Australia.


")


