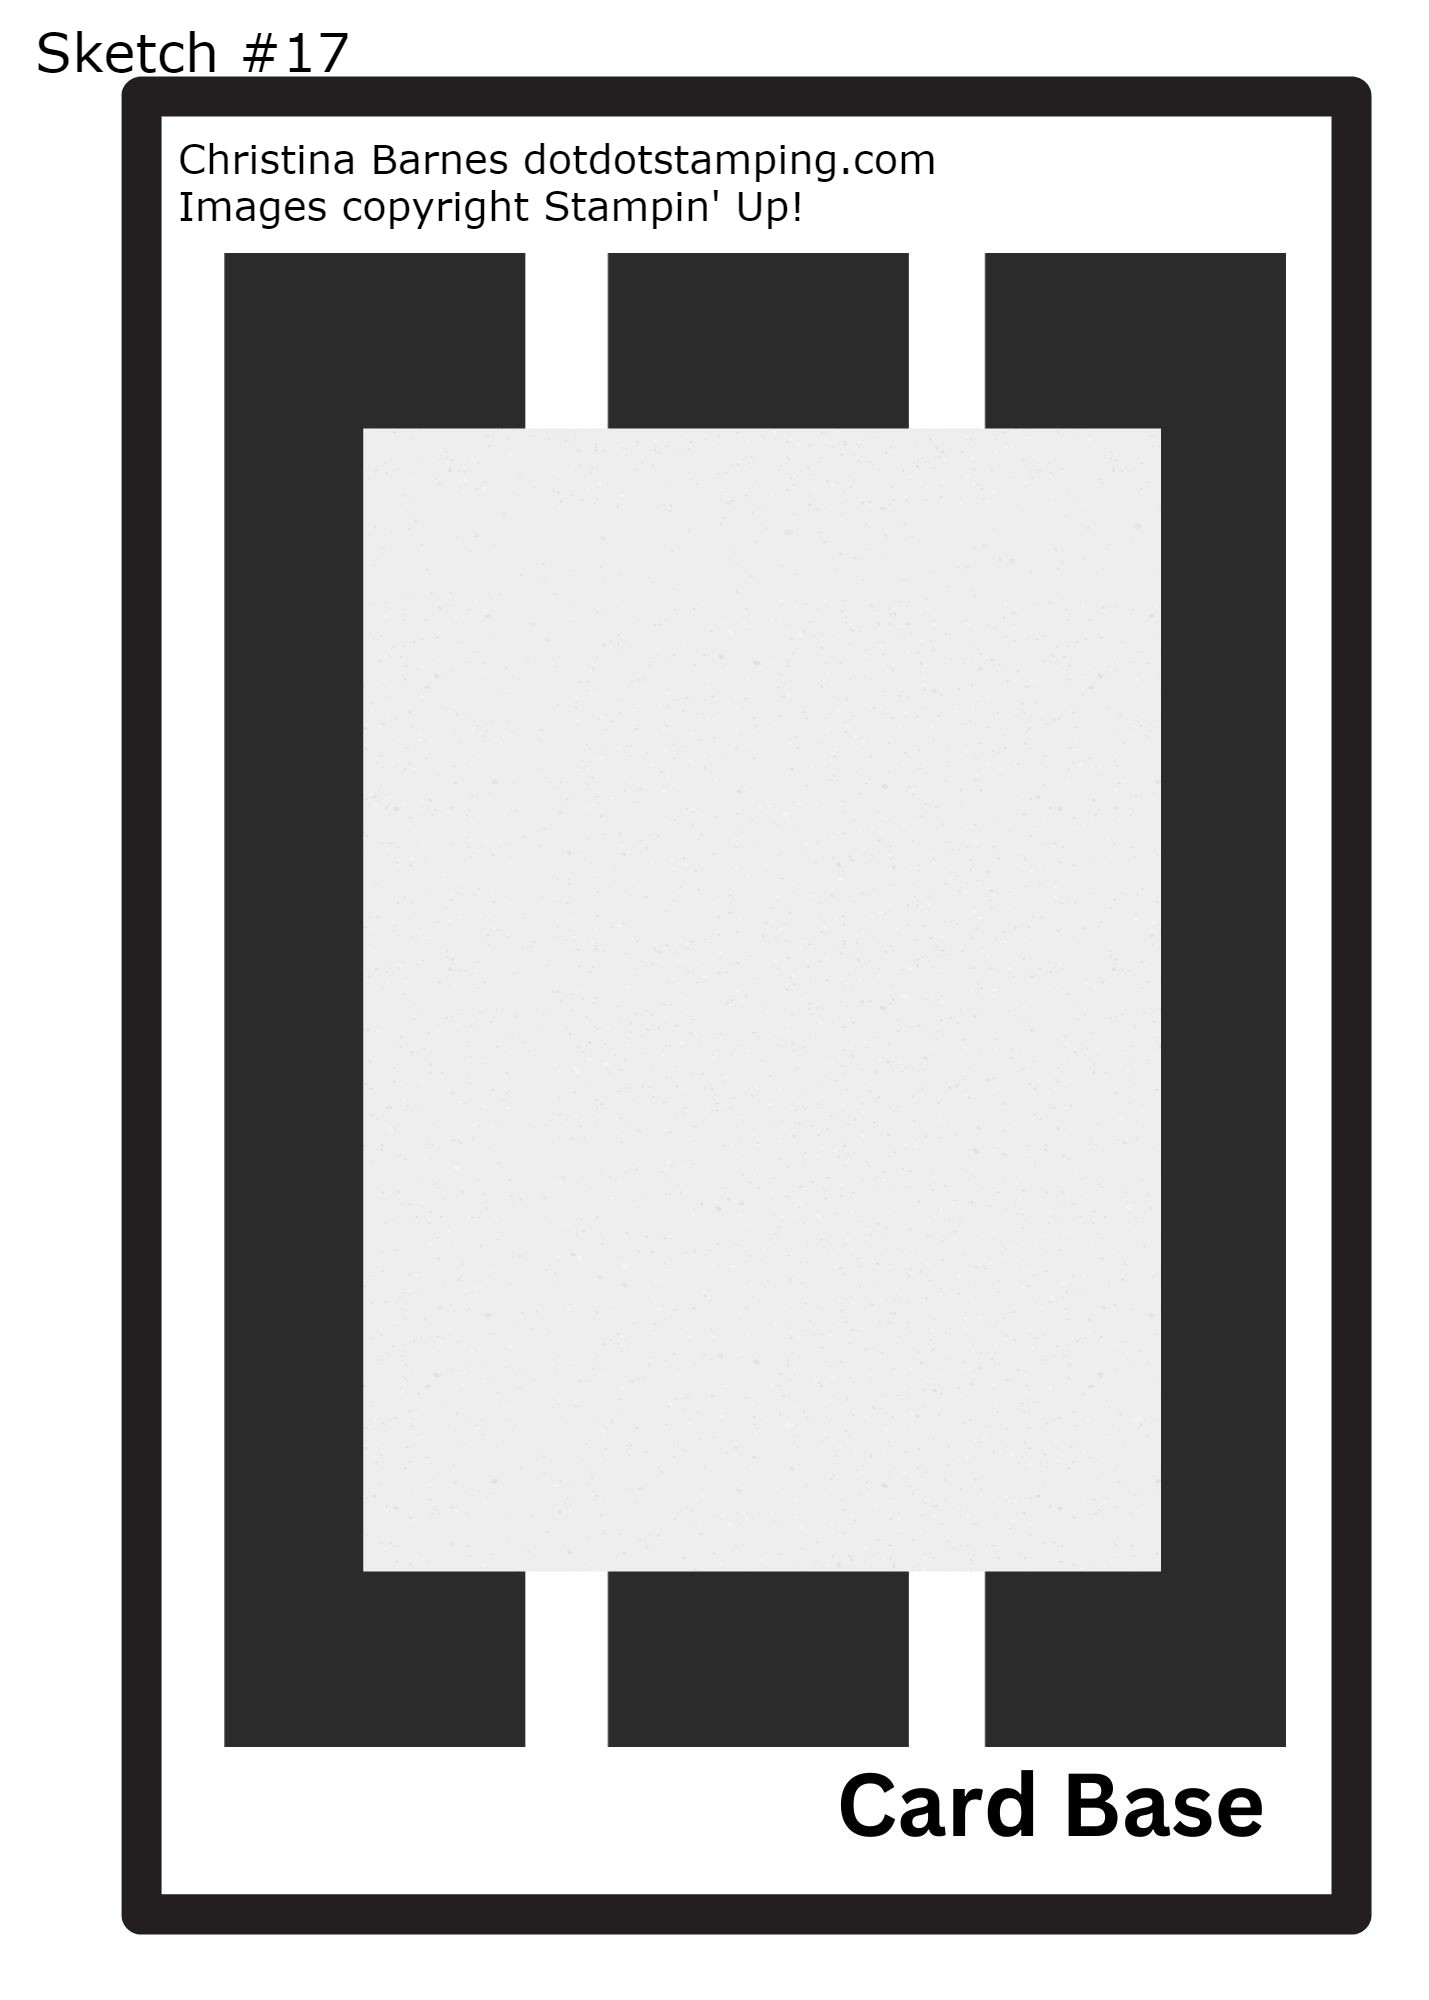
Hi and welcome back to day 17 of my sketch challenge. My card today uses the 17th Sketch from the Stampin’ Up! Annual Catalogue and is my card for this month’s challenge at Craftin Round The World. Here is sketch number 17 from Page 22 of the catalogue. If you would like to find Day 1 of the sketch challenge for the month of August, just click here.
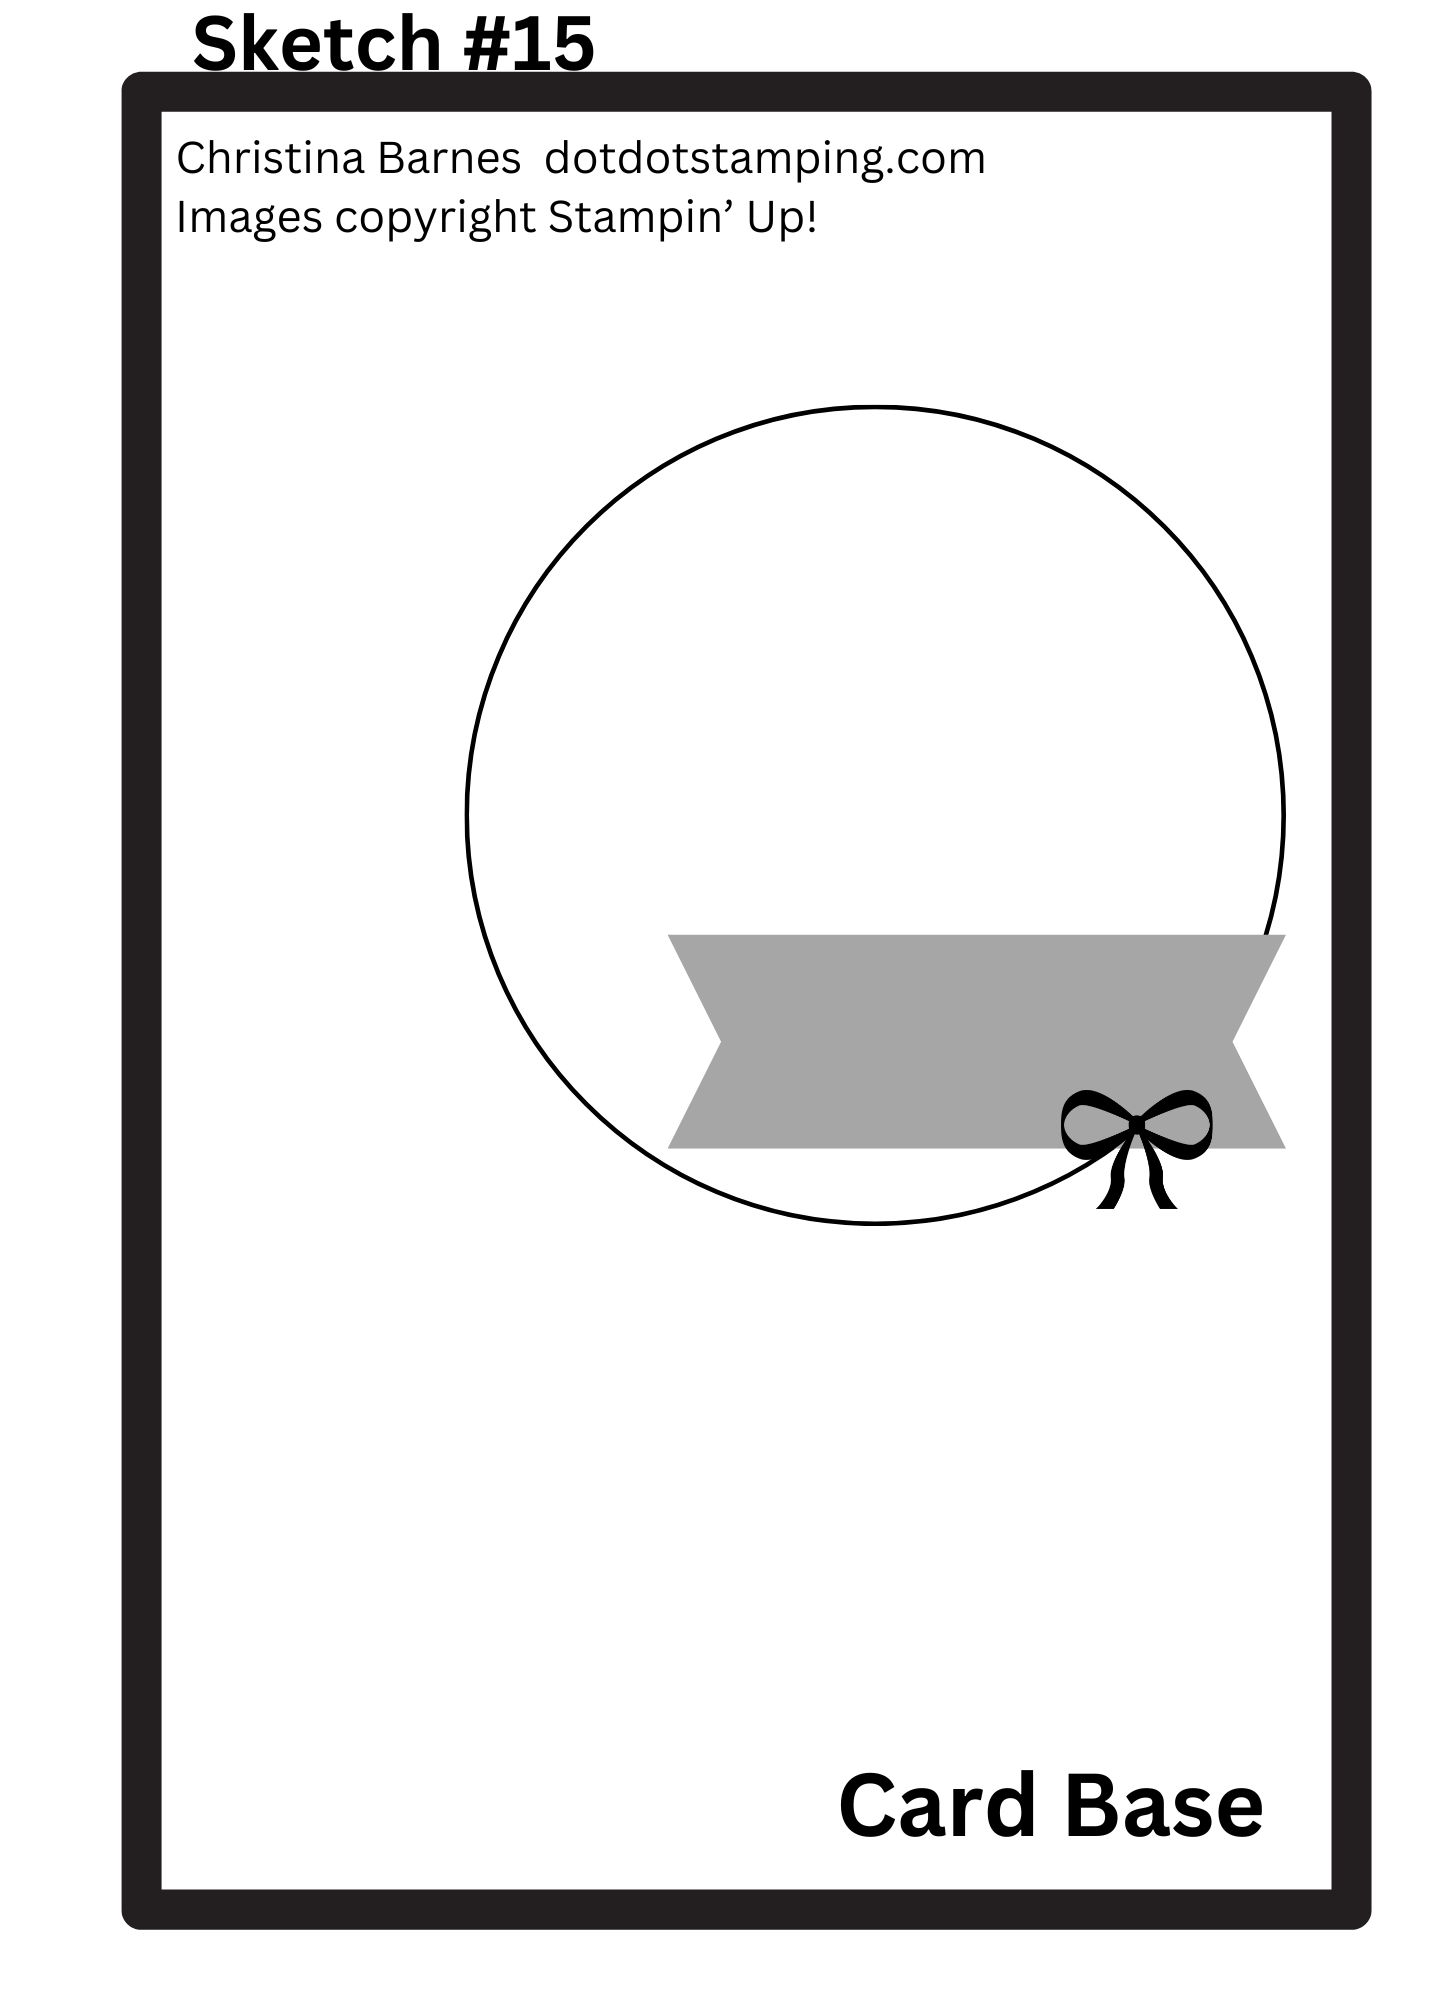
Welcome back. Today is day 15 of inspiration using the sketches on Page 22 of the Annual Catalogue.
I done heaps of colouring on my card today. The images have all been stamped in Black Memento ink and then coloured using Stampin’ Blends to create a base colour, with Watercolour Pencils used over the top of the Stampin’ Blends to add some depth of colour.
I have a cardbase of Thick White Cardstock (21cm x 14.5cm, which is then scored at 10.5cm on the long side and folded, so when it’s folded, your card front will be 10.5cm x 14.5cm. The next layer of patterned paper is 14cm x 10cm), with a layer of Country Woods Designer Series Paper over the top (10.5cm x 14.5cm). The large circle is die cut from the Spotlight on Nature Dies, and the images all from the Country Flowers Bundle.
That’s all from me today, I have been offered some casual work, so I need to get organised for that. Hope you have a crafty day. Happy stamping, Chris
The measurements are as follows: the cardbase is The card base is 21cm x 14.5cm, which is then scored at 10.5cm on the long side and folded, so when it’s folded, your card front will be 10.5cm x 14.5cm. The next layer of patterned paper is 14cm x 10cm. Then a layer of Pretty Peacock cardstock to frame the top layer, and is 7.5cm x 10cm. The top layer of patterned paper is 7cm x 9.5cm. I have taken a strip of Basic White cardstock from my stash of scraps, and stamped the sentiment in Pretty Peacock ink. The sentiment comes from the Country Flowers stamp set.
And that’s it. Sometimes it fun to create a really quick card, and Designer Series Papers can make it easy to do so. And don’t forget the sale on Designer Series Papers for the rest of August, which you can find here in my online store. Happy stamping Chris
Hi and welcome back. Today we have Sketch #8 from the Stampin’ Up! Annual Catalogue.
I apologise for the slightly wonky sketch, some of my rectangles didn’t quite line up. Still, you get the idea. I decided to keep this one really simple. Of course, it could be quite a complicated one if you choose, but mine is nice and easy today.
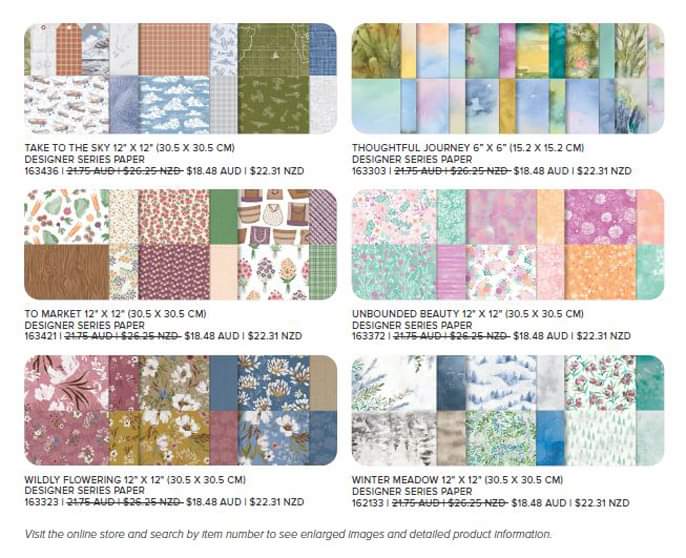
I have taken a piece of the Lily Pond Lane Designer Series Paper (which is currently on sale) and using a ruler and pencil, worked out the measurements to divide it into equal rectangles. I have a Basic Black card base in the standard size ( 21cm x 14.5cm, which is then scored at 10.5cm on the long side and folded, so when it’s folded, your card front will be 10.5cm x 14.5cm). The piece of Lily Pond Lane DSP is the standard size as a layer over the base – 10cm x 14cm. It was pretty tricky trying to work out exact meaurements for the lines, however they are approximately 3.3cm apart on the short side, and 4.7cm on the long side. I have used a Black Stampin’ Write Marker and ruler to draw the blace lines directly onto the DSP.
I have taken a piece of the Country Woods DSP, cut to 10cm x 14cm to lay over the top of my Crumb Cake card base (21cm x 14.5cm, which is then scored at 10.5cm on the long side and folded, so when it’s folded, your card front will be 10.5cm x 14.5cm). The rectangular elements have been die cut using the Nested Essentials Dies, and the circle from the Spotlight on Nature Dies. I have stamped the teapot image directly onto some of the Country Woods DSP, then cut using the die, before adding some shading using a Basic Grey Watercolour Pencil. The leaves were done in the same way and again coloured with Watercolour Pencils.
I found this sketch challenging for some reason, but so far I am enjoying creating using different layouts. I have a tendency to use the same or very similar layouts for my cards, so it’s a good challenge to be trying out some different ideas.
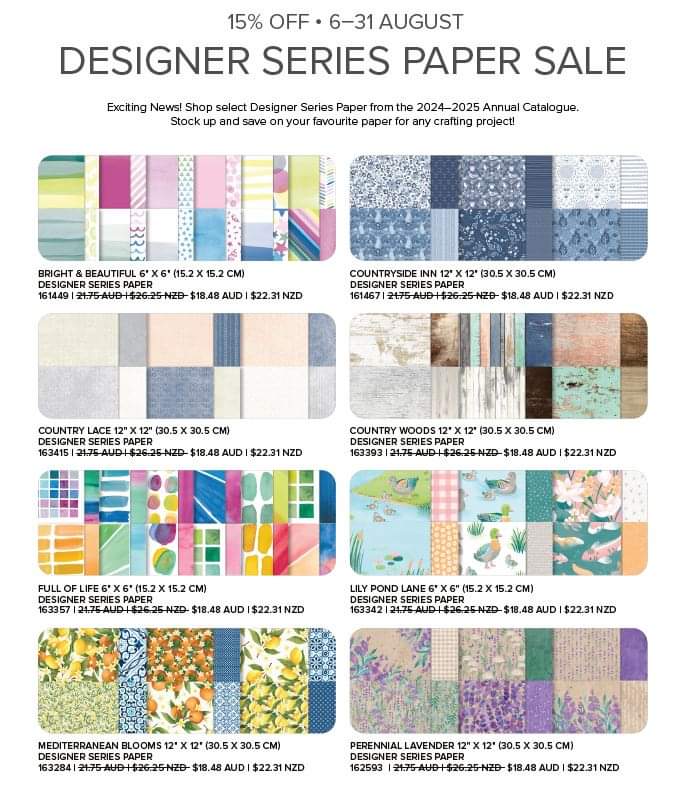
Don’t forget that Designer Series Papers are on sale at 15% off between now and the end of August, and you can order simply by going to my Online Store.
Starting tomorrow, 6th August, the always popular 15% off Designer Series Papers. If you are a papercrafter, you will love this promotion, whether it’s for cardmaking, scrapbooking or any other kind of papercrafting. Stock up here on your favourites, but make sure you get in early in case they sell out.
Have you got some favourites that you need to get? I have a couple that I don’t have yet, so it might be time to invest in something different. If you would like to do the same, you can go right to my Online Store anytime that suits you. Happy shopping, Chris
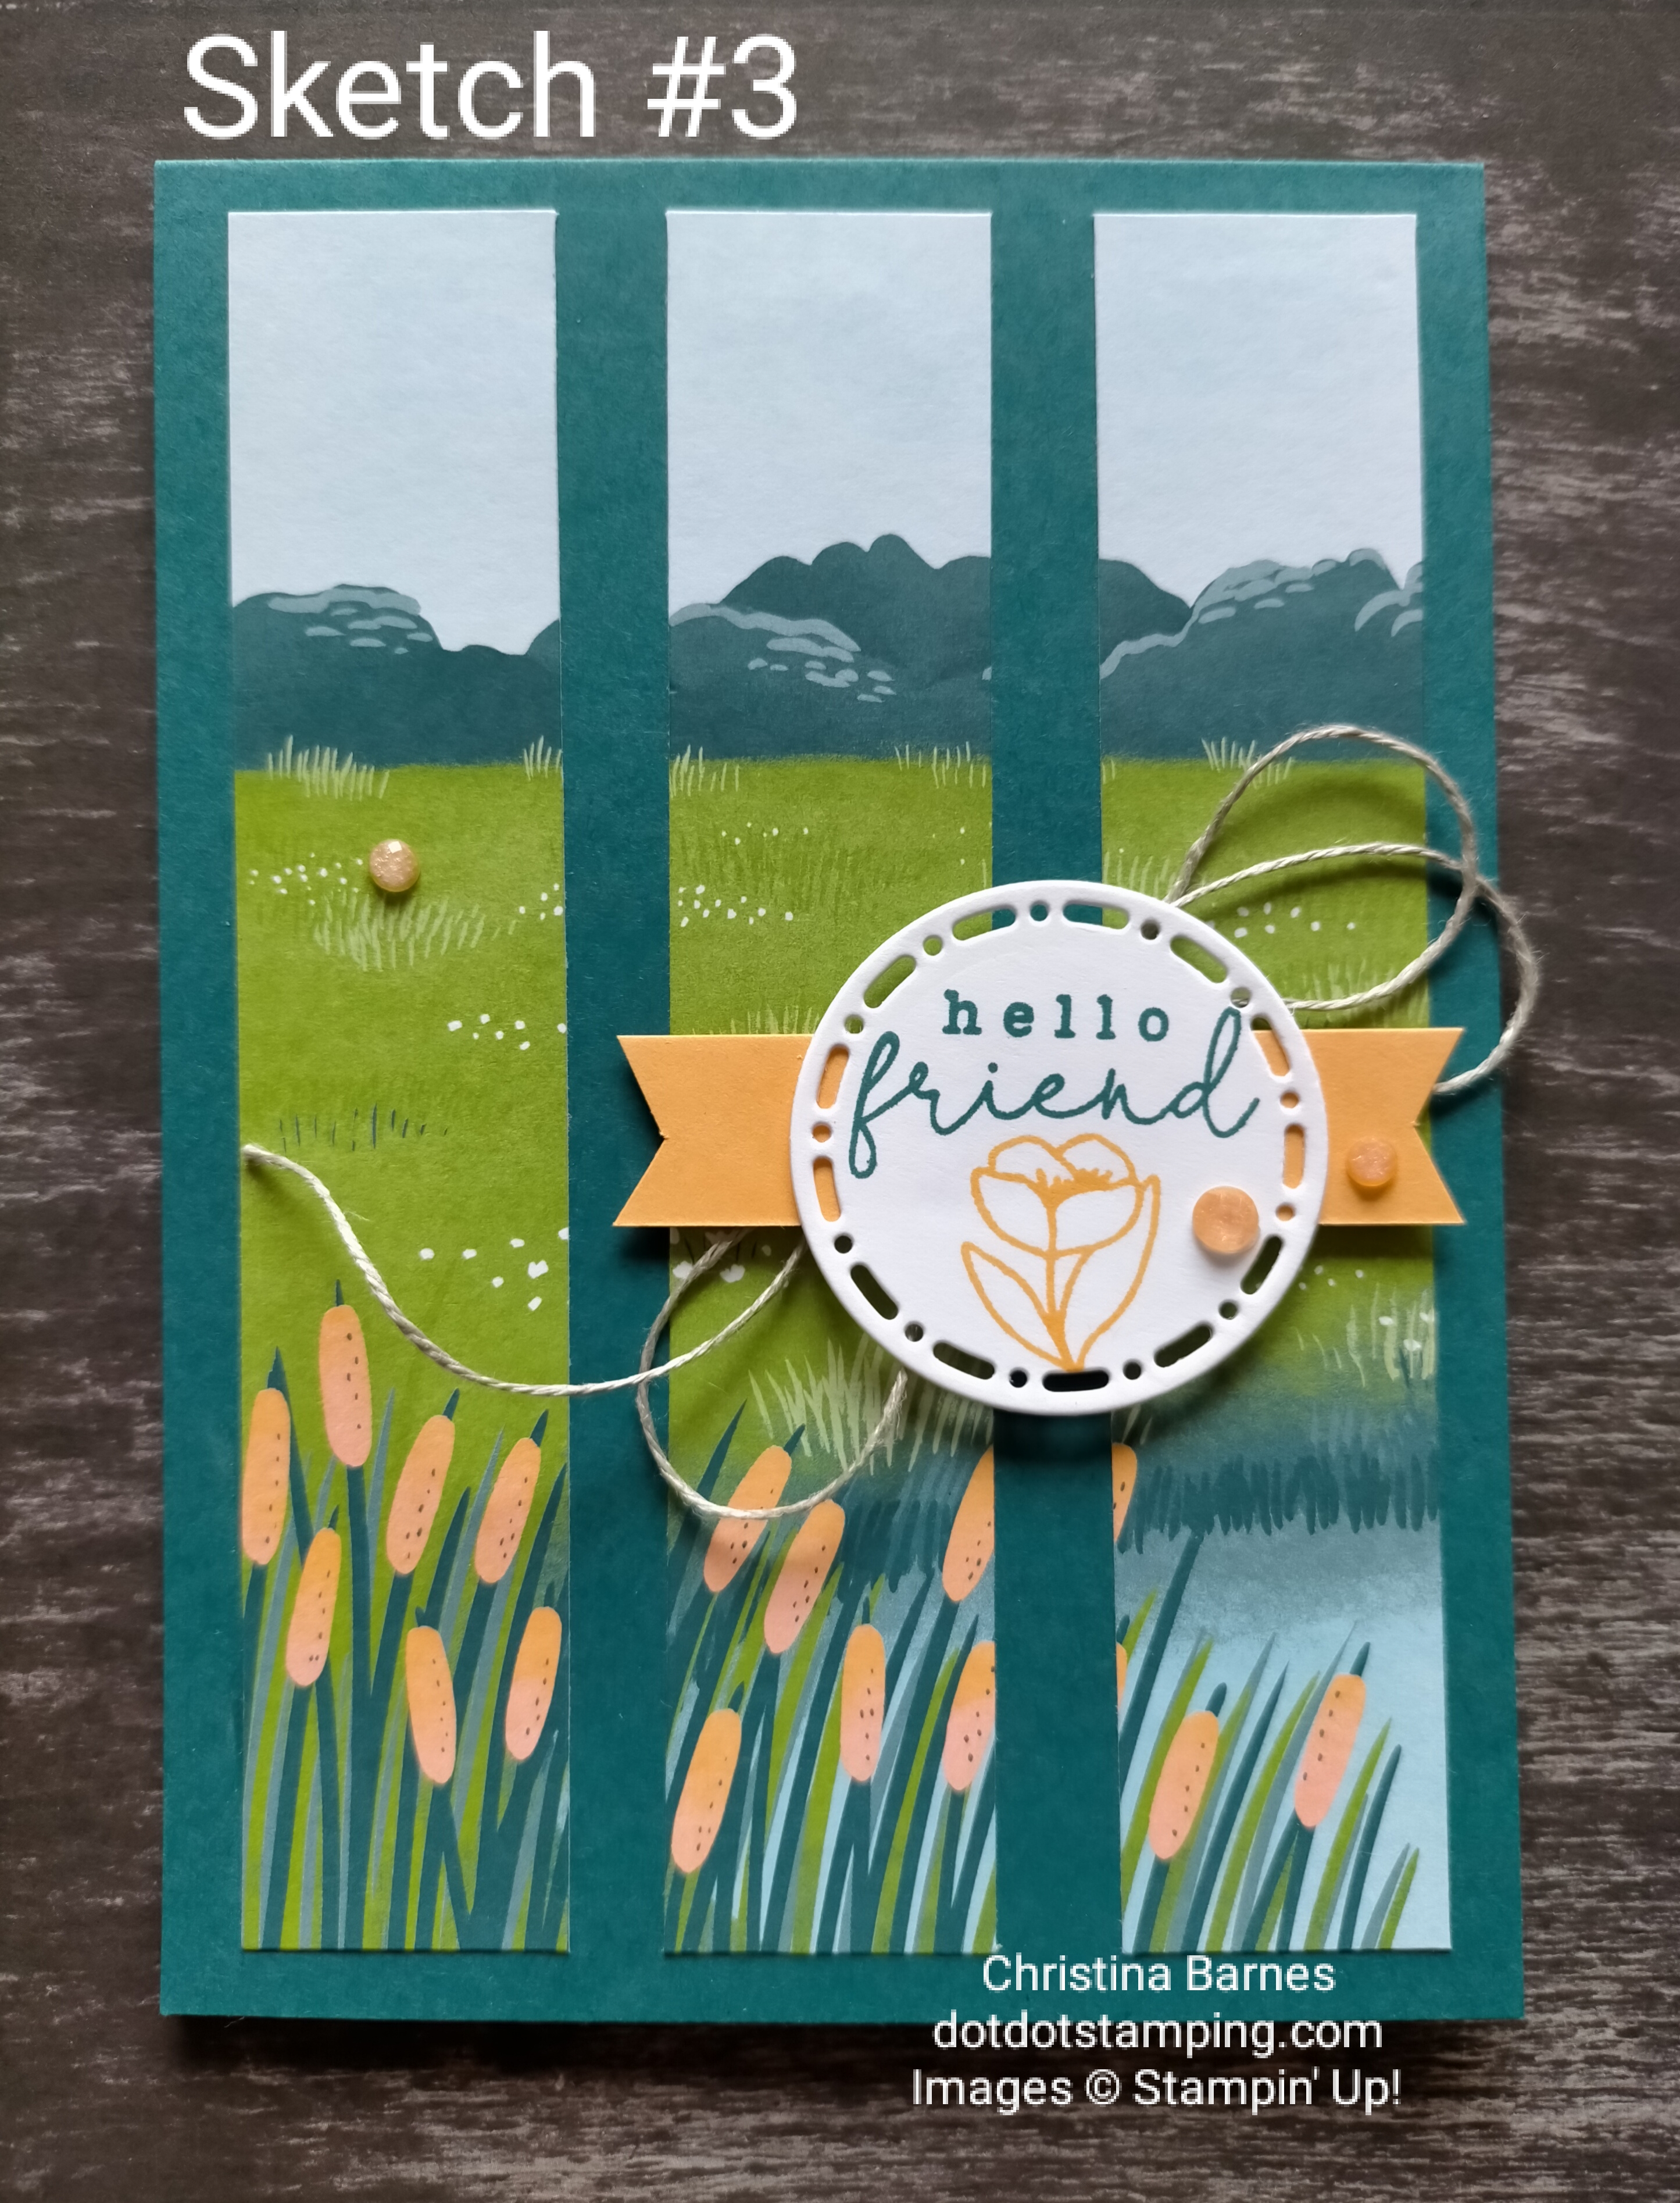
Hi and welcome back to the August month of sketches, where I am sharing my inspiration on the sketches on Page 22 of the Stampin’ Up! Annual Catalogue. Here is Sketch # 3.
Make sure you keep an eye out for tomorrow’s sketch #4. Did you know that you can sign up to receive my blog posts by email? If you look on the far right hand side and scroll down until you see “Follow Blog via Email”. Just pop your email address in there and follow the instructions and you will receive all of my posts in your inbox.
Hi and welcome back. If you have seen the Stampin’ Up! Annual Catalogue, you may have seen that there are quite a number of card sketches through the catalogue, and on Page 22 there are 22 sketches to use as inspiration for cards. So I am challenging myself! I plan to share a blog post every day with the sketches in the order they are in the catalogue, along with a sample of how I made that sketch PLUS the measurements I have used. I have seen a few different people sharing PDFs of the sketches with measurements in Imperial, but I am in Australia, and we use different size card fronts here. So my measurements will be in centimeters and based on our card size.
I have been busy on Canva recreating the sketches from the catalogue, so they are not exact copies of what is in the catalogue but close enough. And since I have put my time and effort into creating these I would appreciate acknowledgement of where you got them from if you plan on using them.
I hope you enjoy them. Here is the first one!
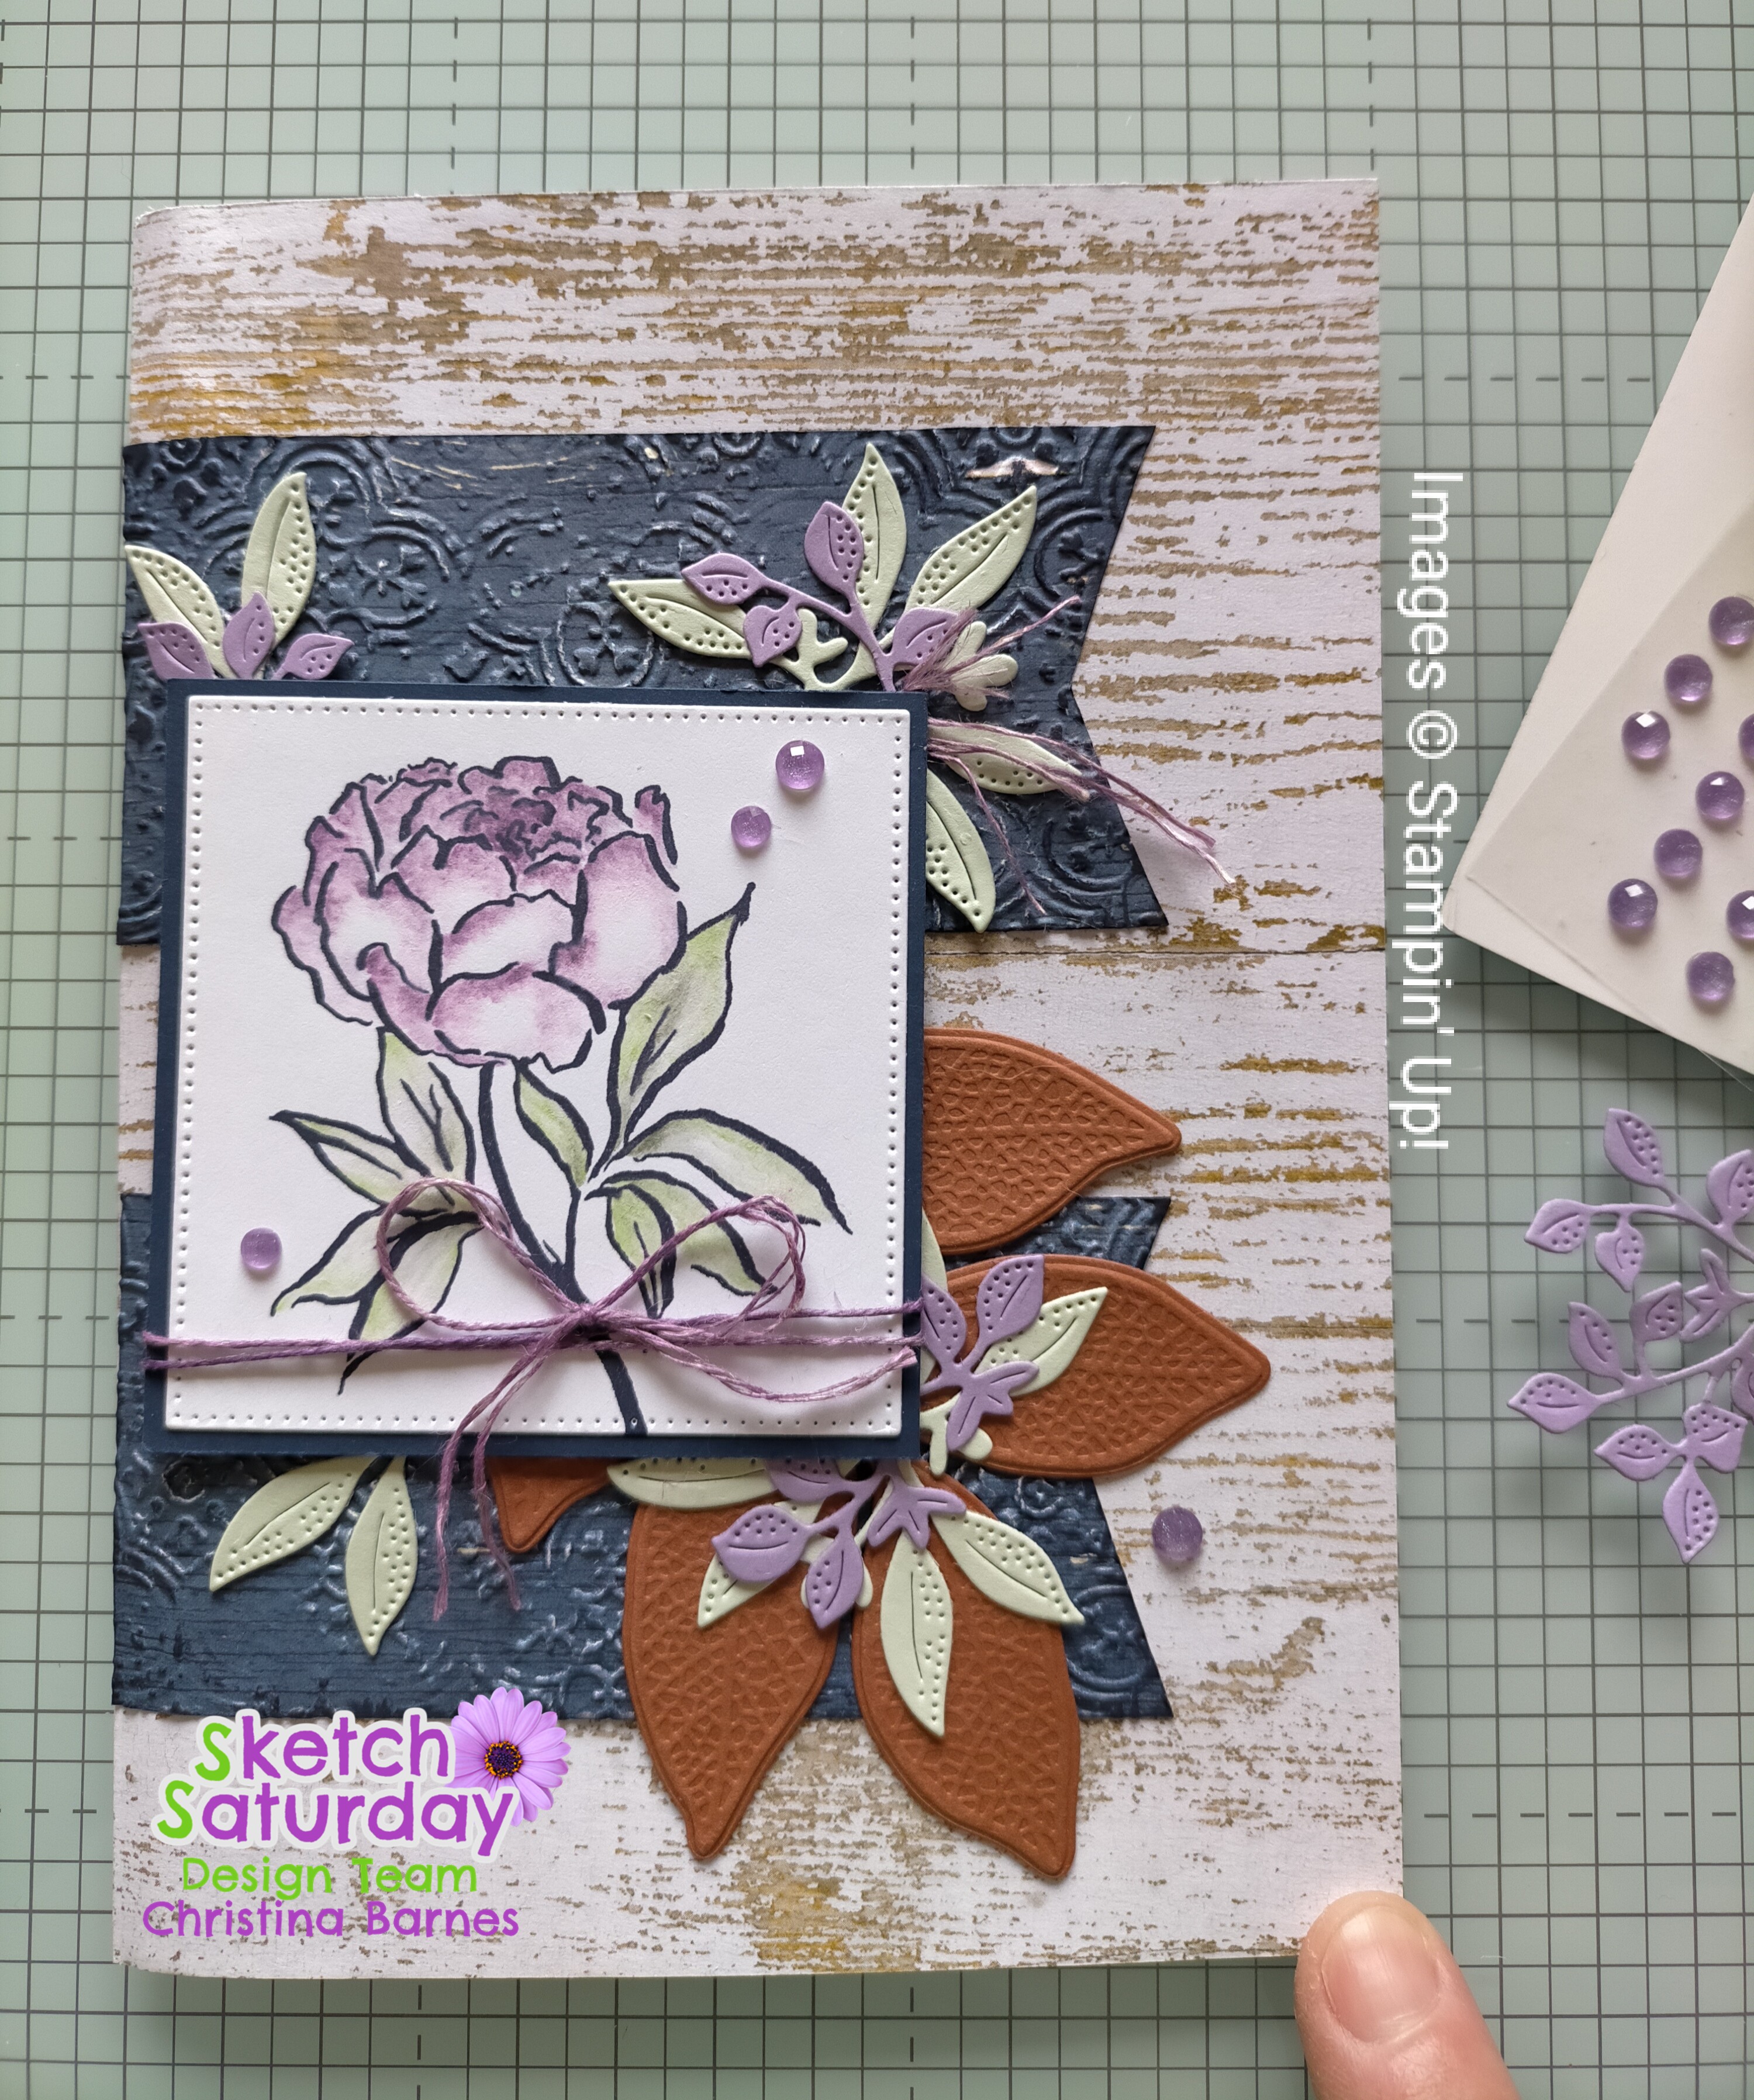
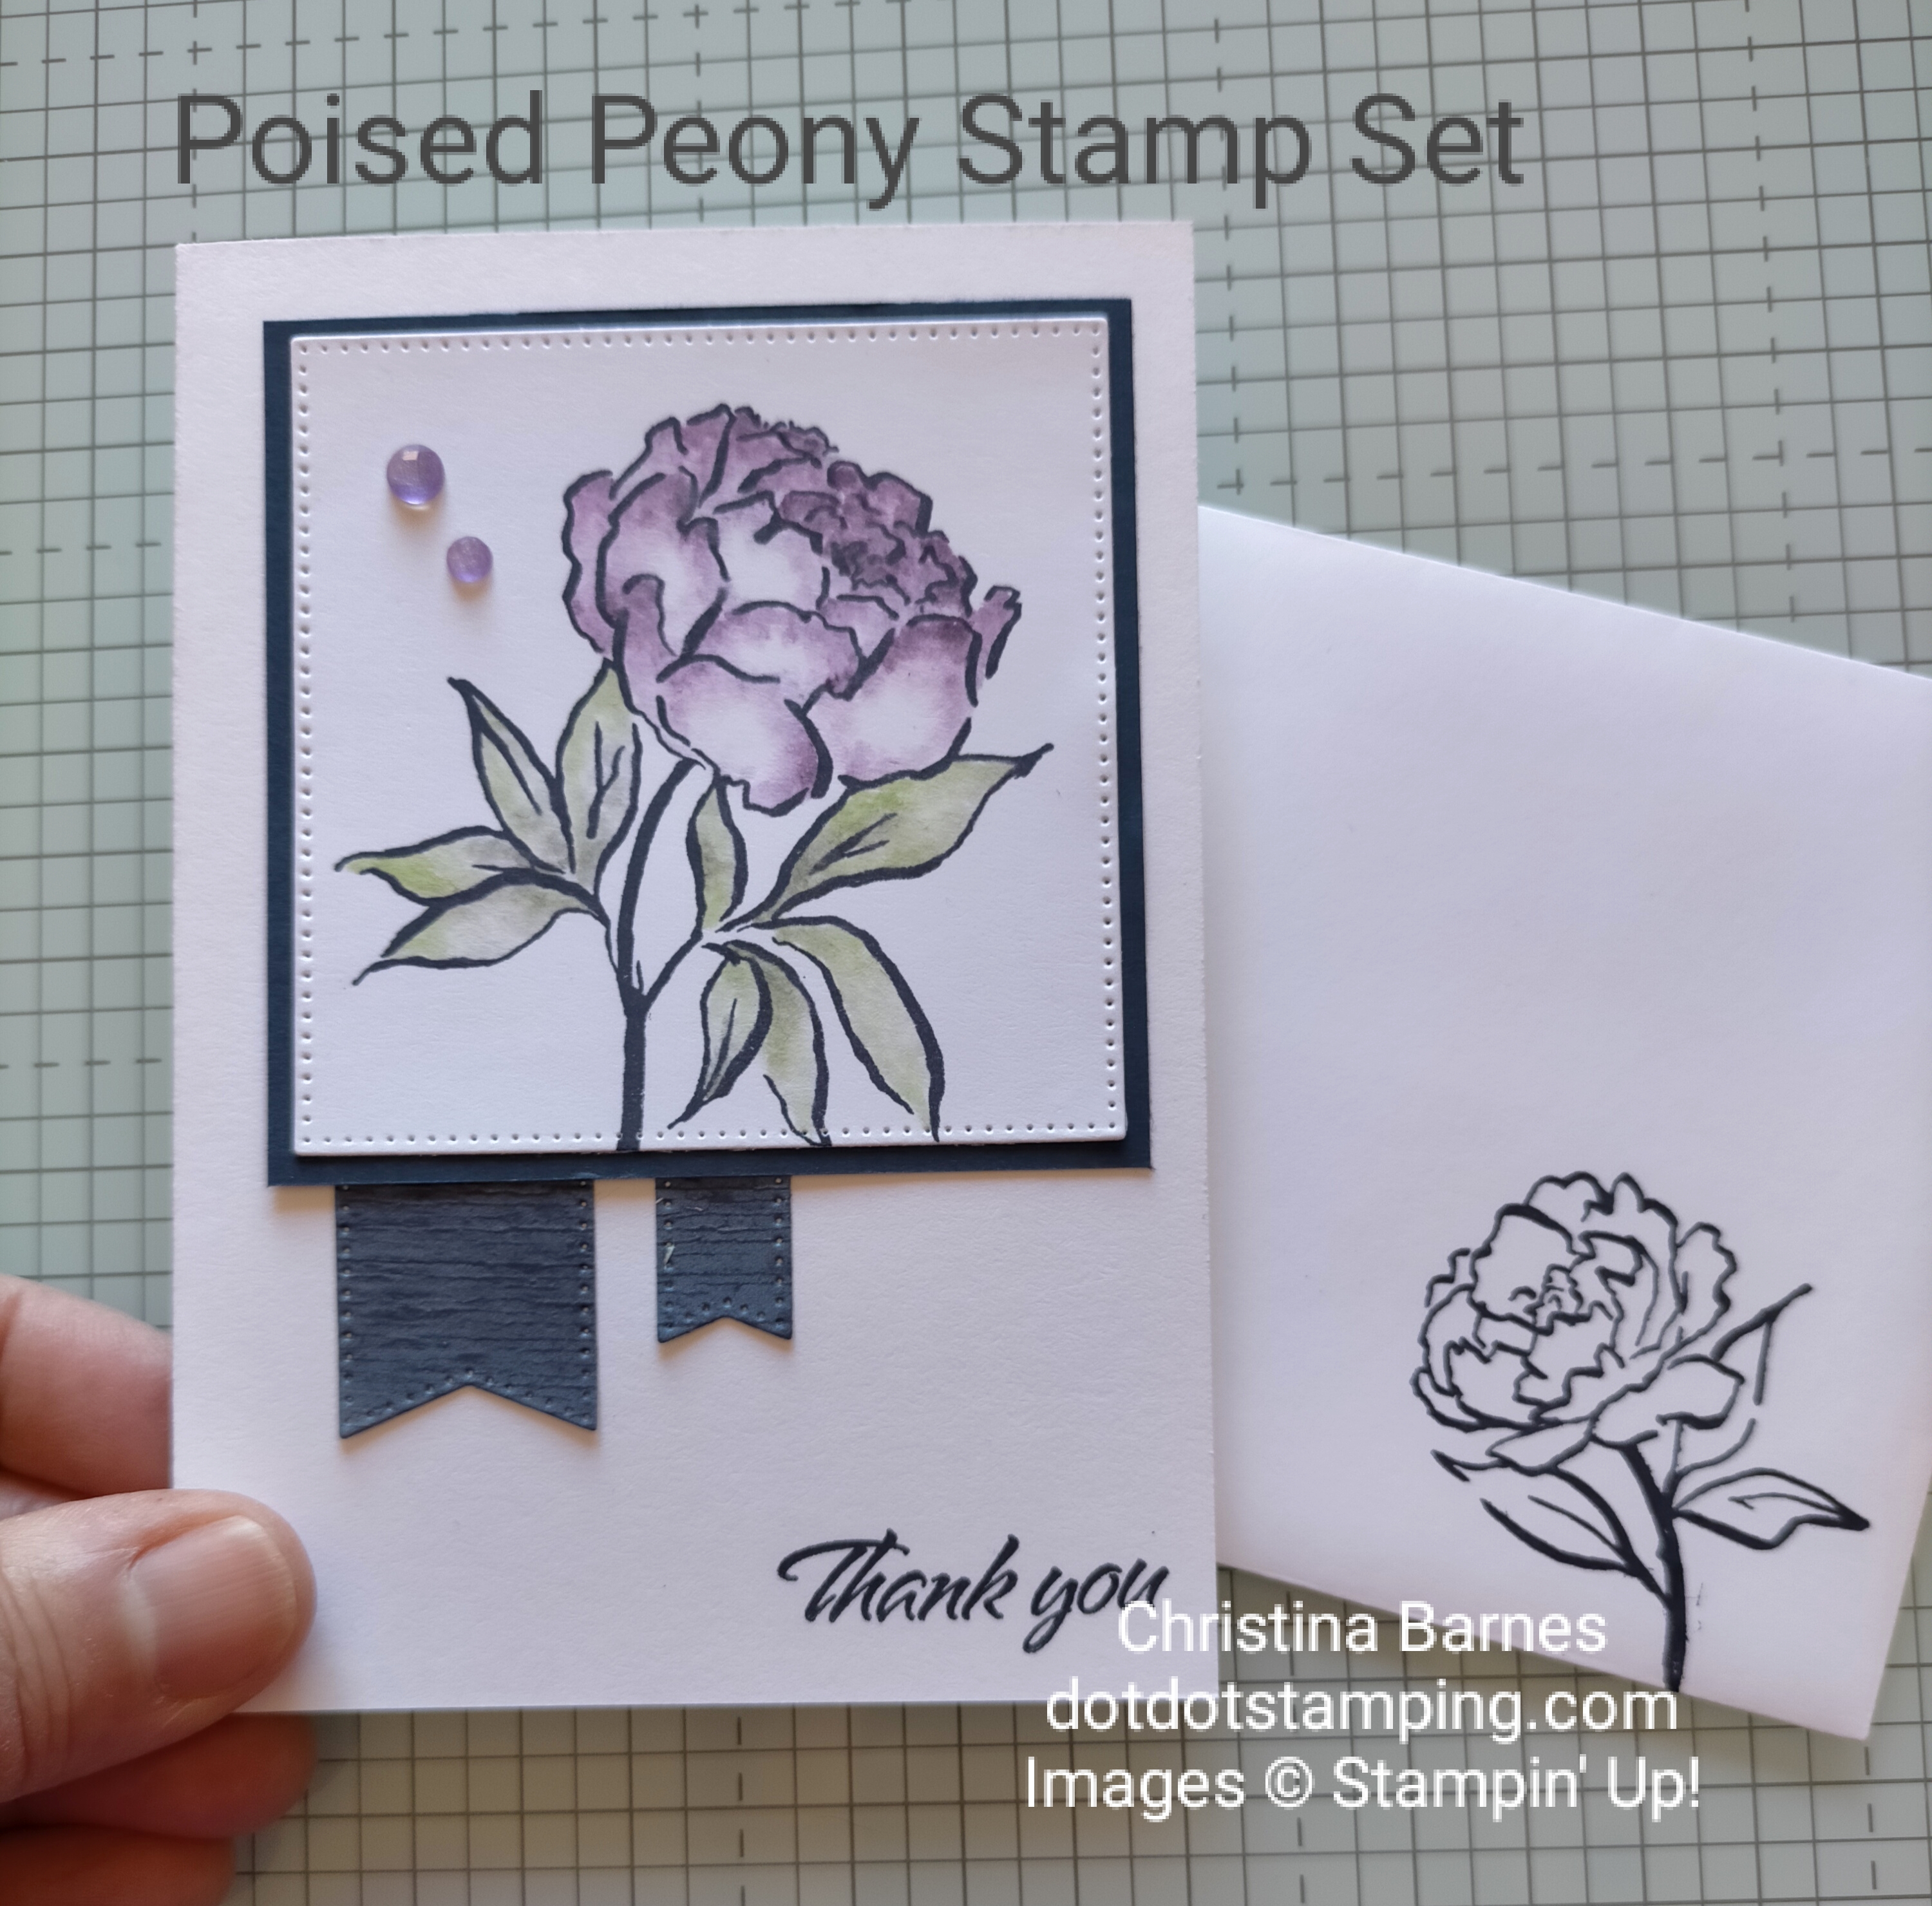
My card using this sketch features some of the beautiful Designer Series Paper which was only available to Stampin’ Up! demonstrators (but is too beautiful not to share) along with the Poised Peony stamp set.
In Australia our card bases are basically half of an A4 sheet of cardstock. However, I have found that it is much easier, especially for beginners to measure it slightly differently, and have a small strip left over. So for my card base, I cut 21cm x 14.5cm – you should be able to get two card fronts from one piece of cardstock. Then along the long side, score at 10.5cm and fold, so when it’s folded, your card front will be 10.5cm x 14.5cm. I have used some Pretty in Pink cardstock for my card base. I have then taken a piece of Designer Series Paper (patterned paper) the same size – 10.5cm x 14.5cm and adhered it onto the card front. The next layer of Designer Series Paper (the darker pink) is 8.5cm wide x 9.5cm. The Basic White focal layer is 7cm x 9.5cm. I decided not to put my sentiment onto a separate piece but rather to stamp it directly onto the panel with the main image, and also to add some Linen Thread, and some Purple Fine Shimmer Gems.
I hope that these will be helpful to someone, and hopefully I can get through all of them for you. Please feel free to leave a comment or reach out to me if you have any questions. Happy stamping, Chris
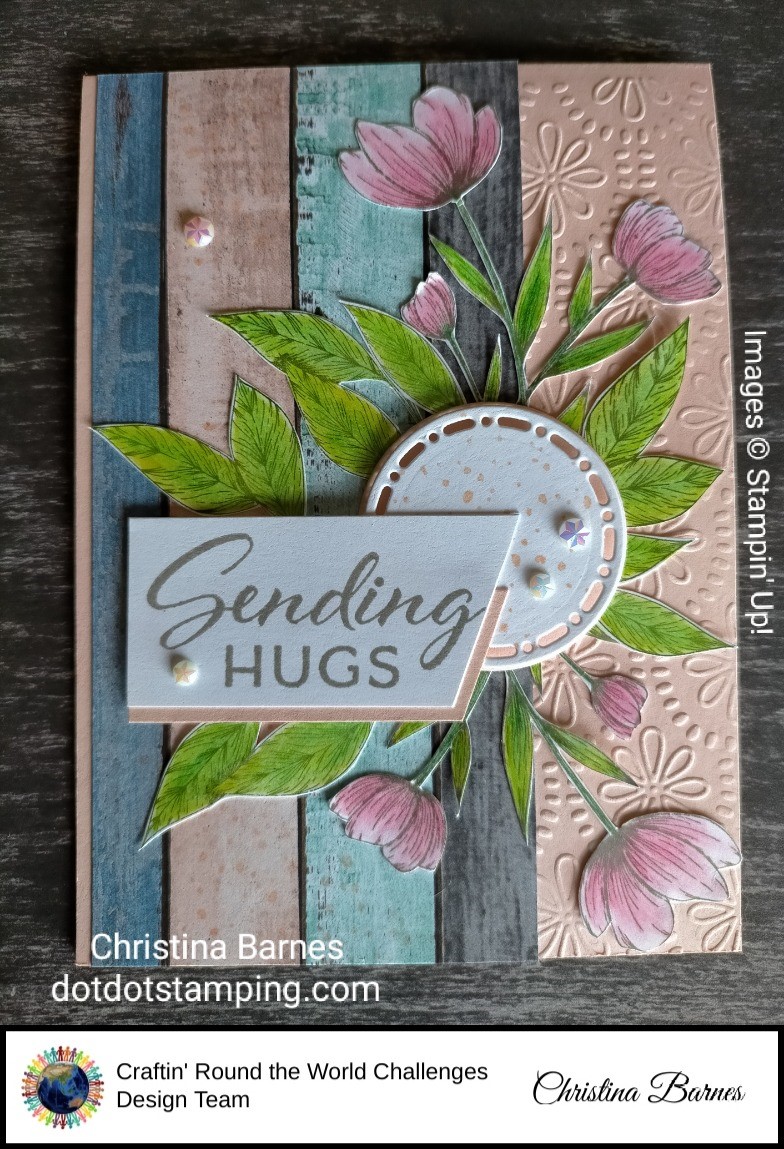
The flowers and leaves have all been coloured with watercolour pencils and then fussy cut. Yes, there’s a lot of fussy cutting there. So what’s the trick to fussy cutting? (fussing cutting is cutting around an image using scissors rather than using a die to cut). The trick is to move the piece you are cutting, rather than moving your hand around the piece, so keep your scissors in one direction as much as possible, and move the piece of cardstock, paper or whatever else it might be. I’ve found that to do this successfully I need to keep the piece of cardstock as small as possible, so I usually do two cuts, one to reduce the size and then one around the image. The other trick is to make sure your Paper Snips (scissors) are nice and sharp. And I enjoy fussing cutting, I find it quite relaxing, a little like meditation.