Foil and Alcohol Inks

Another fabulous challenge for Our Creative Corner this week from Sue at Scrumplescrunch:

The technique of dripping Alcohol Inks onto Foil has an amazing effect. 
The item you make can be anything; a free standing decoration,  or an element to place onto your project, experiment and have some fun, it is getting close to the silly season, so why not let go and free all those inhibitions and let rip with some colour!
I decided not to do Christmas again this week, but did I have fun with the foil and alcohol inks!  Once I am unpacked after my move I will most certainly be playing with this one again 🙂  Thank Sue!
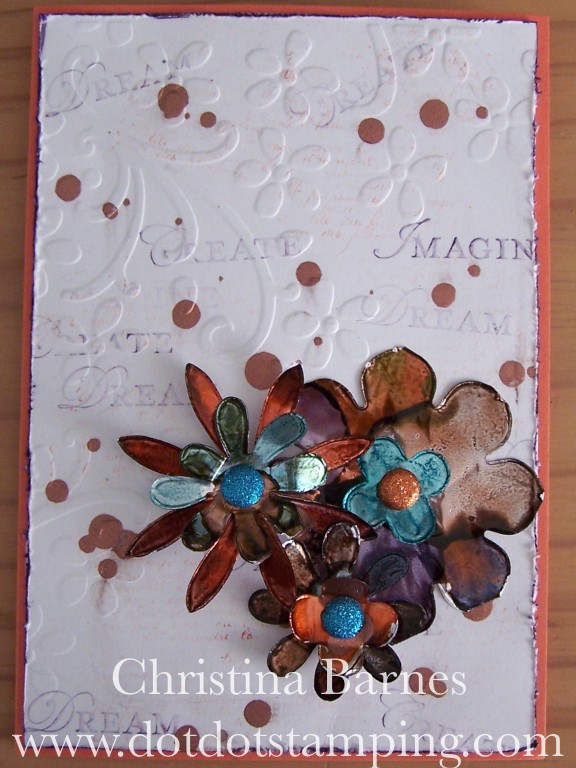
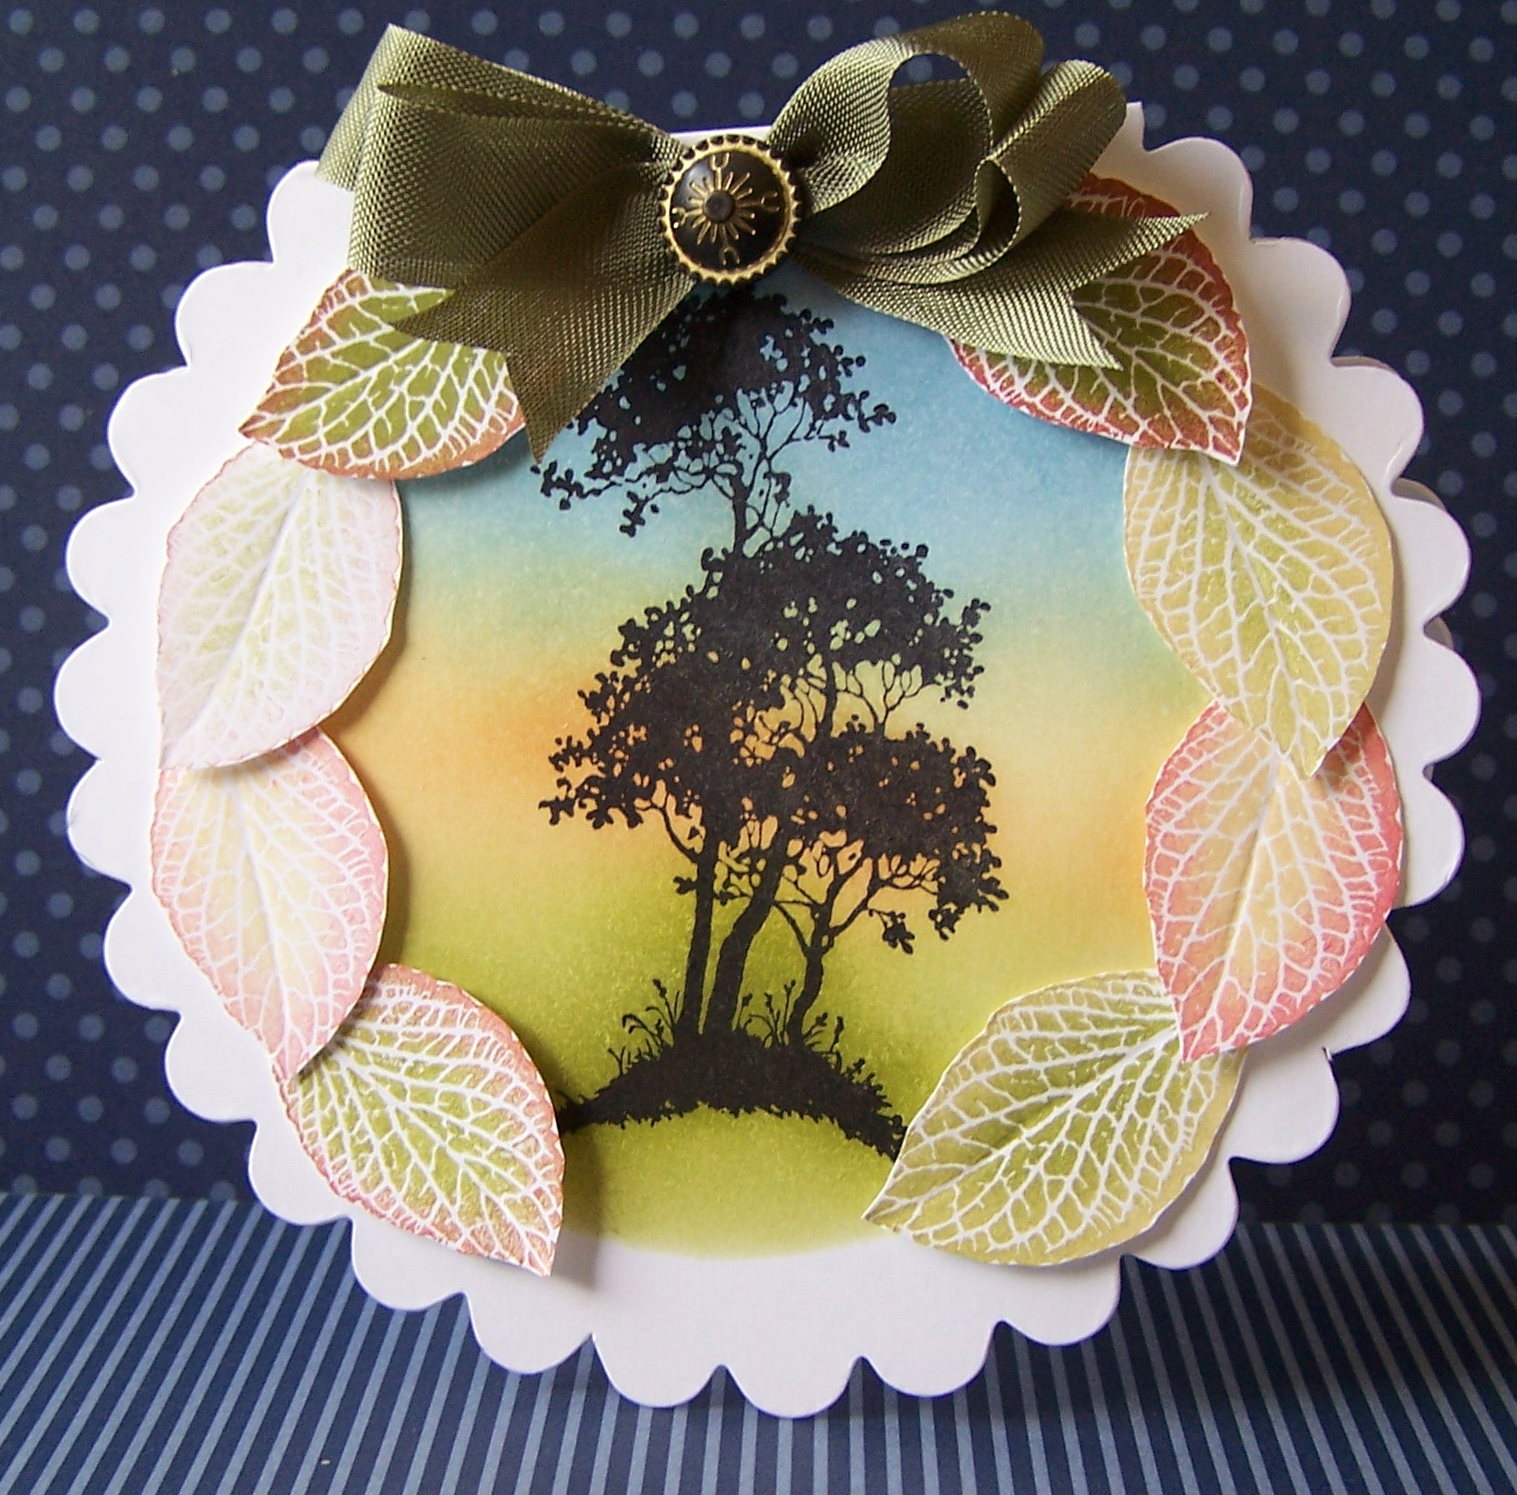
I have die cut the flowers out of a backed foil and then dripped the different colours of alcohol ink onto the foils, adding more colour once the first colour was dry, if I thought it needed more variation.
Here is a closer look at the flowers:
Well, I hope you are all getting lots of crafting time in.  I am looking forward to being able to unpack all my precious stamps and equipment and getting back into it.  But in the meantime, why don’t you check out all the creative and gorgeous inspiration from the very talented Design Team at Our Creative Corner.
Happy stamping!
Chris

Dynamic Duos #28

I did find this colour combination a bit of a challenge.
Actually… very much of a challenge!    But that’s the whole idea, isn’t it? 🙂

So, I am not terribly happy with how my card turned out, perhaps you can do better with these colours.  We would love to see what you come up with.


I have used the Papaya Collage stamp set, and one of the Ribbon Slides with the gorgeous Seam Binding Ribbon.

You will most definitely find some inspiration from the very talented Design Team, and do come on over to the Dynamic Duos blog and share your work with us.

Until next time, happy stamping!
Chris


Make your own Background

Absolutely loved this week’s challenge at Our Creative Corner from the fabulous and very talented Susan Butler at Scrumplescrunch.  If you haven’t already, definitely head on over to her blog for some serious inspiration!
Sue’s challenge is to make your own background:

“Decide whether you are a Pablo Picasso- and delve into mixed-media which involves paint, inks, glue, newspaper-clippings, photographs; in fact anything that you can lay your hands on to make it work visually.
Or do you lean toward Paul Cezanne- water-colours-   (you are allowed to use Distress Inks as your watercolour medium) to set your scene, mood and connection to your project. 
Try not to cover up your background too much with your focal image, allow everyone to view it in all it’s splendour.
And absolutely no patterned paper on your project!”
Since I just love to do water colouring, I decided to use this technique for my background.  I have used a large sheet of water colour paper and wet it down completely under the tap.  So when I say, wet it down, I mean literally  put it under the tap and get it wet all over.
I then used my markers to add ink in different colours (you could use re-inkers for this but mine are packed!) and then an aqua brush to blend the colours nicely.  I wanted to keep the colours soft and subtle.  I then used the French Foliage stamp set to add the leaves, splodges and very faint words, while the paper was still very wet.  I thought it needed a bit more colour then, so I have used some alcohol inks and dropped some blobs of ink in various colours.  The flowers are from the Field Flowers stamp set, which have been stamped and then cut out and layered over the background.  The centres of the flowers have some tiny spots of  Copper coloured alcohol ink in the centre, which gives it a nice shine, along with some Champagne Glimmer paper and Crumb Cake Tulle Ribbon.
Lots of inspiration from the OCC Design Team this week (as always!) so make sure you check out their creations.  And please join in the fun with us this week.
Happy stamping!
Chris

Dynamic Duos #27


Well, here it is, my first challenge with the wonderful Design Team at Dynamic Duos.
Each week we will have two colours to use to create a card, scrapbook page, craft or digital project.  Only the two colours, otherwise known as “The Dynamic Duo”, may be used for the project.  Neutrals such as black, white, vanilla, skin colours and kraft are ok to add to those two colours.

So here is the card I have made using this week’s colour combo.  For most people, the colours probably say “make a Christmas Card!”  but I thought it would be good to see those colours used in a different way.


I have used the Delicate Doilies Sizzlit, and Papillon Potpourri stamp set, and for the greeting an individual stamp called Beautiful Birthday.
Make sure you check out the rest of the fabulous creations from the Dynamic Duos Design Team:

Happy stamping!
Chris

Silhouette Challenge

This week’s challenge at Our Creative Corner is to use either a silhouette stamp or a cut-out silhouette on your project.
I really don’t think I did this challenge justice to be honest with you, I struggled with it and am not happy with what I ended up doing.  My excuse – too many boxes to pack and not enough time to craft!  But I guess I have used some dark tree images against lighter background.
Anyway, I have used the Lovely as a Tree stamp set, and the coloured panel  I have done with ink pad swiped directly onto the card stock then a little bit of sponging to add some shading.

The colours are Sahara Sand, Early Espresso, Old Olive and Marina Mist.

That’s enough for now – back to the packing!
Happy stamping!
Chris

Freshly Made Sketches #57

I have made a Christmas card for this week’s sketch from Freshly Made Sketches. I am really enjoying getting into the spirit of Christmas this year, I have done a lot of Christmas shopping already, so thought it would be good to get started on some Christmas cards too.

I have made quite a few of these ornaments, to go on some Candy Canes to hang on the Christmas tree, and as I was making them, I thought how nice they would look on a card, and here is the result.  I will show you the Candy Canes in another post.
The card uses the Candlelight Christmas Specialty Papers, and the Lacy Brocade Embossing Folder.  And for the ornament I have used the Snow Flurry die, Real Red Glimmer Paper punched out with the scallop circle punch, and the greeting comes from the Mixed Medley hostess set.
Here is the sketch:    

Happy Stamping!

Chris

Clean and Simple Kitchen

No, I am not asking you to go clean up your kitchen, it is this week’s challenge theme at Our Creative Corner.  Meihsia’s challenge is to create a Clean and Simple card featuring something you would see in the kitchen.

I have used the coffee cup from the fantastic Scentsational Season stamp set (page 16 Holiday Catalogue), and while this is definitely meant to be a Christmas set, I didn’t want to make a Christmas card this time, so I punched out the For You sentiment from the Mixed Medley stamp set, one of the new Hostess Sets in the Holiday Catalogue, and layered that over the snowflake image.  The image is cut using the matching dies, which can be bought in a bundle with the stamp set.
The patterned paper is from the Festival of Prints Designer Series Paper Stack, and also the woodgrain is from the Natural Composition Specialty papers.

So please join in this week, we always love to see what you come up with for our challenges.  The rest of the projects from the Design Team can be seen here.

Happy Stamping!
Chris

Fall in the Circle

This week at Our Creative Corner, Meihsia has challenged us to create a circle card or project with a Fall (Autumn) theme – Autumn colours or objects.
I really like this challenge, even though it is Spring here in Australia, I love Autumn colours and the leaves falling from the trees.  And I rarely make circle cards, so it was good to do something a little different again.
I have used the Scallop Circle Die to make the card base in Whisper White, then done a reverse mask to colour the centre area.  The tree is from Serene Silhouettes stamp set and is stamped in Black Stazon ink. The Stazon ink allowed me to sponge the background colours over the top, without the black ink smudging and blending in with the colours.
The bow is made with Always Artichoke Seam Binding ribbon which is held together with a Vintage Brad, and the leaves around the edge are from the French Foliage stamp set.  I have inked the leaves in one colour (i.e. Old Olive), and then sponged around the edge using a different colour (Riding Hood Red) using a sponge dauber.
I do hope you will join in with this great challenge, we love seeing the projects you have made using our challenges.  And make sure you check out what the rest of the Design Team have come up with.
Happy Stamping!
Chris

The Tango

There are some colours within the Stampin’ Up! colour families that I don’t often use, most of them seem to be yellows and oranges, so I took this week’s Dynamic Duos Challenge of using the colours Tangerine Tango and Old Olive.  Now, Old Olive is a long time favourite, but combining it with Tangerine  Tango, hmmmm.
But I am glad I had a go at this one, I am pleased with how it turned out and think I may be using this colour a little more from now on.
The image is from the Serene Silhouettes stamp set, which has been coloured with markers.  And I have used the Two Tags die and the Apothecary Accents Framelits, both very useful and versatile.


I hope this inspires you to have a go at using a different colour combination.
Happy stamping!
Chris

It’s a “Howdy” Challenge

This week’s Our Creative Corner Challenge comes from the lovely Liliana, who has picked a photo of a country scene as inspiration, with the following requirements:

-Create a card or project with a country or western look. Use the photo to inspire you.
-Your project must have something plaid or gingham (checkered/tartan is acceptable too!), such as in a ribbon, or designer paper.
-Most of all, have fun!

And here is the photo:

It took me some time to figure out what to do with this challenge, since I don’t really have anything “country or western” but ended up choosing this cute little cart image from the stamp set For the Birds (Page 34 of the Annual Catalogue).  I decided this could easily be something you would see in the country.  Well, anyway, that’s my story and I’m sticking to it!
I just adore this stamp set, it was on my “absolutely need to have it” list when the new catalogue came out.
The image has been water coloured in colours to match the stripey mount, which is made with the Orchard Harvest Fabric (Page 30 of the Holiday Catalogue).  The dark background layer has been embossed using the Woodgrain embossing folder, then just add some twine and one of the gorgeous new wooden buttons.
I do hope you will play along with us this week, so make sure you check out what the rest of the Design Team came up with here.
And if you have any questions about my card or the challenge, just send me an email.

I promise to return in the next day or so with some new projects, so stay tuned!
Happy stamping!
Chris