Just Add Ink Sketch Challenge

I just love a sketch challenge…..

JAISketch004

So many ideas, so little time!  So, I thought I show you some new goodies which will be available at the end of the month in the Holiday catalogue – yep, lots of Christmas goodies!

The very cute Santa is from a new Photopolymer stamp set called Get Your Santa On.  As you can see, Stampin’ Up! polymer stamps stamp up nice and clearly, and are really easy to use. Santa has been coloured using Blendabilities.  I have also used a new patterned paper and the gorgeous punch which punches out all those little stars along the bottom.  Love it!

Make sure you head on over and check out all the inspiration and great ideas using the sketch at Just Add Ink.

Happy Stamping!
Chris

August Stamps in Your Letterbox

The feature stamp set for the month of August and for Stamps in Your Letterbox is Kinda Eclectic (Page 164 of the Catalogue). This is a really versatile stamp set and heaps of fun to use, so for those of you who are signed up for Stamps in Your Letterbox, you are in for a treat this month!

Today I am sharing a pouch card which I have made using not only Kinda Eclectic, but also the Envelope Punch Board.  The card fits into one of our standard size envelopes so that you can send it in the mail.


The card itself is a flat card, like a post card, but there is plenty of room for writing on it, and it slides into a decorated pouch made using the Envelope Punch Board.


I have used some of the bright and cheery papers from the Sweet Taffy Designer Series Papers (Page 186), and the “Birthday Greetings” comes from the Four You Stamp Set.  They are a little hard to see in the photo, but I have added a little bling with some Sequins (Page 208) on the butterflies, along with some Thick Baker’s Twine (Page 207) around the top of the card to make it easier to pull the card out of the pouch.

It’s not too late to take part in Stamps in Your Letterbox for August, just contact me to sign up, and you can find out more information here.

Happy Stamping!
Chris

CASE-ing The Catalogue

This week’s challenge at CASE-ing The Catty Challenges is to use the Memory Keeping Section (Pages 24-41) of the catalogue to inspire a project.
While I was tempted to share some Project Life pages for this challenge, I liked the idea of creating a masculine card based on the picture at the bottom right of Page 31.

I have used the Post Card stamp for my background, which is a stamp that I love but which has not had enough use!  I have done some faux stitching around the edge of the postcard in Early Espresso, and done some off-set layers to make it a little different.  The main image is from the Traveler stamp set, along with a few left over bits and pieces of the Typeset Specialty papers (Page 184), some Gold Fancy Foil Designer Vellum (Page 193), some Chevron ribbon and Linen Thread (Pages 206-7).

**Quick update:  Feeling special, thanks to the ladies at CASE-ing The Catty Challenges, who chose my card as their Top Case! 🙂

Hope you are having a crafty day!
Happy stamping!
Chris

Create with Connie and Mary Colour Challenge

I thought the colour challenge from Create with Connie and Mary (CCMC308) would really be a challenge for me, they are definitely not colours I would normally put together.  However, since it’s the middle of winter here, and I like a challenge, I decided to have a go and create something bright and cheery.
Here are the colours:

I also thought I would like to use some of the new Project Life products which will be available when the new catalogue goes live on the 1st July.  Just one of the many things I love about being a Stampin’ Up! demonstrator is being able to get these products in advance to show you what can be done with them.


Becky Higgins, the founder of Project Life, has now partnered with Stampin’ Up! to bring authentic Project Life products to you in Stampin’ Up! exclusive colours and designs.
Don’t know what Project Life is? Project Life was developed as a quick and easy way of keeping memories and photos alive, without the time involved with traditional scrapbooking, it’s simple, easy and fast and keeps your photos organised.
Today I have made a card with some of the Project Life products, no stamping on this card!  I will be making up some pages using Project Life to share with you as well.  As a homeschooling family, I find Project Life the ideal way of keeping records of the things we have been doing.

Hope you are enjoying your weekend.
Happy stamping!
Chris

Blooom with Hope

I have had such a busy week or so, and I promise that I will share some of what we have been doing, and not just stamping and crafting!  We are just loving our new home and having heaps of fun exploring the area. Some photos will follow soon. 🙂

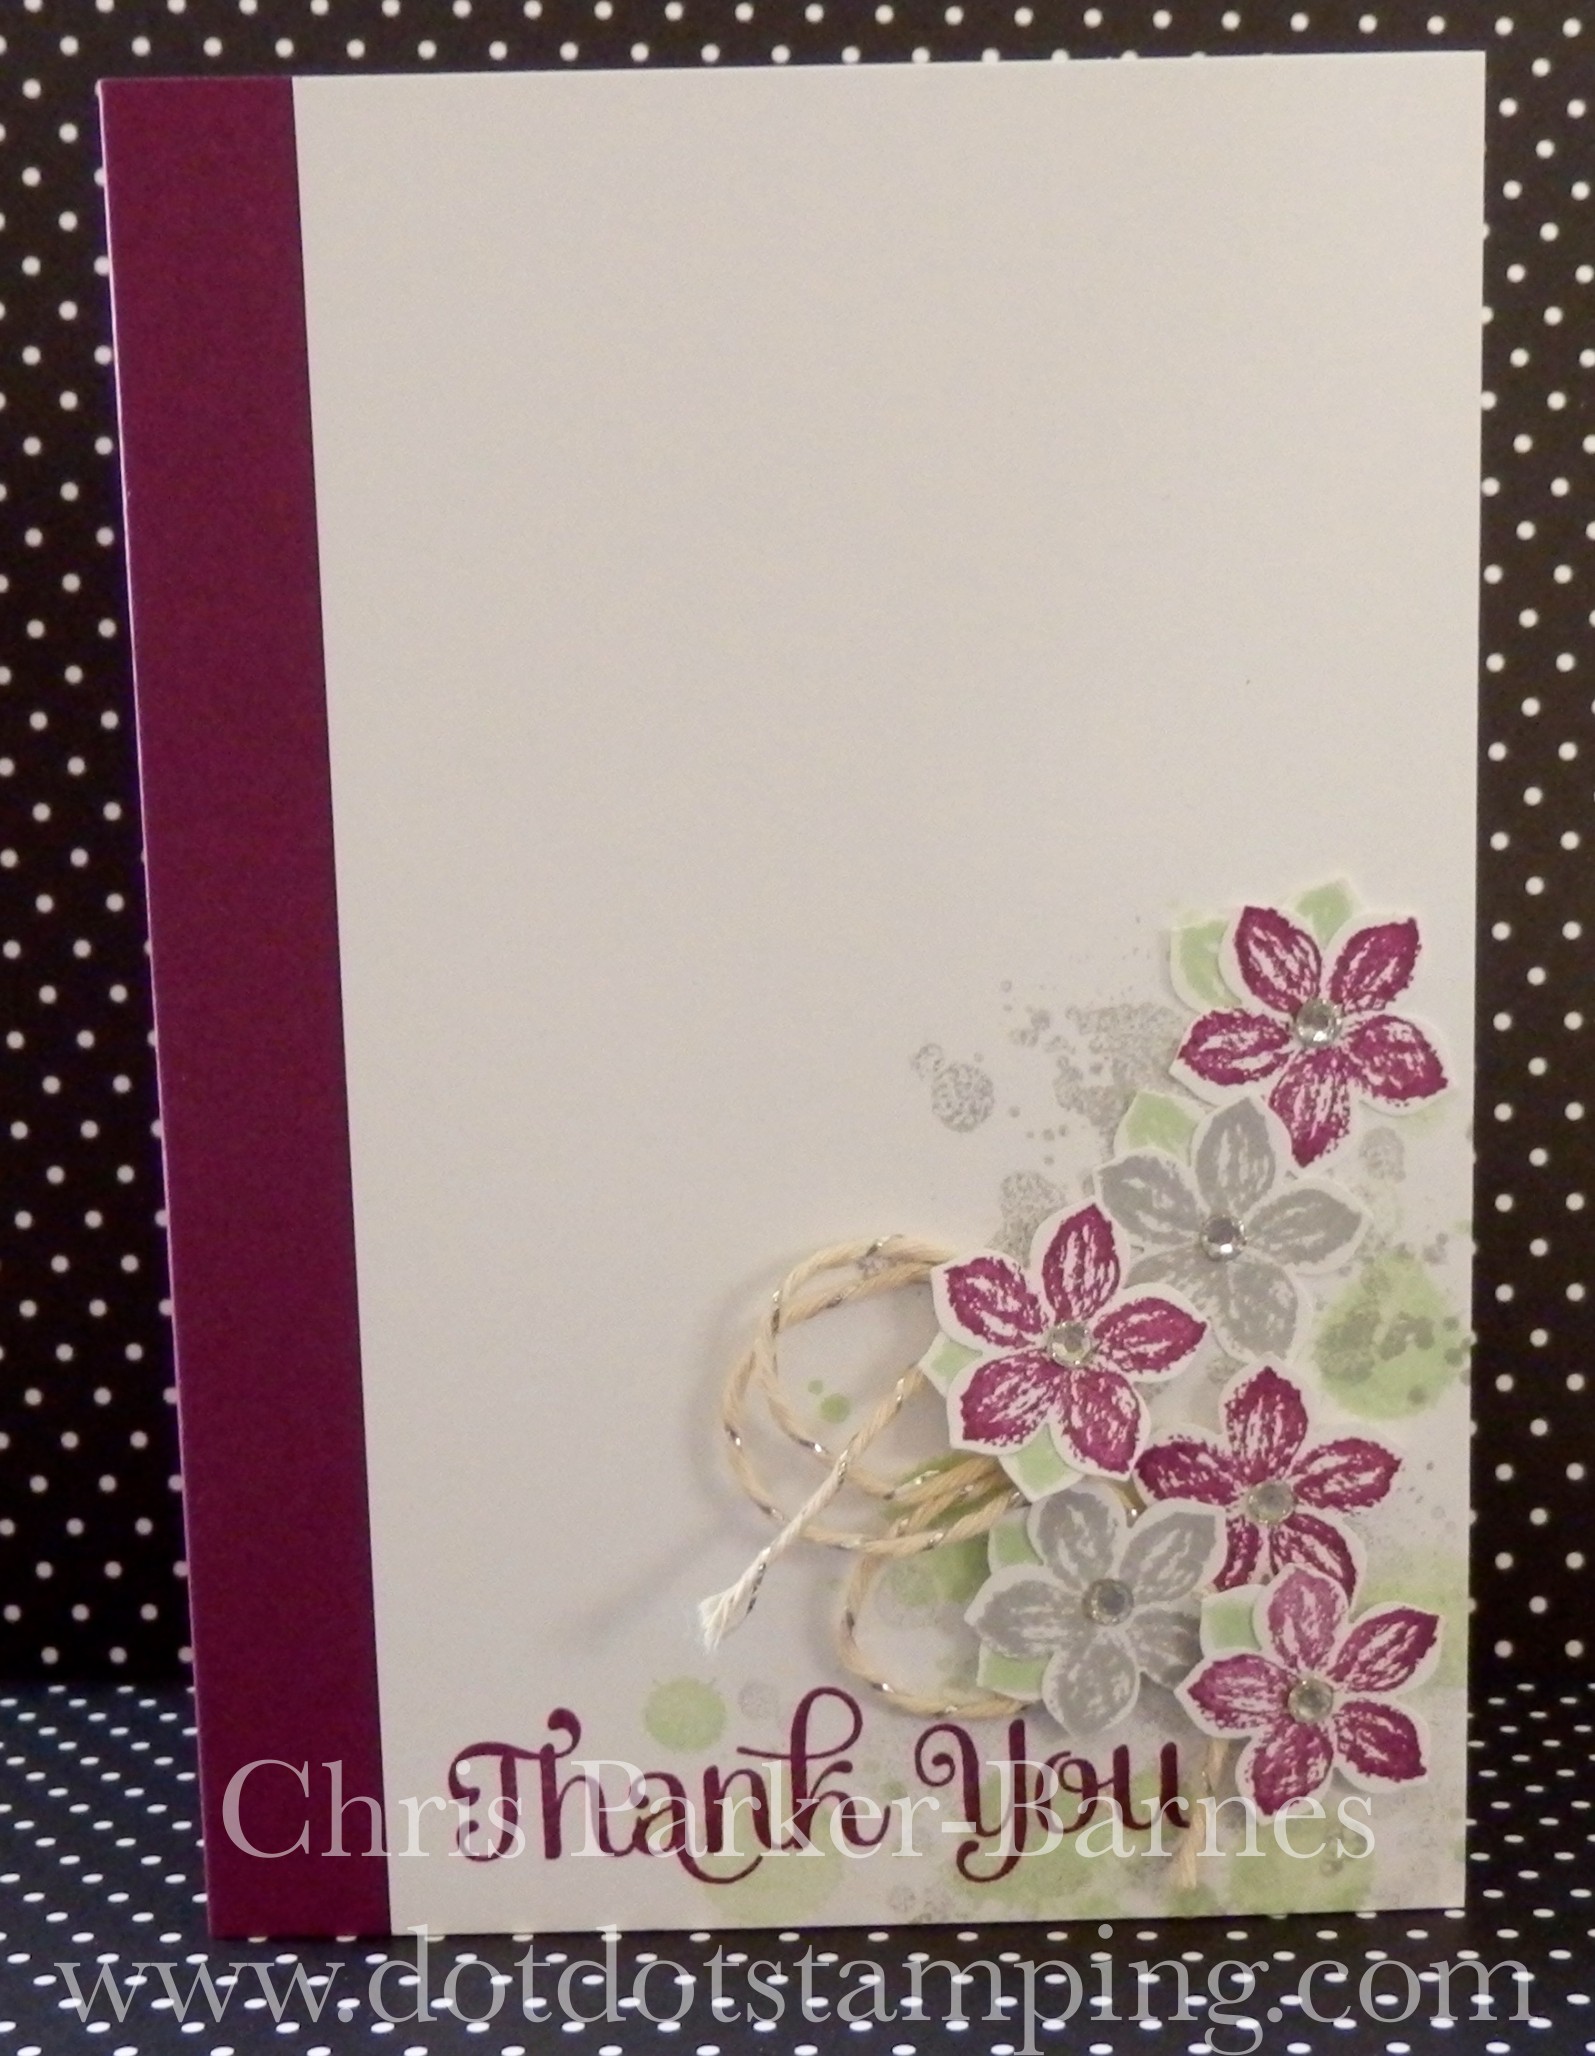
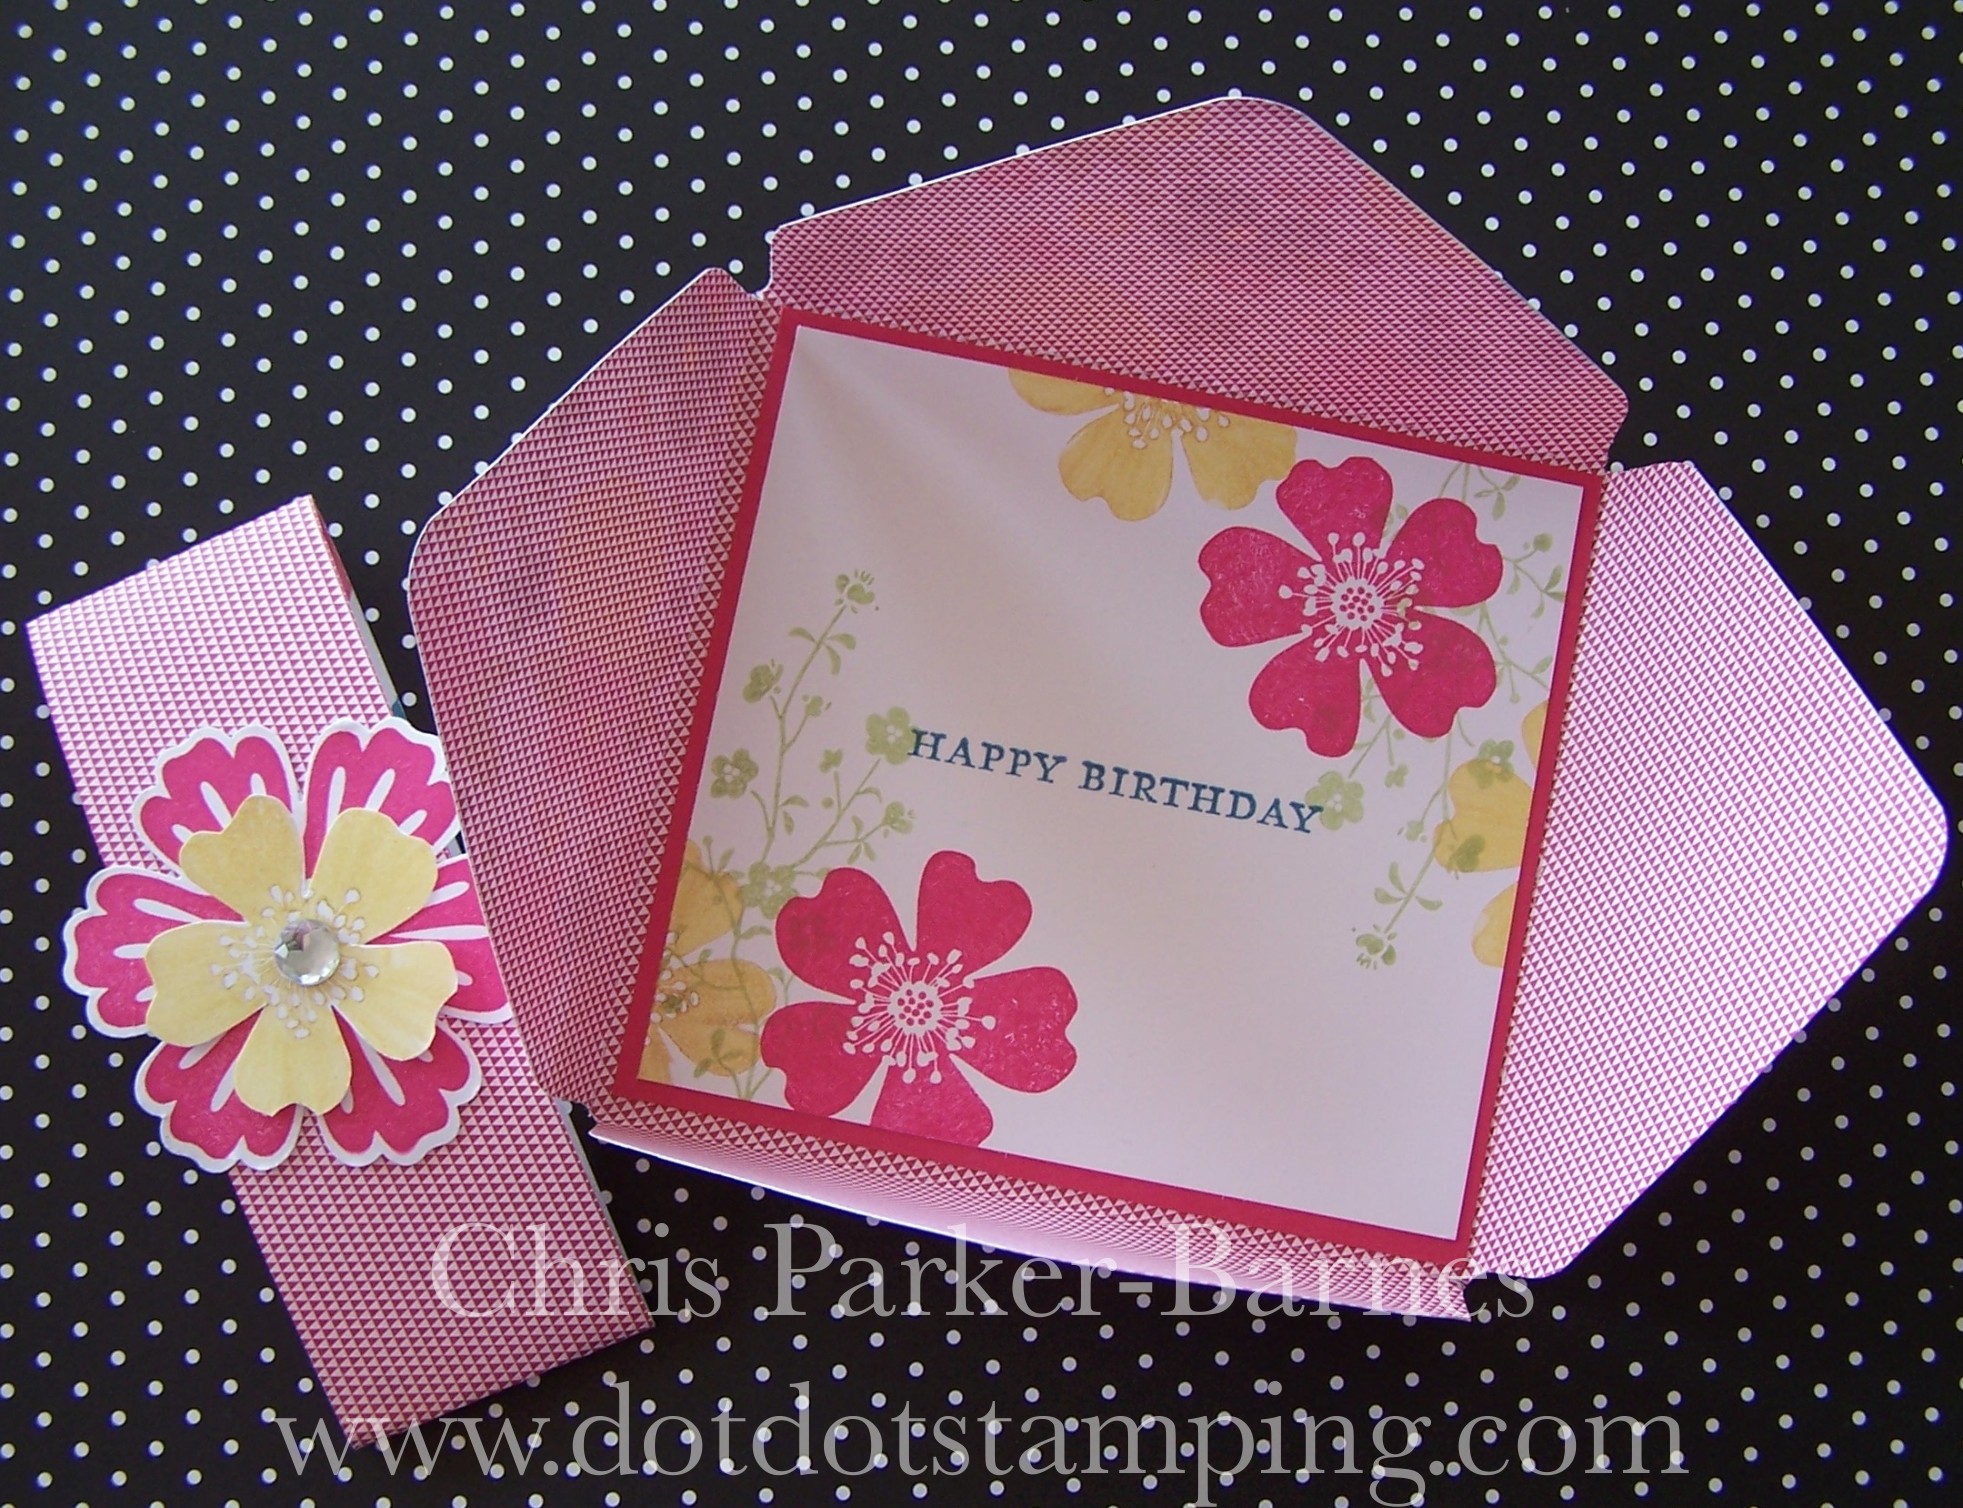
I made this set of cards as a thank you to a lovely hostess for all her work in getting a group of ladies organised for a morning of stamping recently, and have used the gorgeous new hostess set (available 1st July with the new catalogue) called Bloom with Hope.  And of course I had to have another play with my Blendabilities!
The colours are not great as I was taking the photos at night. The cards are actually made with Whisper White Cardstock!

There are six cards in all, using different images from the stamp set and different colours of Blendabilities.

I have also used some pieces of a new stack of patterned papers called Moonlight DSP – gorgeous combination of colours!


We are having a bit of a joke at our house at the moment, my response to doing anything other than stamping involves me speaking like a petulant child and saying “but I want to colour in!”  🙂
Blendabilities are so much fun!  Can’t take life too seriously. 🙂
And last but definitely not least…. Mr Pumpkin Head!  Now, I know it is not Halloween, but it is winter here in Australia and we decided to have fun with a pumpkin and make a Jack o Lantern.  Not bad for our first try. He looks fabulous all lit up at night.

If you live in Cooma, NSW or the surrounding area and would like to find out more about my stamping classes and parties, please feel free to contact me.  Leave a comment, or send me an email and I’ll get back to you.  And yes, I am still doing parties and classes in Canberra as well.

Hope you are having a crafty day!
Happy stamping!
Chris

Maritime Birthday

Here is the card I made for a lovely young friend of ours who recently turned 9.  And of course, I wanted to use some of my new goodies, and show you another sneak peek.  Who can resist new Stampin’ Up! goodies….. I know I can’t 🙂


Isn’t the paper just gorgeous?  I adore this colour combination, it’s wonderful for masculine cards, so bright and cheery.  And the only stamping this one has, is for the sentiment, which is from the Label Love stamp set and matching punch.  The DSP is called Maritime.
Hope you are having a crafty weekend.  And for those of you in Australia, a crafty long weekend! 🙂
Happy stamping!
Chris

Petite Petals

I have a few new goodies to play with and share with you, from the current Occasions catalogue, and my card today uses some of them.  I have used the Petite Petals stamp set and matching punch.


The card was inspired by this week’s sketch from Lesley at Always Playing with Paper.
The colour combination is Rich Razzleberry, Pistachio Pudding and Smoky Slate, and I have used some of that gorgeous Silver Baker’s Twine. There is a little bit of background splattering which is from the Gorgeous Grunge stamp set, and the sentiment from the Four You stamp set.

Happy stamping!
Chris

More challenges

When I printed off the card front for this card I printed four copies on one sheet of cardstock, and planned to do something different with each panel, so here is the second card using that same image, made in My Digital Studio (MDS).
I have used this week’s great sketch from the Freshly Made Sketches challenge:

and I used heaps of layers on my card so that I can enter the card into the current Just Add Ink challenge, which is to add layers to your project.

So you will have seen in the previous post that I have made the card front using MDS and some stamps that I don’t own, which is the great thing about making them digitally.  I have then printed off the digital image that I created, and used it to make some cards.  This card includes some of the gorgeous Silver Bakers Twine (#132976), some of the patterned paper from the Subtles Paper Stack, lots of layers and a little bit of faux stitching.  The colour combination is Pink Pirouette, Wisteria Wonder and Elegant Eggplant.

Lets see what else I can come up with for the other two card fronts, but in the meantime…..
Happy Stamping!
Chris

Time to share…..

My computer was out of action for such a long time that I have quite a few photos here of things to share with you, so I will post up a few now, and perhaps some more in another post tomorrow.

This is a really pretty project I made using the Envelope Punch Board – I’m not sure what you would call it, an Envelope Card perhaps…..


Anyway, it’s just making the envelope and then putting a flat piece of stamped cardstock into the centre, then making a belly band to go around to hold the envelope part closed.

I have used the Gingham Garden papers, the Mixed Bunch and  Morning Meadow (Hostess set) stamp sets.
I love how bright and cheery this card is, especially now that the cooler Autumn weather has arrived here.  Still, it’s a good excuse to stay out of the chilly wind and do some crafting!

I am entering this card in this week’s challenge at The Paper Players – they are looking for a clean and simple card celebrating spring!
Happy stamping!
Chris

More Envelope Punch Board

Yes, ok, I admit it, I am addicted……. to my Envelope Punch Board!
I have had a few people asking for some basic instructions on how to use this fantastic tool, so I thought I would share with you a video made by Mary Fish, which explains the process very clearly and simply.  Thanks Mary.
Here it is: http://www.youtube.com/watch?v=sq23wwHPeZM

And here is my card in the same size as the one in the video with matching lined envelope.  This time I have used standard cardstock to make my envelope (in Pumpkin Pie), and while it is a lot heavier than a standard envelope, it will still go through standard mail ok, and protect your wonderful handmade creation a lot better too!  Of course, you can also use patterned papers for the envelopes if you prefer.


I have used the Witches Brew Designer Series Paper (#132185) for this card.  Halloween is not something that we celebrate much here in Australia, but I loved the colours of these papers and thought they would be great for some masculine cards!  And the stamped image is again from the Love You More stamp set (#131853) available until the 27th January 2014.
So make sure you get your order in for these items before they go, by clicking here.  And feel free to leave a comment or send me an email if you have any questions.
Happy stamping!
Chris