This year’s Stampin’ Up! Convention was just amazing and an experience that had to be seen to be believed. They are such a special company to be part of.
I have just so much to share, I took over 500 photos – don’t worry I won’t post them all, but I will try to pop a few up over the coming days. I also have rather a lot of things I want to try out and share with you, but firstly I will show you the swaps that I made. These are simply card fronts using Stampin’ Up! products that we make in order to exchange or “swap” with the other demonstrators at convention. I only made 25 this year and had swapped all of mine before the first hour was even over.

My swap uses the Clockworks stamp set in the background and features my favourite “Faux Stitching” along with the Epic Day This and That Designer Series Paper. This fabulous paper is part of the This and That Bundle which is available at a 15% discount, but only until this coming Friday – 31st May 2013. Feel free to contact me if you would like to know more about this bundle and how you can get hold of it, or if you would like to know how you can come along to next year’s Stampin’ Up! convention.
Off to do some stamping and creating now 🙂
Happy Stamping!
Chris
Tag Archives: Faux Stitching

CASEing… again …..
My card today is inspired by an Australian stamper, who I have long admired and hope one day, to be able to make beautiful cards the way she does… I am talking about the fabulously talented Teneale Williams. I am not sure that I even get close, even after years of practice 🙂 nevertheless, I just adore her work and was thrilled when she recently visited my blog and left a comment. Thanks for your kind words Teneale.
Here is Teneale’s card:
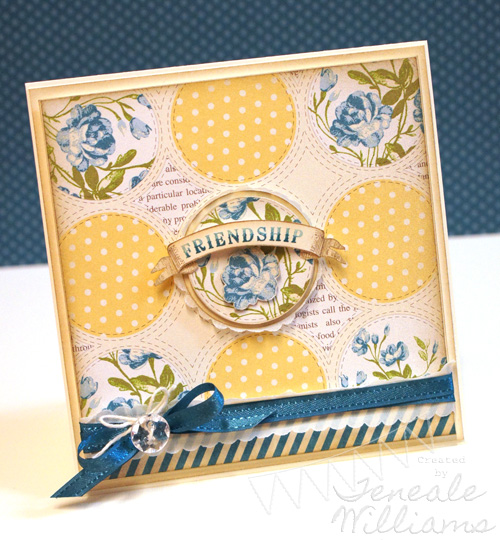
And here is my CASE, with a little bit of “me” added! 🙂
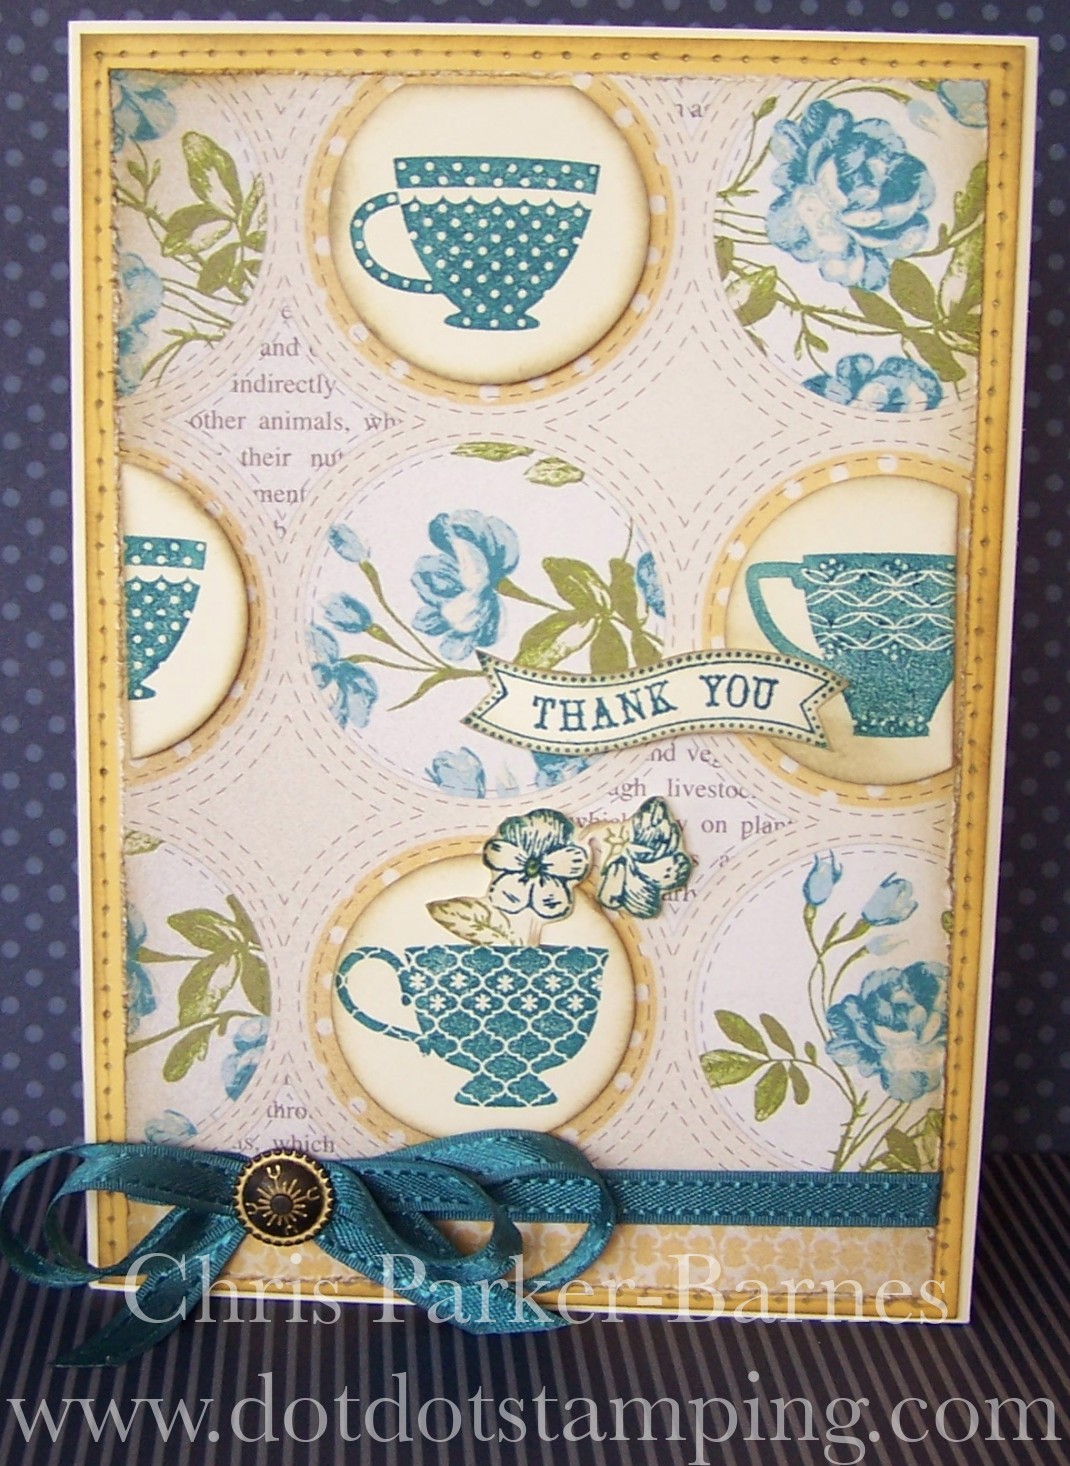
The patterned paper is called Tea For Two and is from the current Seasonal Catalogue. Isn’t it just gorgeous? Because the paper refers to “Tea” I thought it was only fitting to use the Tea Shoppe stamp set, one which has been a little neglected of late. The individual tea cups have been punched out using a circle punch and then layered with some dimensionals, over the yellow circles on the paper. I have also stamped and then fussy cut the flower from the stamp set and popped it in the bottom tea cup. Add some of my favourite faux stitching around the edge of the So Saffron layer of cardstock, lots of sponging on the edges, a pretty ribbon and bow, and a Vintage Brad, and there is my version.
Happy stamping everyone.
Chris
Share this:

Pretty in Pink
Oh no, Pretty in Pink is soon to be leaving us! If you didn’t already know, Stampin’ Up! have done a colour renovation and with the new catalogue in July, will come a new set of gorgeous colour combinations. One of the colours that will be leaving the collection is Pretty in Pink… it is such a pretty, girly pink, I am going to miss it!

I have used this week’s sketch from Freshly Made Sketches as a basis for my card and also used my Sizzlits Pinwheel die which hasn’t seen the light of day until now. The papers are from the Tea For Two Designer Series Papers pack. The pinwheel may look a little different to how you are used to see them, but I wanted to use just the pink side of the patterned paper without the pattern on the other side showing so I just reversed it – I think it looks a little more like a windmill than a pinwheel, but never mind 🙂 I also struggled with where to put the sentiment. I have stamped it onto some vellum for a nice soft look, but it just didn’t quite look right, no matter where I put it. Perhaps I should have left the card sentiment free.
The other challenge that I will enter this card in is SUO Challenges, who are currently running a challenge using anything Sizzix – well, I have plenty of those!
Hope you have a crafty week. Happy stamping!
Chris
Share this:

Dynamic Duos # 48
Ok I will admit, I struggled with this week’s Dynamic Duos colours…. a lot!

The first card I made started with some ideas and then didn’t turn out anything like I had intended it to. The lovely ladies on the Design Team told me they liked it, but I am really unhappy with how it turned out. However… I promised them I would post it here so that you can see both the cards I made with these colours. So without further ado……..

I have used some of the Delicate Details Lace tape over strips of Pumpkin Pie cardstock, along with a doily, and the circle image is from Serene Silhouettes stamp set. There are also layers of the Creped Filter Papers which have been punched out and then sponged with Bashful Blue ink.
The second card using these colours is a masculine one. I have seen this idea on Pinterest, but unfortunately the card didn’t have a persons name attached to it so I can’t credit them with the idea. As per usual though, I have changed it and added a few my own favourite techniques and ideas to it.
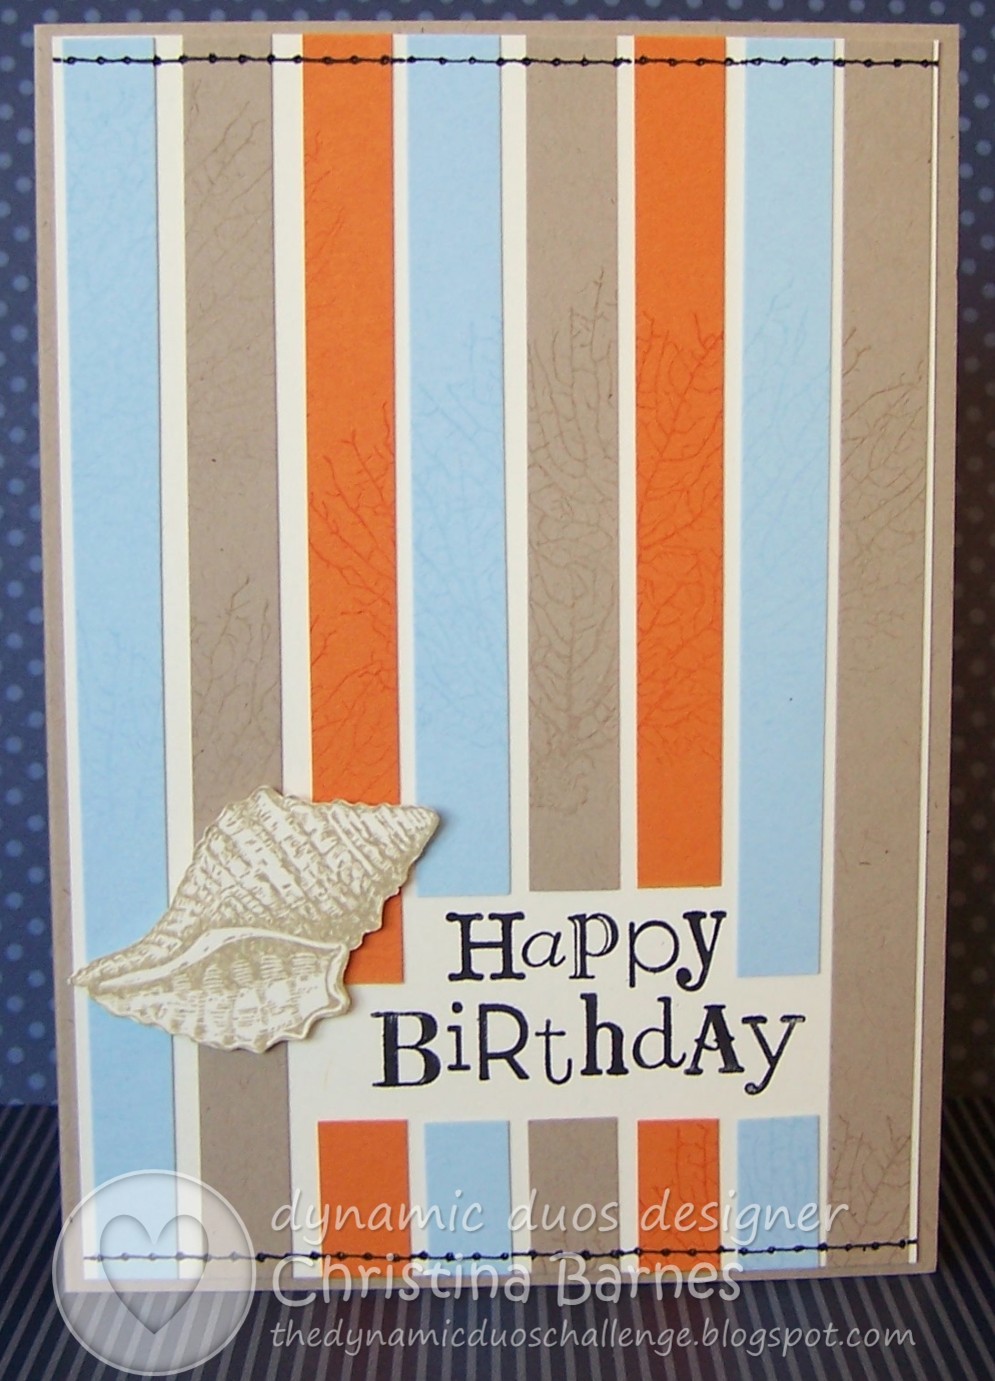
Firstly, I have stamped the sentiment from Wacky Wishes, then added the strips of coloured cardstock to the base (I have used some Crumb Cake along with the Bashful Blue and Pumpkin Pie). I have then stamped in Versamark ink, the seaweed image from By The Tide stamp set, over the cardstock strips. It is a little harder to see it in the photo than in real life. The shell image, also from By The Tide, is stamped in Crumb Cake and then cut out by hand. And of course, I had to add some faux stitching!
Please feel free to leave a message and let me know which one you like best, and make sure to check out lots of inspiration from the Design Team.
Happy Stamping!
Chris
Share this:

Dynamic Duos #41
This week’s Dynamic Duo‘s colours are:

Yum… another gorgeous combination!
The colour reminds of a beautiful clear ocean, so I made my card using the new By The Tide stamp set.
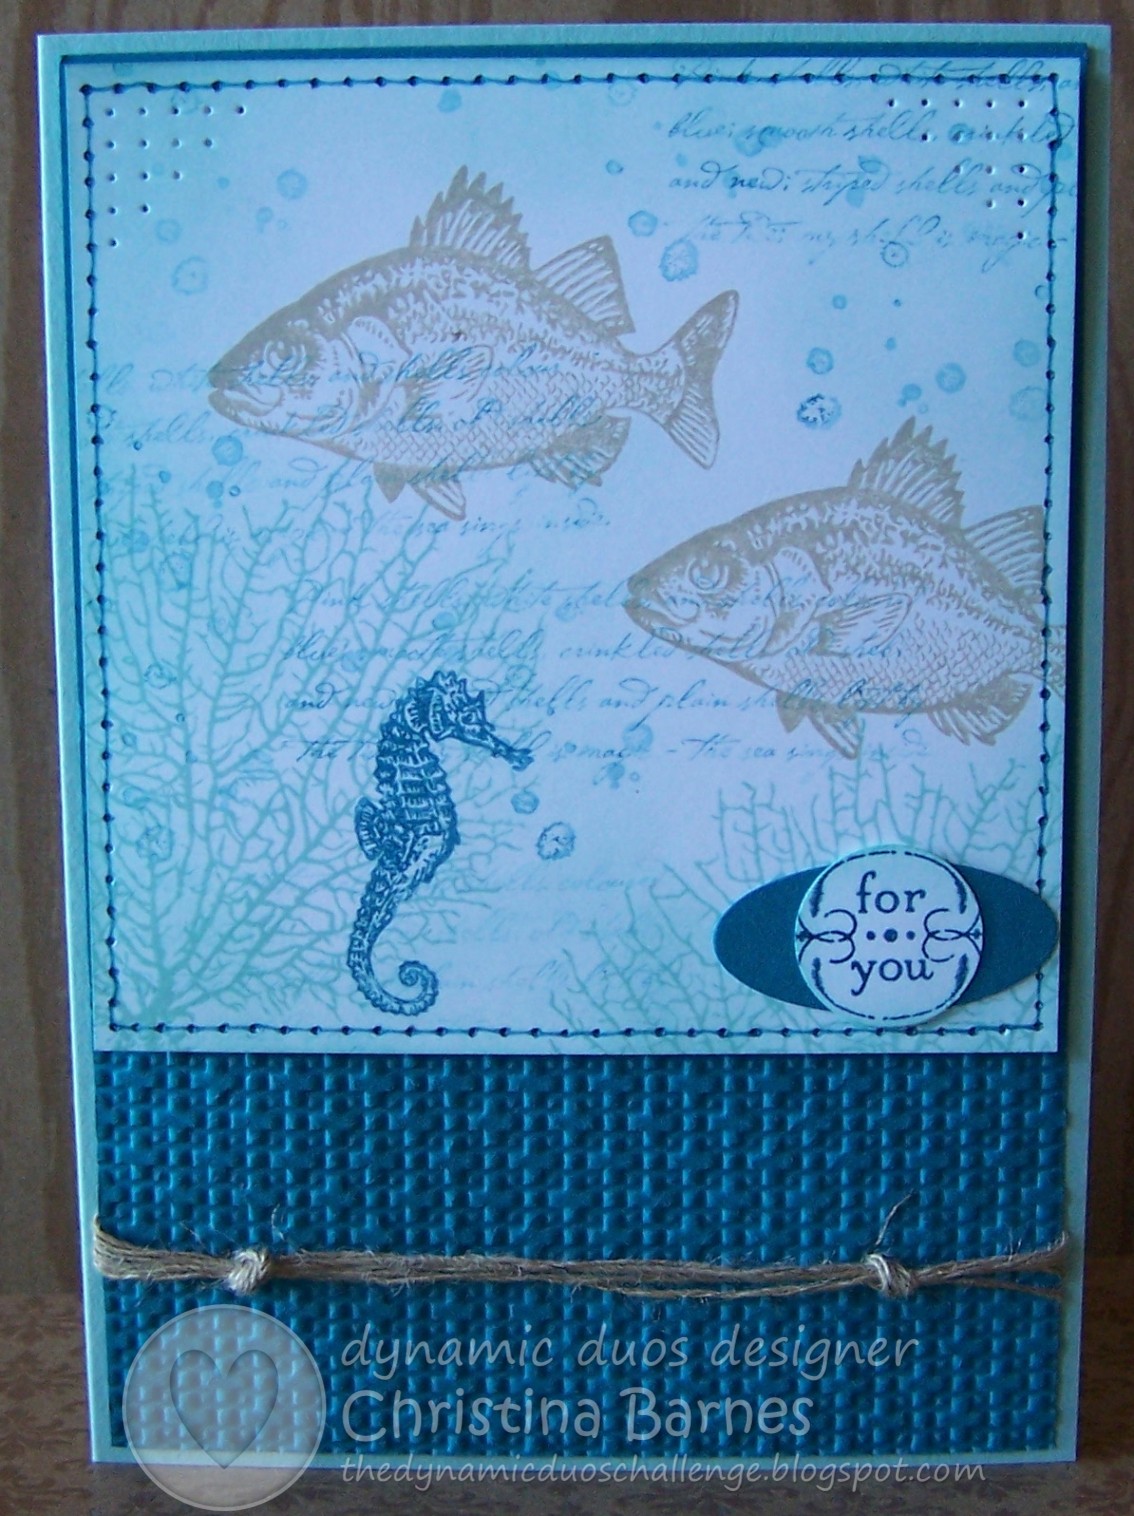
I have also used the French Foliage set to add some “bubbles” in the background along with the Square Lattice embossing folder and some sponging around the edges, and paper piercing and faux stitching of course! 🙂
You can see what the rest of the Design Team have done with these colours here. Please join us and share your wonderful creations.
Happy stamping!
Chris
Share this:

A New challenge
If you are a follower of my blog, you will know how much I love a challenge… whether that’s a colour challenge or sketch challenge, or any other challenge for that matter! So I love it when I find a new challenge site, especially one which is being run by two very talented stampers, Bronwyn Eastley and Kathy Tanner. So of course, I just had to take part in the first challenge at Still AddINKtive which is both a sketch and colour challenge. Love it!
I have made a card for a friend whose birthday is later this week, and since she loves stitching, and I love doing it on my projects, I added lots of faux stitching!

My card uses the Betsy’s Blossoms stamp set and some patterned papers from Floral District Designer Series Papers. Add to that a greeting from the Itty Bitty Banners set and some pretty pearls, and that’s it! Quite simple really.
This is such a pretty colour combination, why don’t you give it a go?
![]()
Happy stamping!
Chris
I am thrilled to let you know that my card was chosen as a Top Pick for this challenge, and I also won a prize! I am feeling very lucky! 🙂 Thanks Bronwyn and Kathy.
![]()
Share this:

Stitching and Fabric
Our challenge this week at Our Creative Corner is to create a project which uses some stitching and fabric. Stitching can be done on the sewing machine or faux stitching, and the fabric could be used in any part of the project, either as an embellishment, or as I have done, an entire panel.
Again, I am sewing machine-less… that is, without sewing machine…. so I had to use “faux stitching” on my card. Faux stitching is one of my favourite’s, so it wasn’t a chore, actually I think I may have got a little carried away with it, what do you think? That’s all faux stitching around the outside of the greeting and the lines along the top and bottom of “Season’s Greetings”, plus there is some around the red star, it’s just a bit hard to see in the photo.

I stuck with some traditional Christmas colours for this one, and have used a non Stampin’ Up! embossing folder which has been sitting unused for some time now. The Christmas tree looks a bit lumpy in the photo, but I have just used some cotton wool behind it to make it puff out a little.
The Christmas Tree was cut out of the white panel of card stock using the Holiday Collection Framelits die, and the fabric is from the Orchard Harvest Designer Fabrics. And the greeting is from the Welcome Christmas stamp set.
If you have any questions about how I made my card, please feel free to send me an email. And you can see what the rest of the Design Team have made for this challenge here. We do hope you will give this one a go and join in the fun, we love to see what you have created using our challenges.
Next week is my challenge, so make sure you come back to see what I have for you, and it is also our final challenge for the year, as we are taking a well earned break over Christmas.
Happy Stamping!
Chris
Share this:

Our Creative Corner Santa Challenge
So, my second card for the week… yes, I did…. this time though, I had a few more supplies.
 This week’s challenge at Our Creative Corner, is to make a vintage style card or project which uses a Santa Claus image, along with some red, such as a red button, brad or ribbon.
For my Santa image, I have used a free image from this site which I printed onto Very Vanilla card stock. I have then sponged, and done some red zig zag faux stitching around the edge. Ah, yes, you guessed it, my sewing machine is still packed!
I have used some Be of Good Cheer Patterned Paper in the background, along with some tulle, seam binding ribbon and of course, a gorgeous Vintage Brad and some half backed pearls.
And up in the top corner you will see a little Merry Christmas, this is from the For The Birds stamp set, I have just used my marker to ink up the greeting without the bird.
Check out the rest of Santa inspired projects from the Design Team this week, and please join in the fun, we love seeing your projects.
Happy stamping!
Chris
Share this:

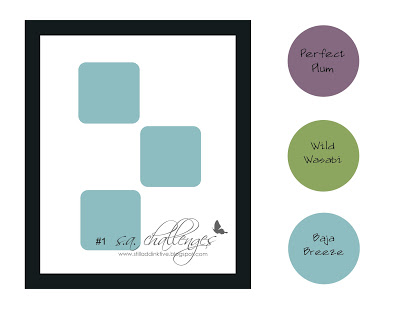
Let’s Be Royal
Our Creative Corner challenge for this week is a royal theme, and I had a real struggle with this one!
The requirements are:
– Create a card or project with a royal look using a crown, castle or a princess.
– Use the photo to inspire you.
– Your project must have something yellow or gold embossed.

Well, I don’t have any castle or princess stamps and the only crown stamp I have looks more like a jester’s hat than a crown!
So, I did a google search on princess images and decided to do some paper piecing, not something that I have done much of before. Actually, truthfully, I have never done anything like this before so it really was a challenge!
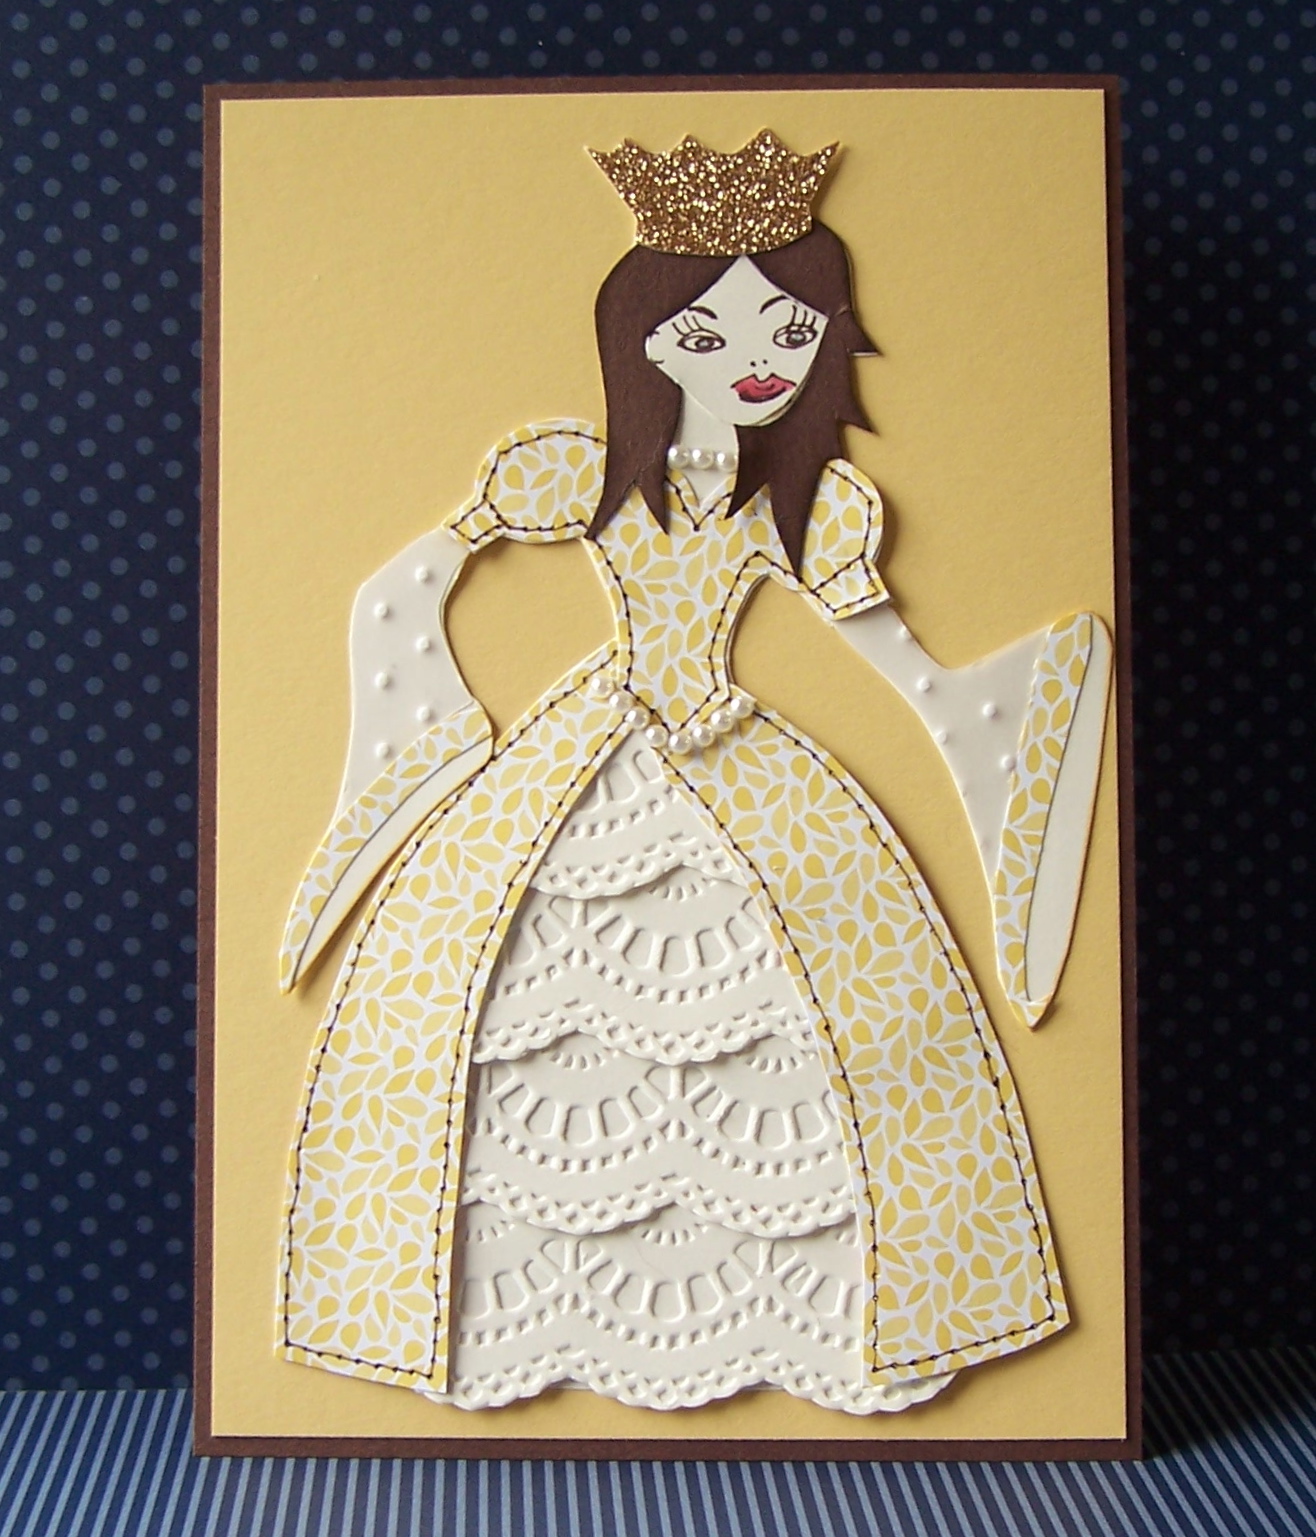
Personally, I think she looks a bit evil, or angry, what do you think?
I have used patterned paper from the Floral District paper pack, and the Delicate Designs Embossing Folders to create the lacy underskirts, along with lots of fussy cutting and faux stitching.
I am not all that happy with the final result, but I guess for a first attempt it’s ok.
There is plenty of wonderful inspiration for this challenge from the rest of the Design Team though, so make sure you check it out, and lets see what you come up with – we would love it if you would share your creations.
Well, that’s it for now, but I will be back with some more real soon.
Happy stamping!
Chris
Share this:

It’s a “Howdy” Challenge
This week’s Our Creative Corner Challenge comes from the lovely Liliana, who has picked a photo of a country scene as inspiration, with the following requirements:
-Create a card or project with a country or western look. Use the photo to inspire you.
-Your project must have something plaid or gingham (checkered/tartan is acceptable too!), such as in a ribbon, or designer paper.
-Most of all, have fun!
And here is the photo:

It took me some time to figure out what to do with this challenge, since I don’t really have anything “country or western” but ended up choosing this cute little cart image from the stamp set For the Birds (Page 34 of the Annual Catalogue). I decided this could easily be something you would see in the country. Well, anyway, that’s my story and I’m sticking to it!
 I just adore this stamp set, it was on my “absolutely need to have it” list when the new catalogue came out.
The image has been water coloured in colours to match the stripey mount, which is made with the Orchard Harvest Fabric (Page 30 of the Holiday Catalogue). The dark background layer has been embossed using the Woodgrain embossing folder, then just add some twine and one of the gorgeous new wooden buttons.
I do hope you will play along with us this week, so make sure you check out what the rest of the Design Team came up with here.
And if you have any questions about my card or the challenge, just send me an email.
I promise to return in the next day or so with some new projects, so stay tuned!
Happy stamping!
Chris

