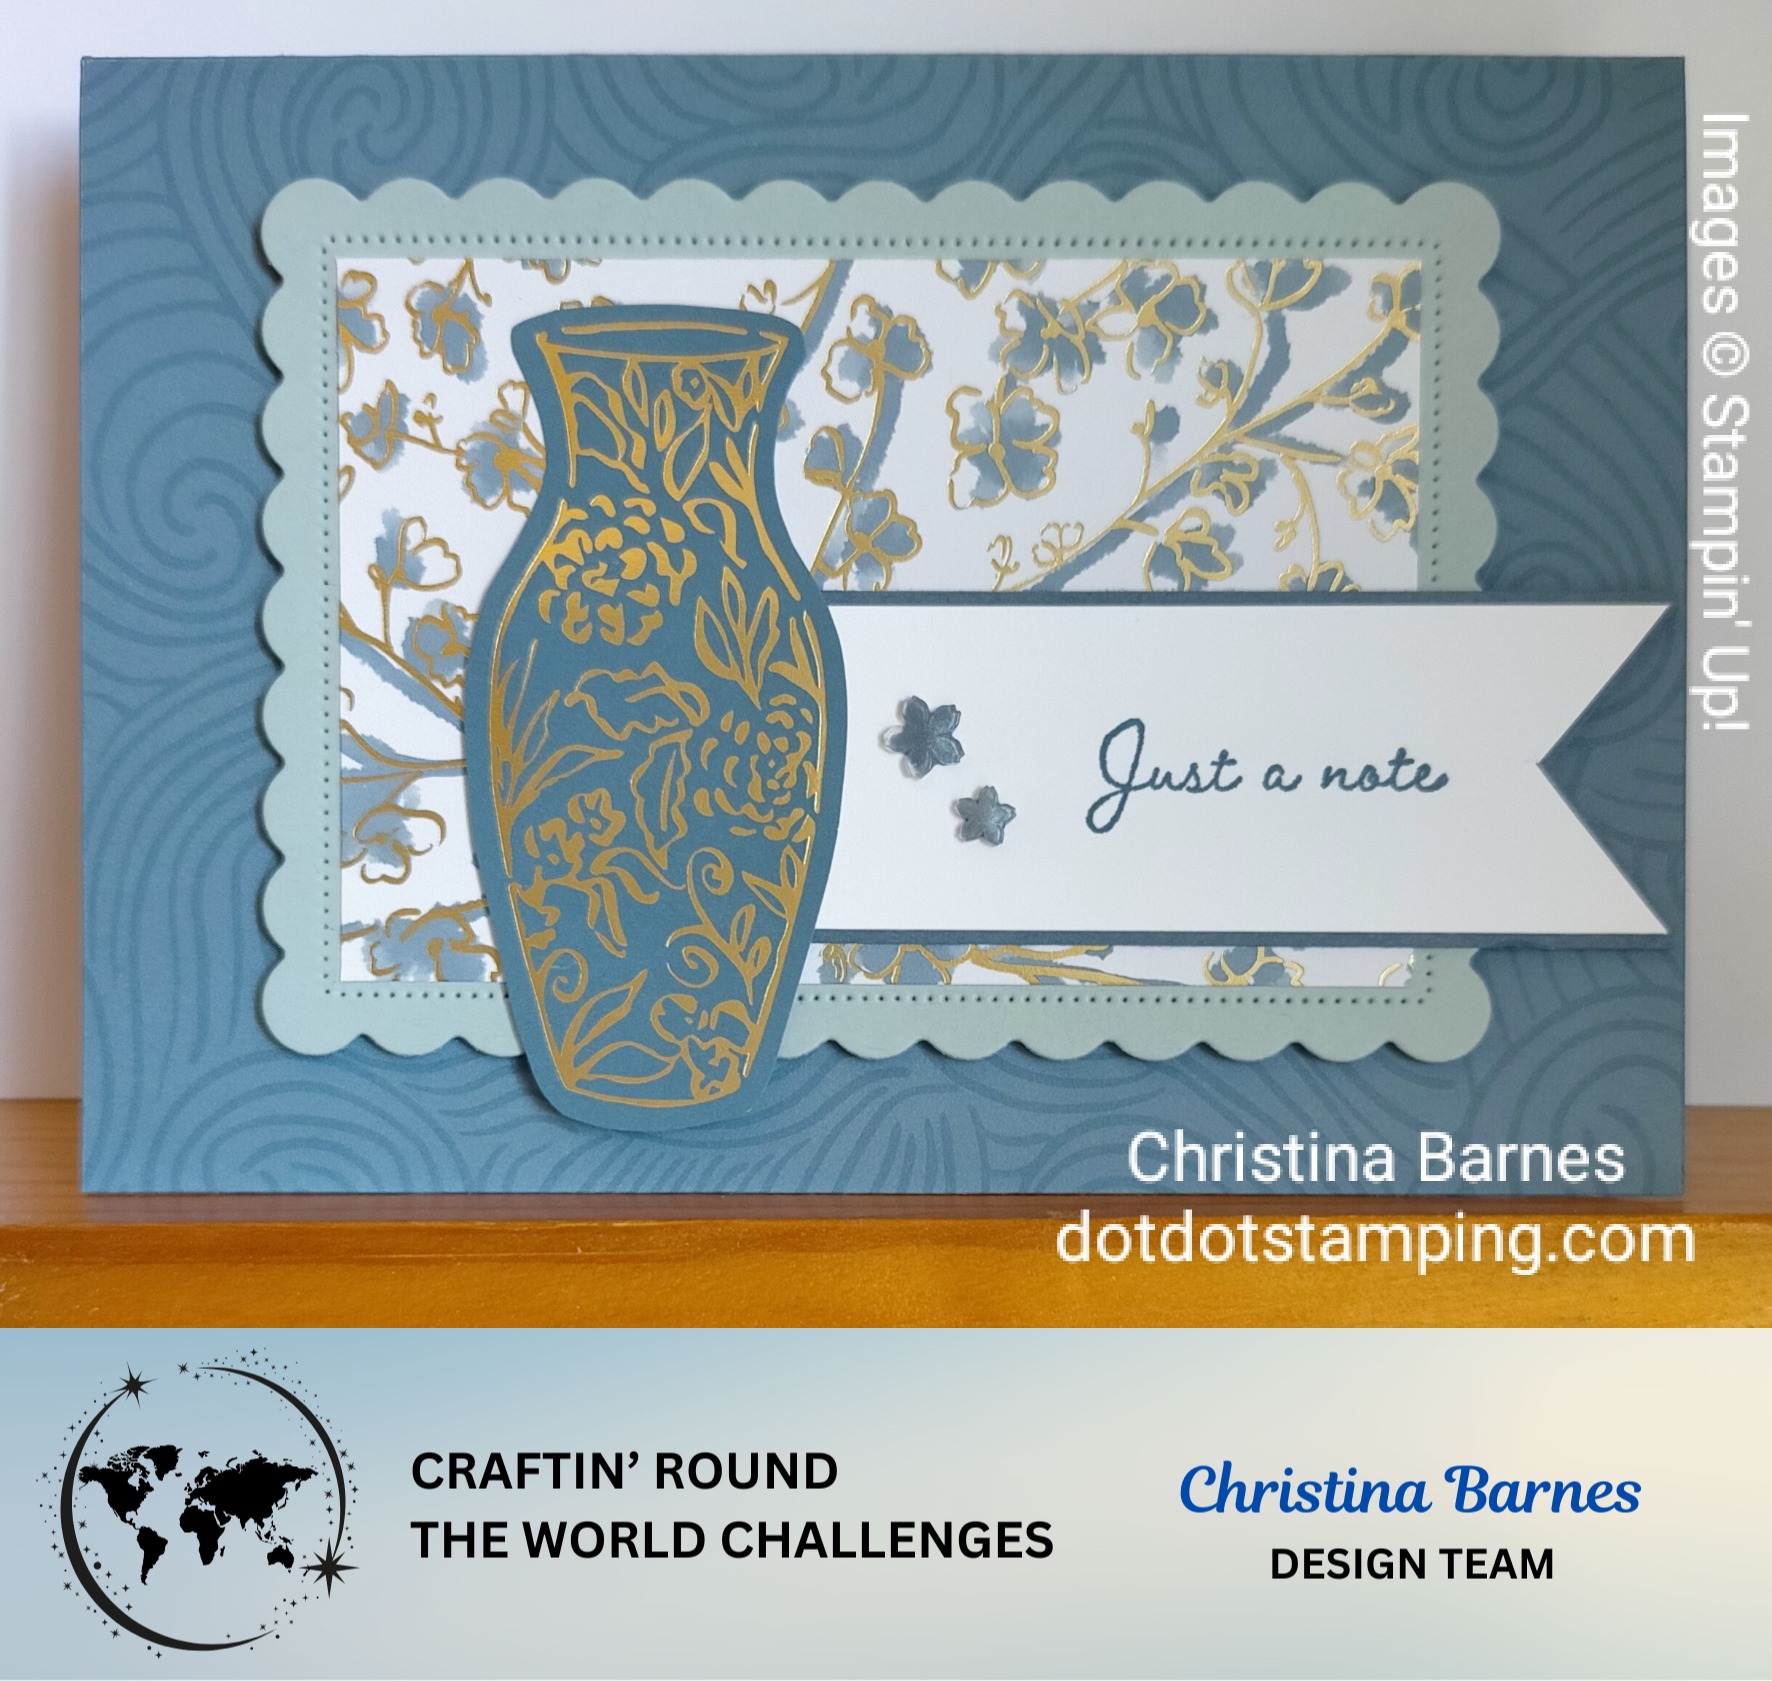
Kintsugi Inspirations is the name of the patterned paper I have used for my card today.
Kintsugi Inspirations is on Page 59 of the Stampin’ Up! Annual catalogue. I love all the gorgeous blues and pretty florals. I have adhered the background layer onto a card base of Misty Moonlight cardstock, and the retired Scallop Contours Dies have been used to cut a layer using Cloud Cover cardstock – one of this year’s In Colors. The vase on my card has been fussy cut from the paper.
Hi there! Well, it has certainly been a long time between posts. I am still here and still crafting, and feeling like I am starting again from scratch with cardmaking and blog posts. But sometimes, that’s how life goes. While I have been doing a fair bit of crafting, I haven’t been doing any cardmaking, there’s been a lot of crochet, journal making and pyrography, and I might start sharing some of those here as well as my papercrafting.
Despite all of the challenges I have been facing over the last few months, I am still a member of the lovely Design Team for Craftin’ Round The World Challenges. And today’s card is using the Sunrise Sailing stamp set and coordinating embossing folder, along with some of the Peaceful Garden Designer Series Paper which will be available in the upcoming mini catalogue, available on the 3rd September, and which also contains a lot of gorgeous Christmas goodies!
That’s it for today, thanks for reading along. Happy stamping, Chris
You can shop for your own Stampin’ Up! supplies in Australia by scanning the QR Code below….
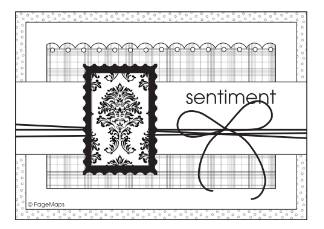
Hi and welcome back to another Sketch Saturday challenge. Here is the new sketch for our inspiration, a lovely sketch that you could do so much with, or keep very simple.
The only issue I had with this sketch was deciding which of the many ideas I would use for my Design Team card for today.
I have used a piece of the Perennial Lavender Designer Series Paper over some Crumb Cake cardstock for the background, and I have lightly inked the edges of the DSP with some Crumb Cake ink, just to take away the white of the cut edge. And I have done the same with the layer of Melon Mambo paper which comes from the Countryside Rose Designer Series Paper, a paper which was only available to Stampin’ Up! Demonstrators but I loved the colour of it behind these flowers. The flowers and leaves come from the Fully Flowering Ephemera Pack, so are already cut and coloured for you.
Thanks for stopping by today, and I hope you will share your projects with us at Sketch Saturday. Happy Stamping, and don’t forget the sale on Designer Series Papers which has only a few days left, and you can make the most of by clicking here.
I’m feeling a little tired and in need of some down time, so I will take a break from the sketches for a day or two, but I will be finishing off the rest of the sketches.
In the meantime, don’t forget the awesome sale on gorgeous papers, for the rest of August, or until sold out.
If you live in Australia and would like to make the most of this sale, you can shop online here.
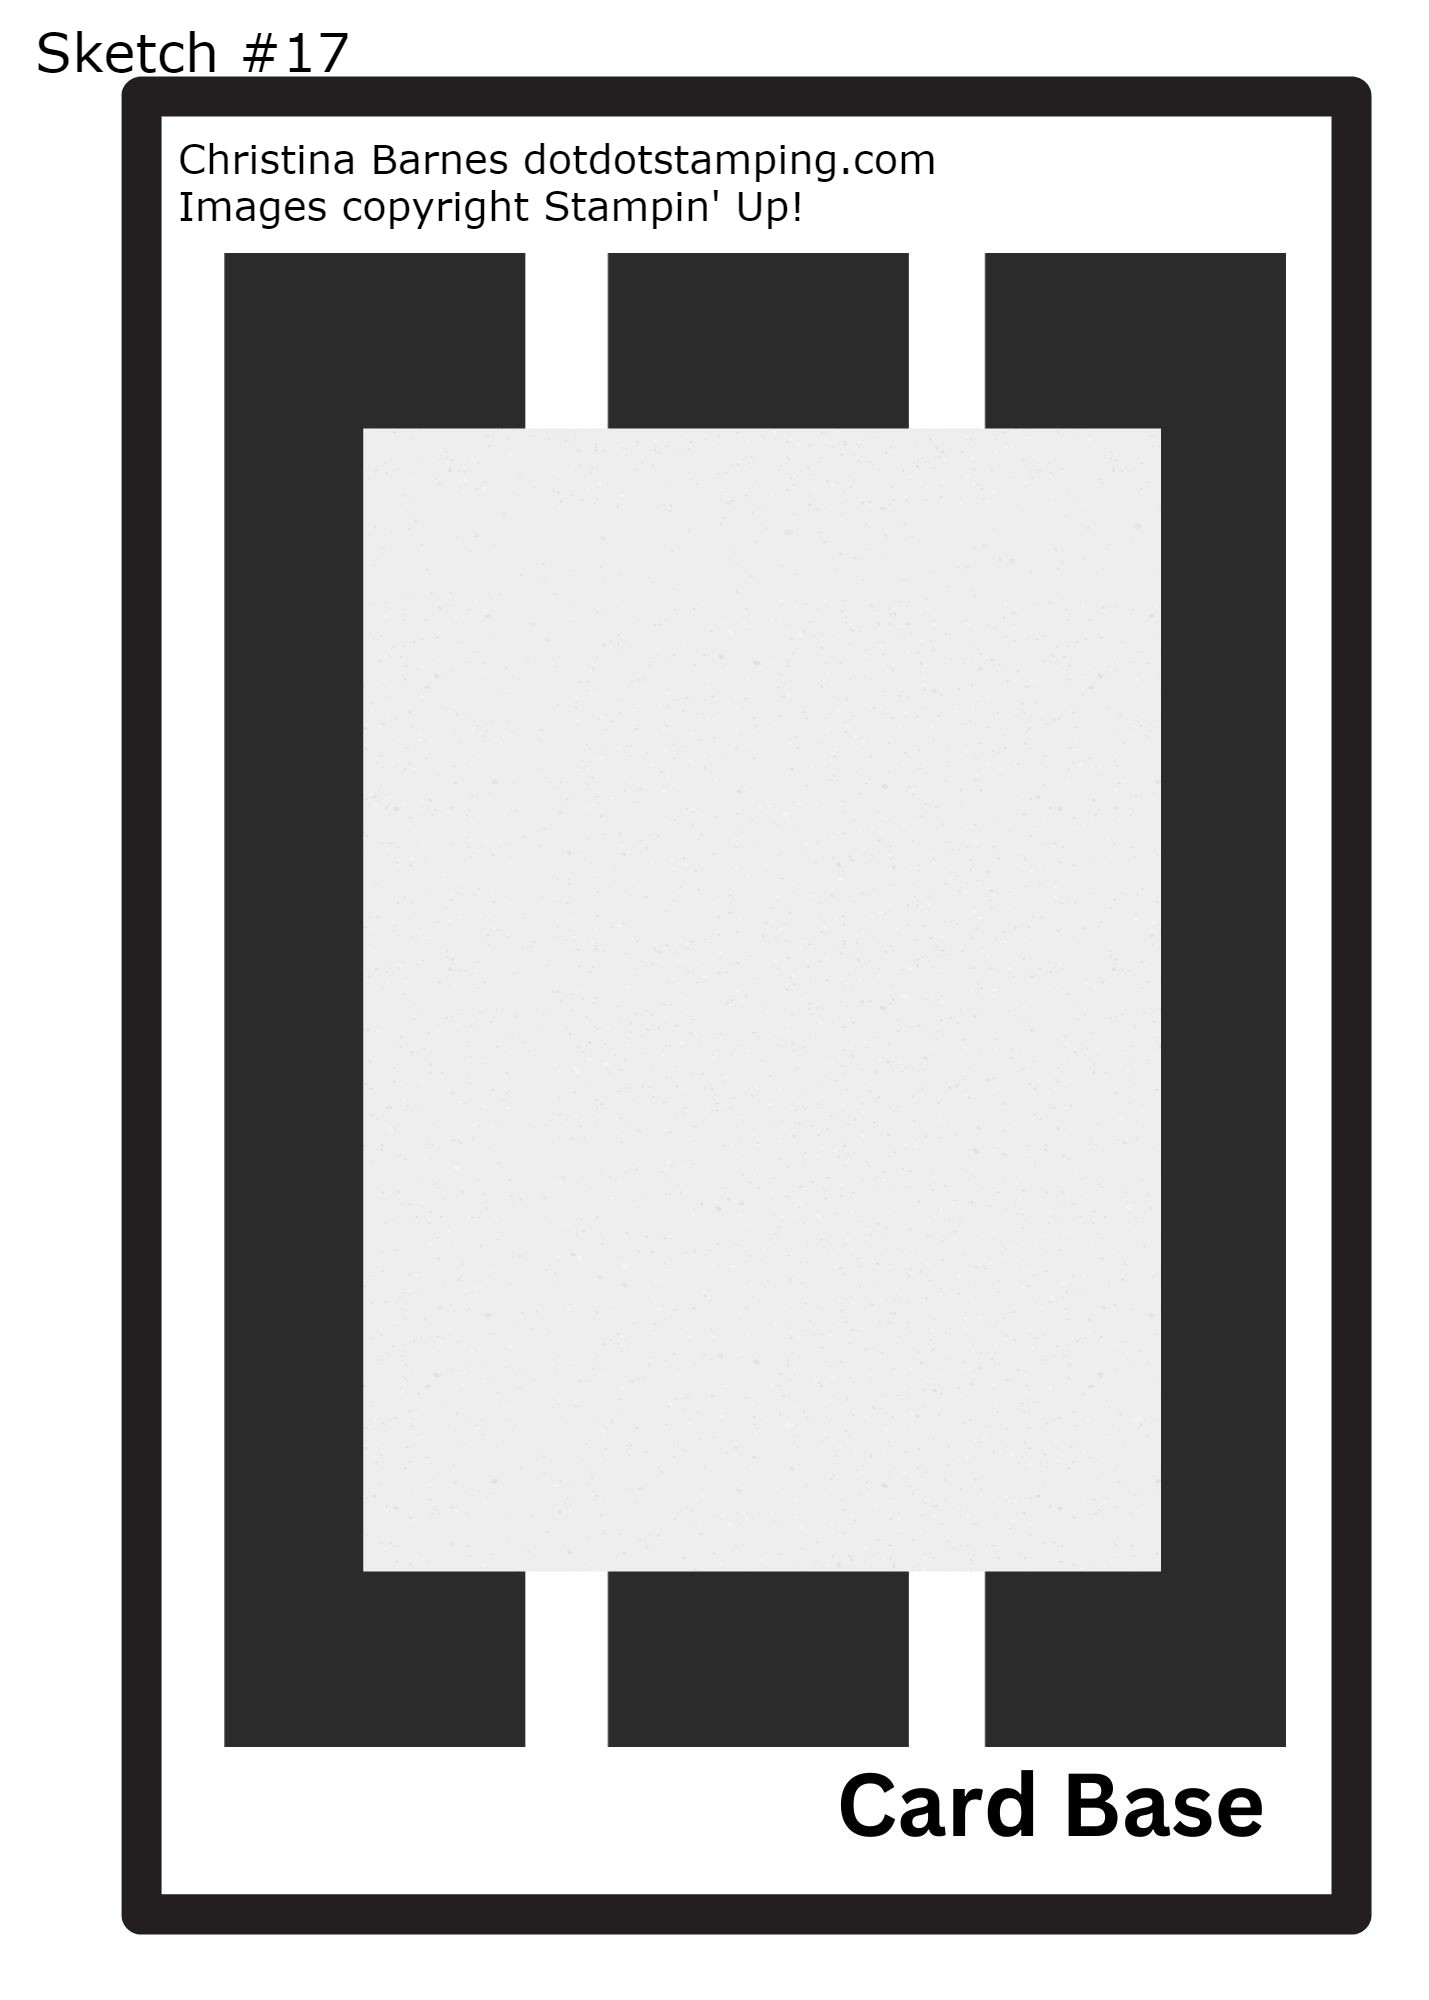
Hi and welcome back to day 17 of my sketch challenge. My card today uses the 17th Sketch from the Stampin’ Up! Annual Catalogue and is my card for this month’s challenge at Craftin Round The World. Here is sketch number 17 from Page 22 of the catalogue. If you would like to find Day 1 of the sketch challenge for the month of August, just click here.
The measurements are as follows: the cardbase is The card base is 21cm x 14.5cm, which is then scored at 10.5cm on the long side and folded, so when it’s folded, your card front will be 10.5cm x 14.5cm. The next layer of patterned paper is 14cm x 10cm. Then a layer of Pretty Peacock cardstock to frame the top layer, and is 7.5cm x 10cm. The top layer of patterned paper is 7cm x 9.5cm. I have taken a strip of Basic White cardstock from my stash of scraps, and stamped the sentiment in Pretty Peacock ink. The sentiment comes from the Country Flowers stamp set.
And that’s it. Sometimes it fun to create a really quick card, and Designer Series Papers can make it easy to do so. And don’t forget the sale on Designer Series Papers for the rest of August, which you can find here in my online store. Happy stamping Chris
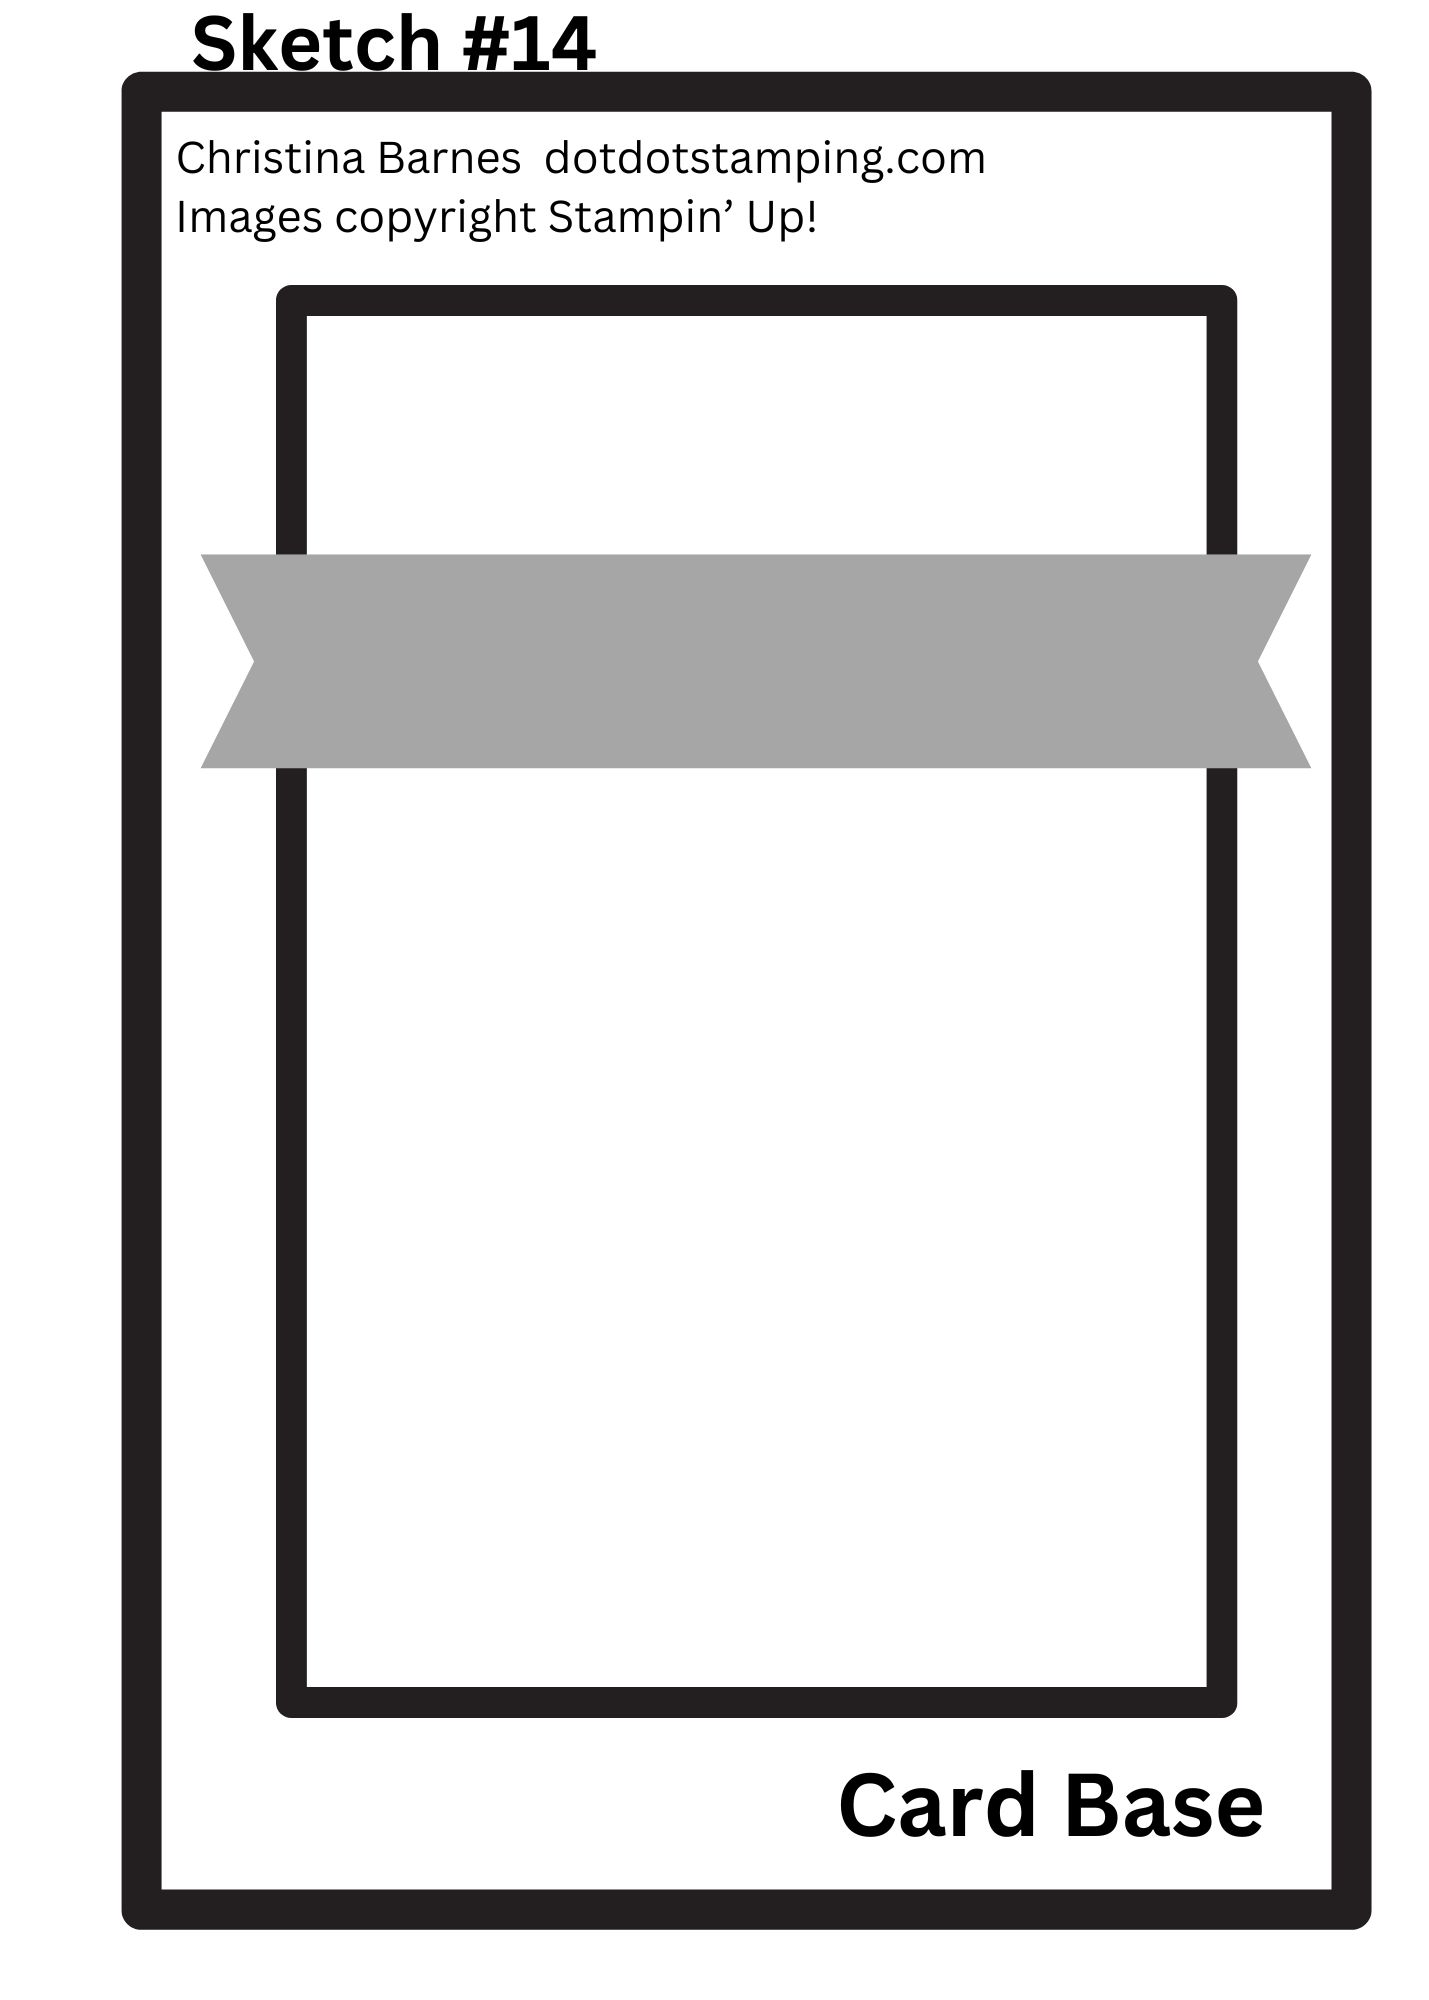
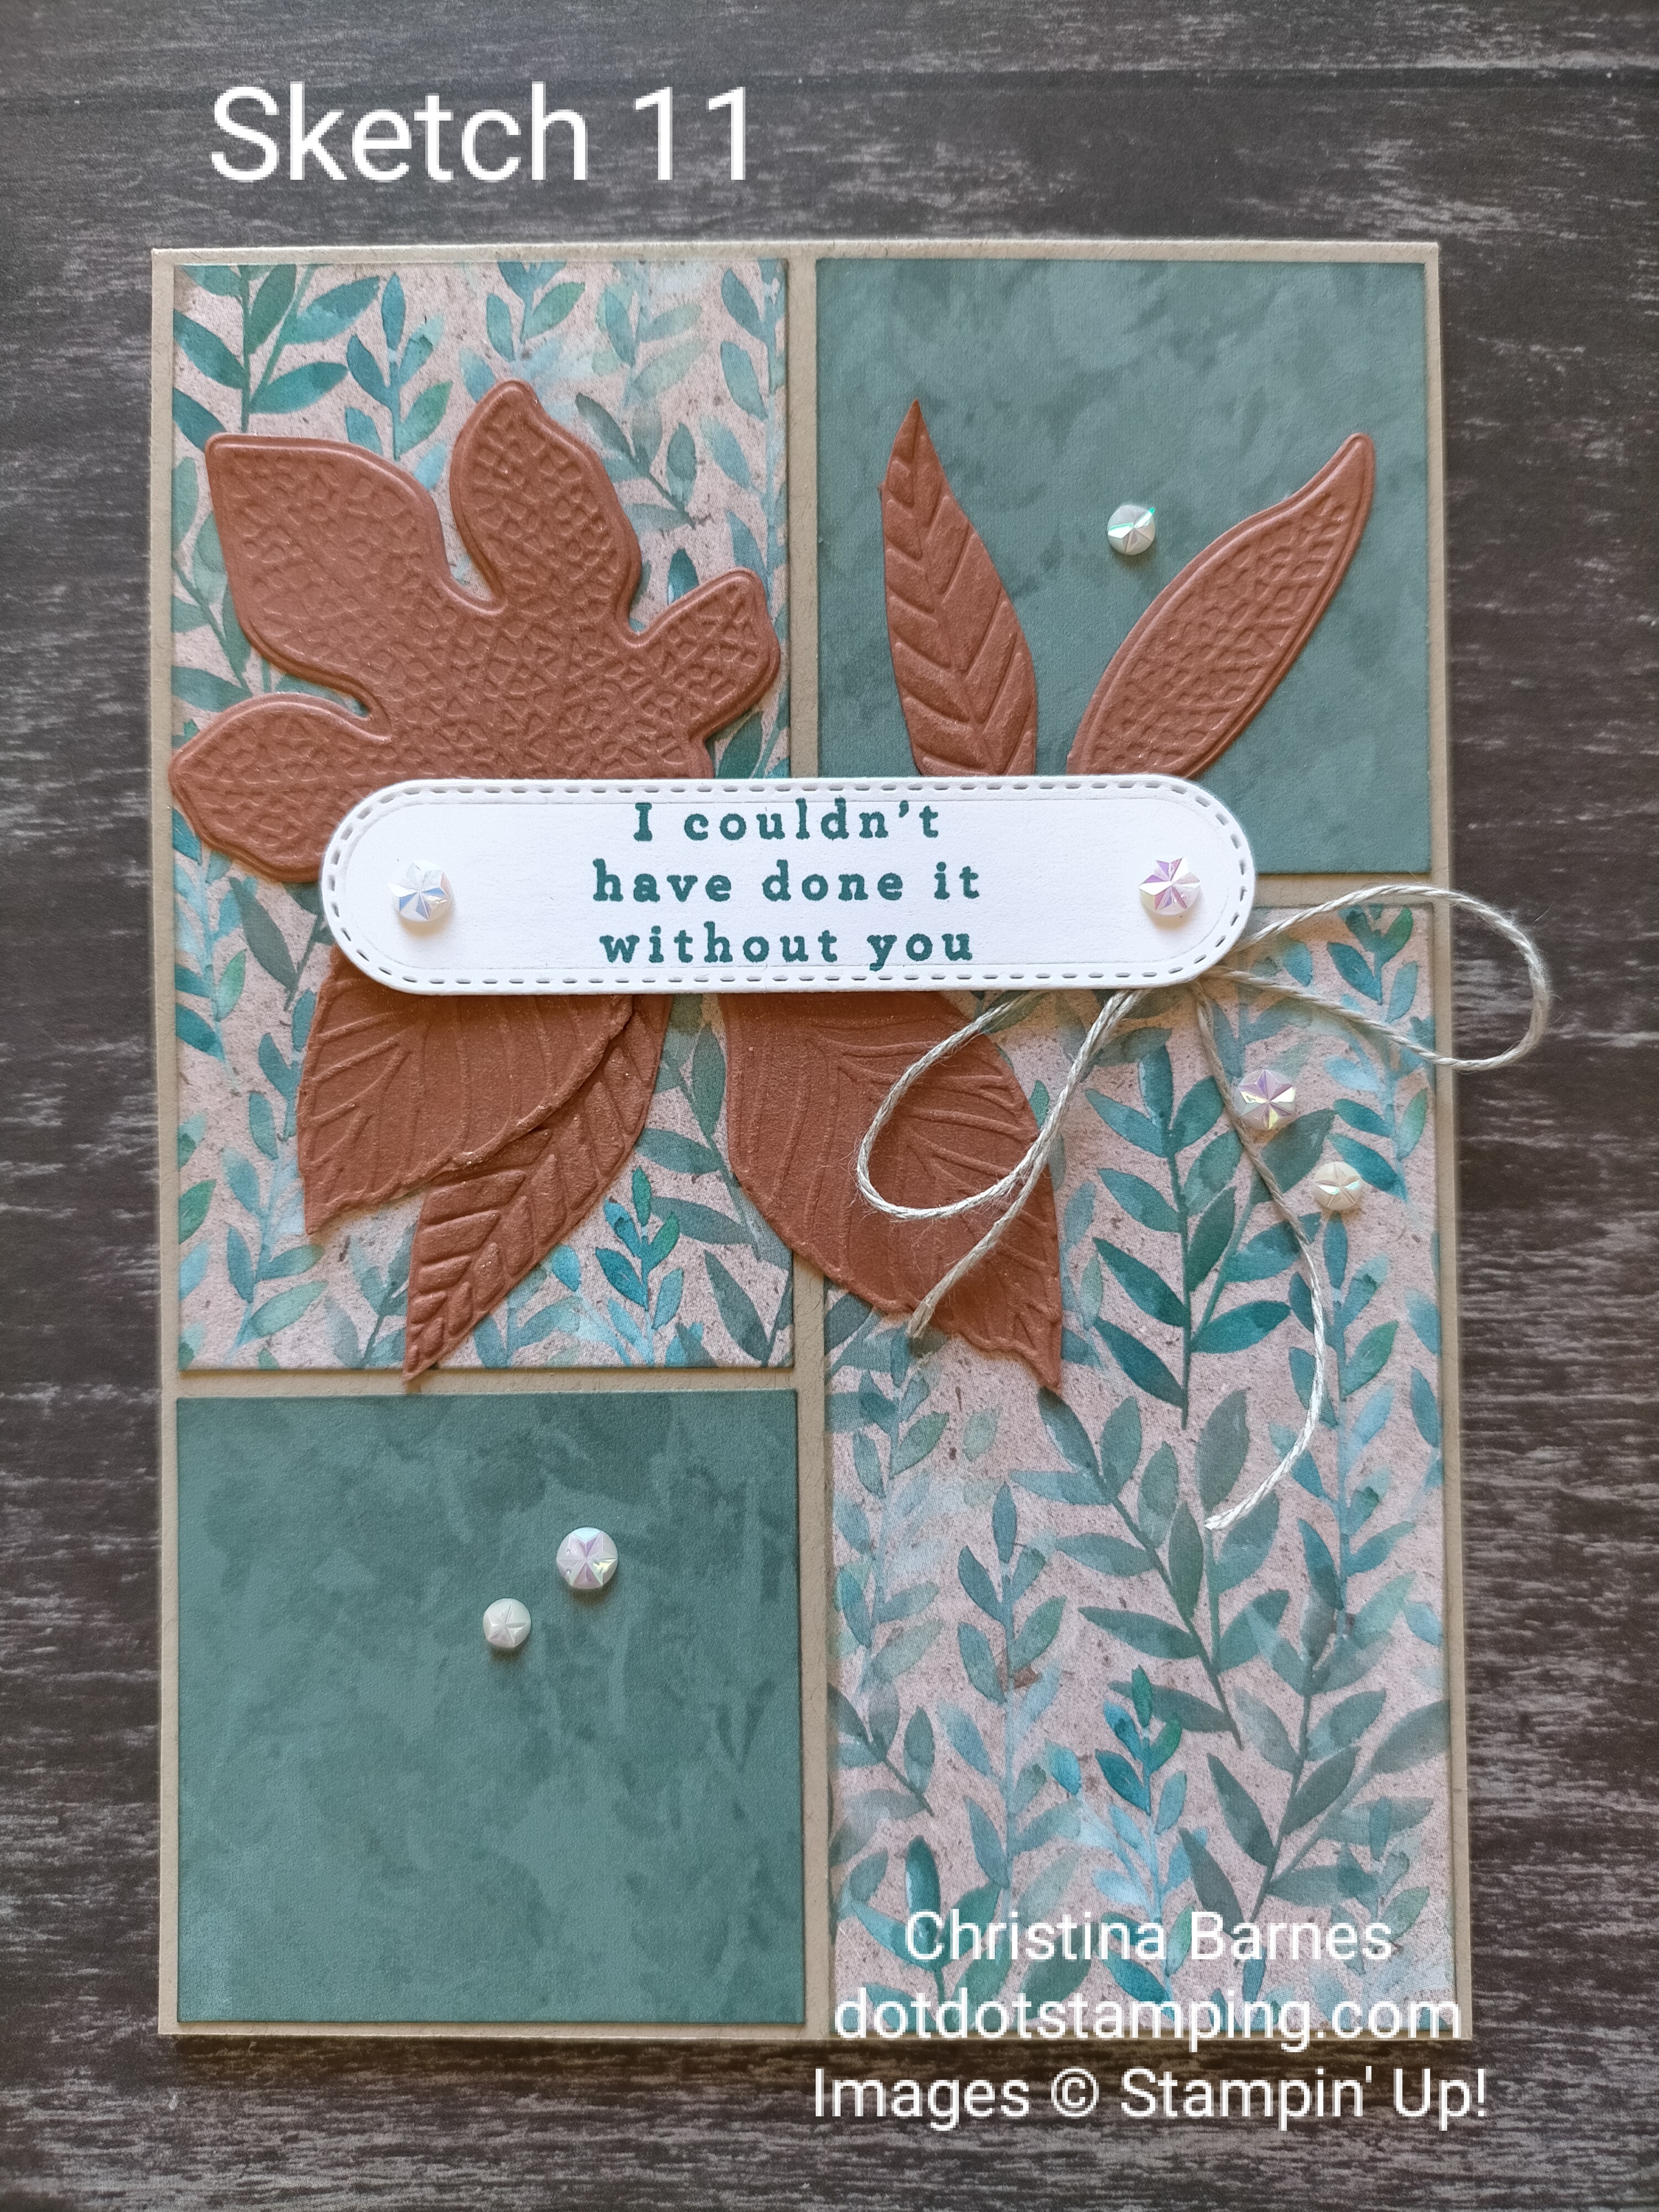
Welcome back to the Stampin’ Up! Annual catalogue Sketch inspiration, we are halfway at Sketch #11.
I do apologise, I haven’t done a very good job with putting this sketch onto Canva, and it doesn’t quite work here because the background is white and I don’t think I can change. You will see what I have done with the cards though, and it will all make sense. I hope.
Both cards use Crumb Cake cardstock for the card base (21cm x 14.5cm, which is then scored at 10.5cm on the long side and folded, so when it’s folded, your card front will be 10.5cm x 14.5cm), and the layer of Perennial Lavender Designer Series Paper is cut at 14cm x 10cm. I have then cut the DSP down the centre (lengthwise) at 5cm, then taken each of those strips and cut a 5cm x 5cm square off either the top or the bottom. Those smaller squares are then turned over so that you see the reverse side pattern. All of the DSP pieces have been sponged around the edges using some Crumb Cake ink and a Sponge Dauber. For the first card above, I have then placed each piece of DSP so that the sides are pushed up against each other, leaving a larger amount of cardstock around the outside edge.
Hi and welcome back. Today we have Sketch #8 from the Stampin’ Up! Annual Catalogue.
I apologise for the slightly wonky sketch, some of my rectangles didn’t quite line up. Still, you get the idea. I decided to keep this one really simple. Of course, it could be quite a complicated one if you choose, but mine is nice and easy today.
I have taken a piece of the Lily Pond Lane Designer Series Paper (which is currently on sale) and using a ruler and pencil, worked out the measurements to divide it into equal rectangles. I have a Basic Black card base in the standard size ( 21cm x 14.5cm, which is then scored at 10.5cm on the long side and folded, so when it’s folded, your card front will be 10.5cm x 14.5cm). The piece of Lily Pond Lane DSP is the standard size as a layer over the base – 10cm x 14cm. It was pretty tricky trying to work out exact meaurements for the lines, however they are approximately 3.3cm apart on the short side, and 4.7cm on the long side. I have used a Black Stampin’ Write Marker and ruler to draw the blace lines directly onto the DSP.
I have taken a piece of the Country Woods DSP, cut to 10cm x 14cm to lay over the top of my Crumb Cake card base (21cm x 14.5cm, which is then scored at 10.5cm on the long side and folded, so when it’s folded, your card front will be 10.5cm x 14.5cm). The rectangular elements have been die cut using the Nested Essentials Dies, and the circle from the Spotlight on Nature Dies. I have stamped the teapot image directly onto some of the Country Woods DSP, then cut using the die, before adding some shading using a Basic Grey Watercolour Pencil. The leaves were done in the same way and again coloured with Watercolour Pencils.
I found this sketch challenging for some reason, but so far I am enjoying creating using different layouts. I have a tendency to use the same or very similar layouts for my cards, so it’s a good challenge to be trying out some different ideas.
Don’t forget that Designer Series Papers are on sale at 15% off between now and the end of August, and you can order simply by going to my Online Store.
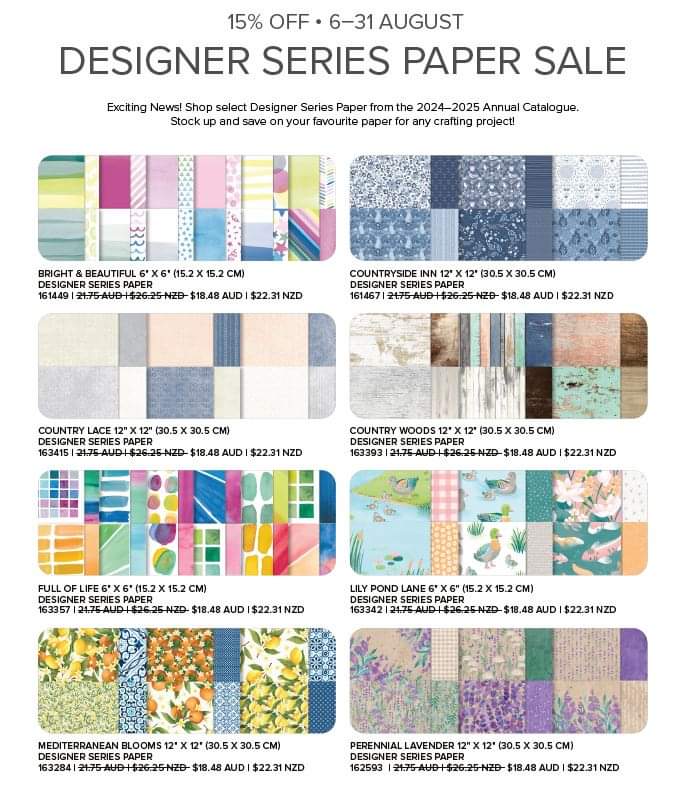
Starting tomorrow, 6th August, the always popular 15% off Designer Series Papers. If you are a papercrafter, you will love this promotion, whether it’s for cardmaking, scrapbooking or any other kind of papercrafting. Stock up here on your favourites, but make sure you get in early in case they sell out.
Have you got some favourites that you need to get? I have a couple that I don’t have yet, so it might be time to invest in something different. If you would like to do the same, you can go right to my Online Store anytime that suits you. Happy shopping, Chris