Annual Catalogue Sketches – Sketch #18

Hi and welcome back to my inspirational journey using the sketches from the Annual Catalogue.
Today we are up to Sketch 18 so only four more to go after today.

My card features the Changing Leaves bundle which I am loving, despite it being nearly spring here in Australia. There’s something timeless about the images of leaves that I really love to use on cards.

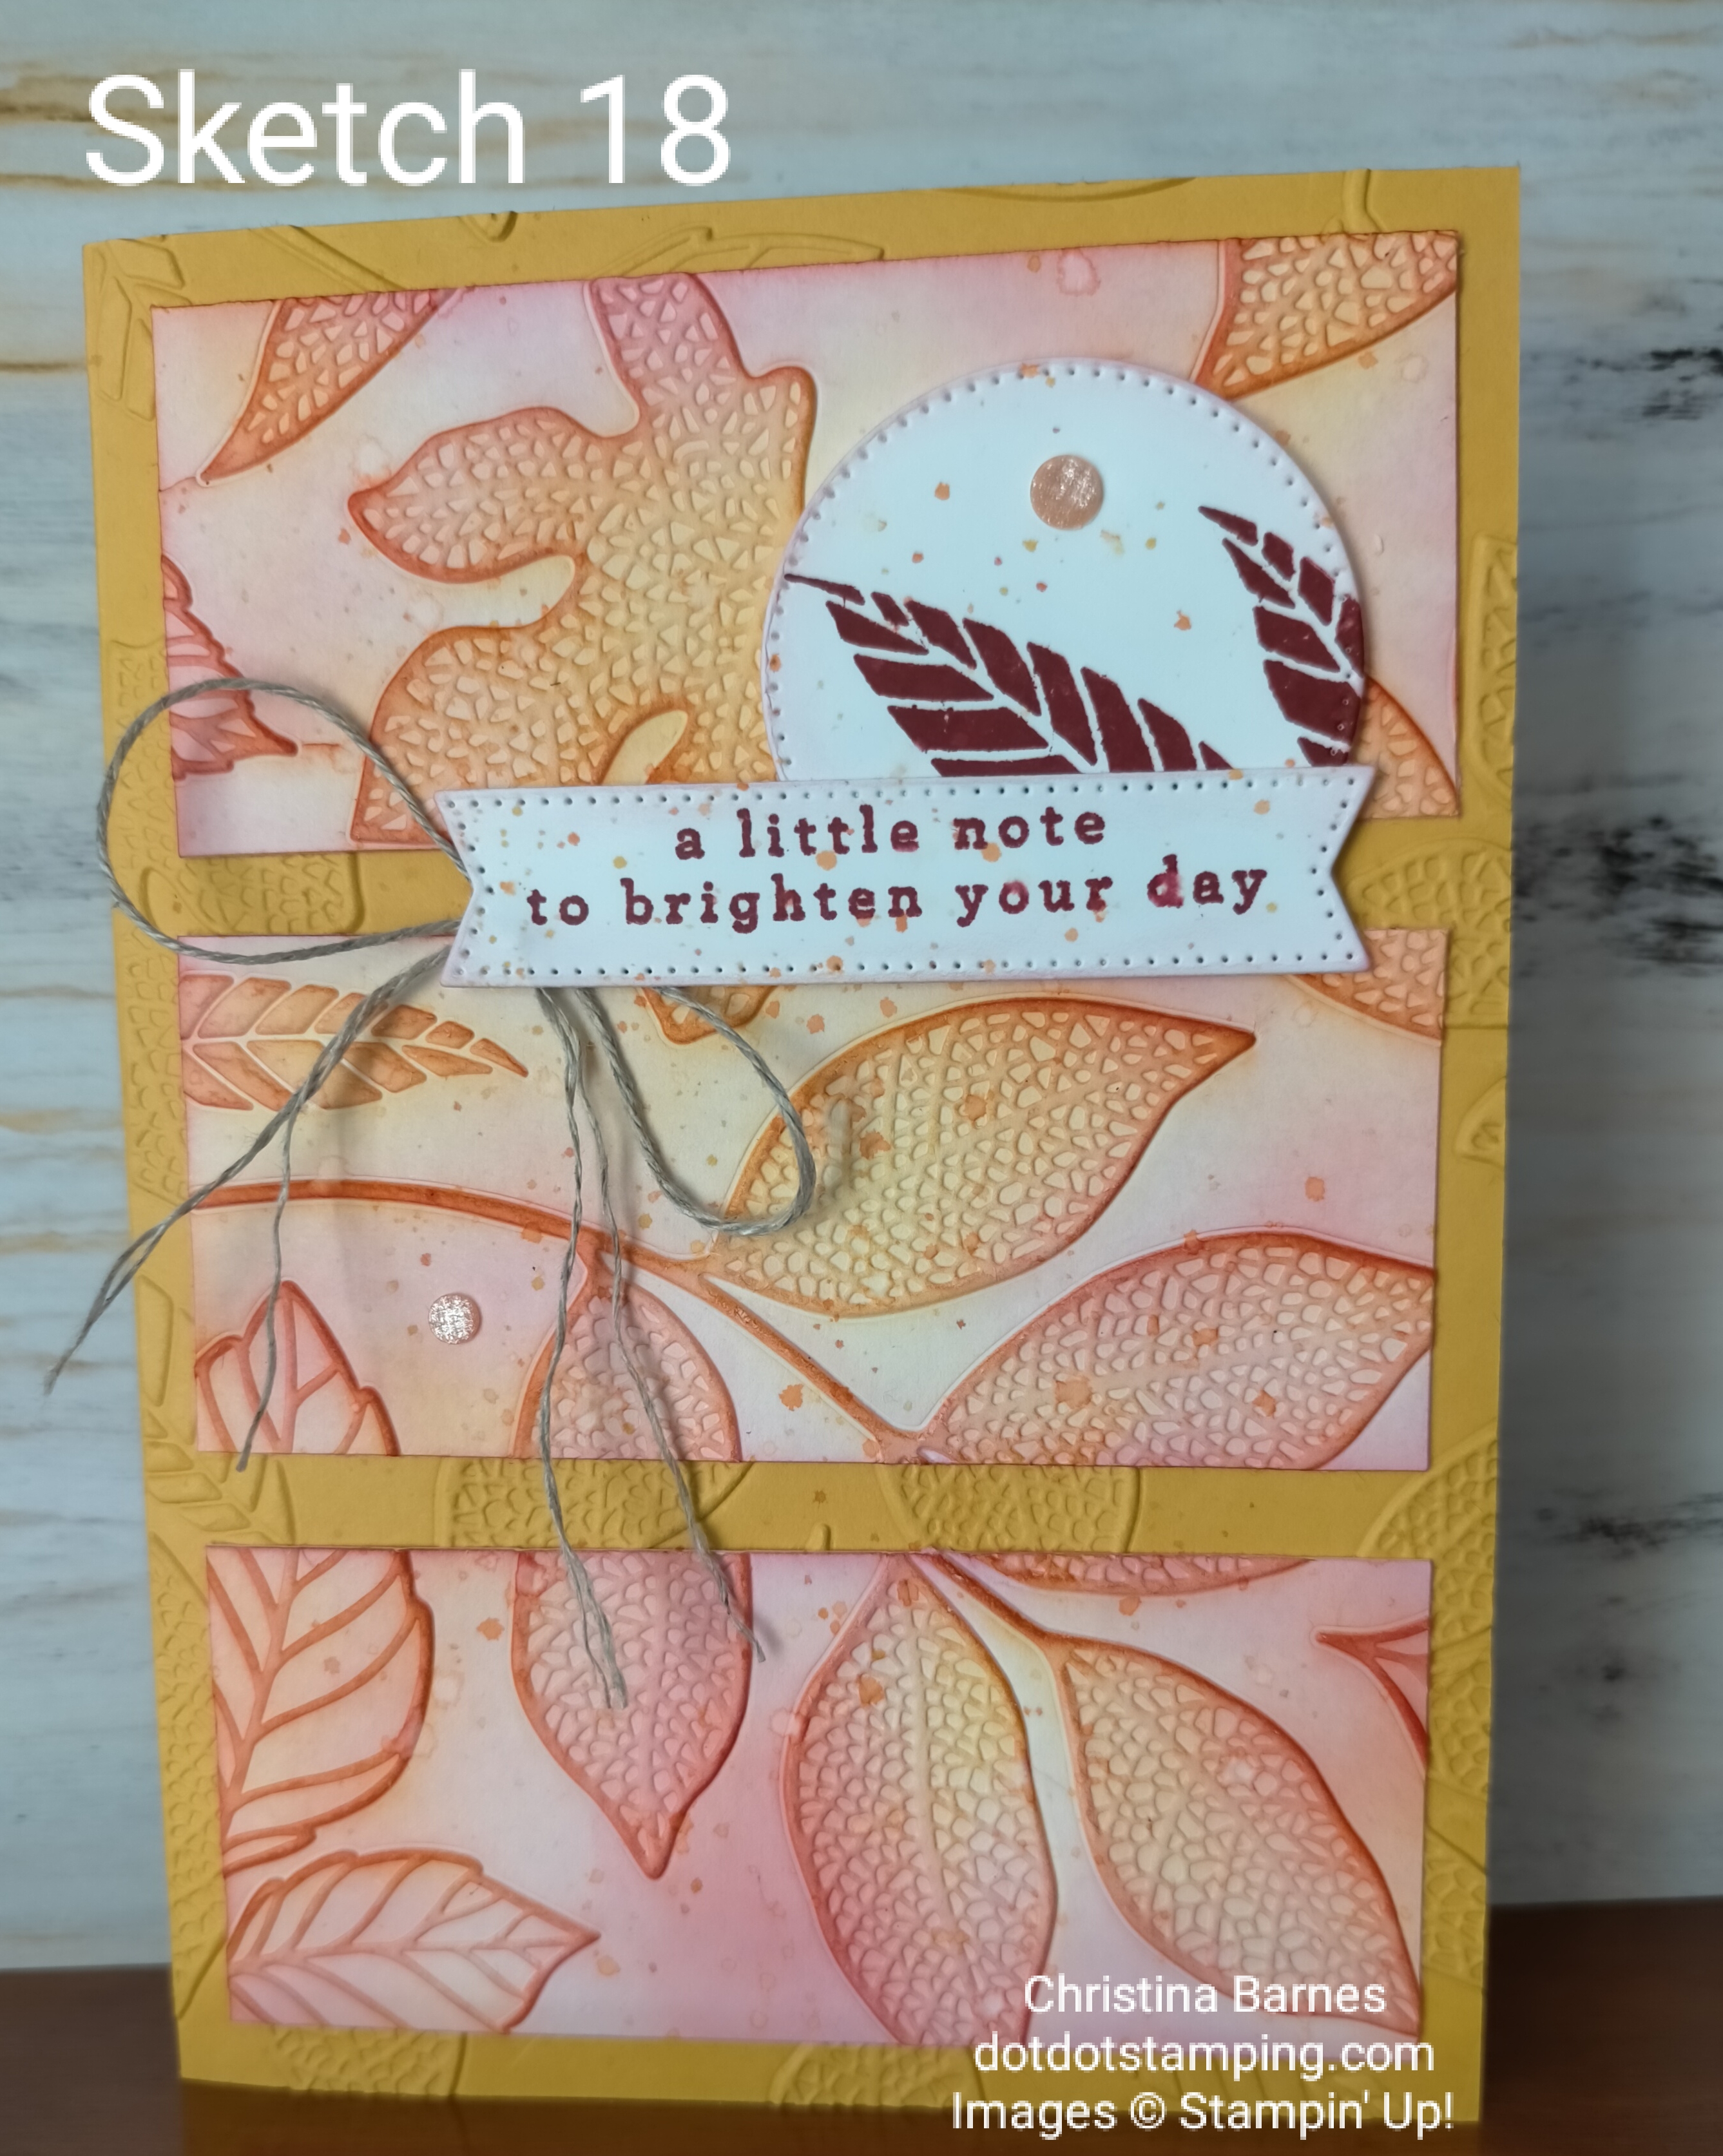
The cardbase is Crushed Curry Cardstock, which I have put through the Changing Leaves Embossing Folder, with just half of the card in the folder so that the back is still plain. The card base is my usual size – 21cm x 14.5cm, which is then scored at 10.5cm on the long side and folded, so when it’s folded, your card front will be 10.5cm x 14.5cm.
The next layer of Basic white cardstock is 13.5cm x 9.5cm, again run through the Changing Leaves Embossing Folder and then cut into three sections. Each section measures 9.5cm x 4cm.
I have then used blending brushes to add colour to the panels using Crushed Curry ink, Pumpkin Pie ink, Real Red ink and Cherry Cobbler ink. The panels were then evenly placed on the card based and adhered down.
I have cut a circle and sentiment panel from the Stylish Shapes Dies, stamped the sentiment and leaves in Cherry Cobbler ink before popping them down with some Dimensionals.
I have used the Water Painter with Pumpkin Pie and then Crushed Curry ink, and splattered some colours across the card, before adding some Linen Thread to finish the card off.

Happy stamping,
Chris

Annual Catalogue Sketches – Sketch #5

Hi and welcome back.
Today we have Sketch #5 from the Stampin’ Up! Annual Catalogue.

Today’s card has a black card base, again measuring 21cm x 14.5cm, which is then scored at 10.5cm on the long side and folded, so when it’s folded, your card front will be 10.5cm x 14.5cm.
The next layer is a Basic White layer measuring 14cm x 10cm which I have run through the Stampin’ Cut and Emboss Machine using the Distressed Tile 3D Embossing Folder. I have then added some ink to the cardstock by dabbing the ink pad lightly across the raised areas, I have used a touch of Poppy Parade ink and some black Memento ink.

The next layer is flagged at both ends. I have taken a piece of Poppy Parade cardstock cut to 6.5cm x 12 cm, cut approximately 1cm up the centre of the short ends and then cut from the corners into the top of the cut to create the flag ends. Once that was done I have run that through with the Distressed Tile Embossing Folder and this time I have turned it over to use the debossed side.

The focal image is on a piece of Basic White cardstock measuring 7 x 7cm with a layer of Basic Black behind it which measures 7.5 x 7.5cm.
The flowers come from the Inspirational Sketches stamp set, stamped in Memento Black Ink and then coloured using Stampin’ Blends in Old Olive, Poppy Parade and Daffodil Delight.

The sentiment comes from the Changing Leaves stamp set and then cut using the Stylish Shapes Dies but you could use any offcut that you have.
And of course we need some of the obligitory bling with some Iridescent Faceted Gems.

I have been busy on Canva recreating the sketches from the catalogue, so they are not exact copies of what is in the catalogue but close enough. And since I have put my time and effort into creating these I would appreciate acknowledgement of where you got them from if you plan on using them.

I would love to know if these posts are helping to inspire anyone, so please leave me a comment if you are liking what I am sharing.

Happy stamping,
Chris

Annual Catalogue Sketches – Sketch #4

Hi and welcome back.
Today we have Sketch #4 from the Stampin’ Up! Annual Catalogue. Here is the sketch that I copied from the catalogue.

For my card I have chosen a single layer of Thick Basic White cardstock with no other layers.

The card base is 21cm x 14.5cm, which is then scored at 10.5cm on the long side and folded, so when it’s folded, your card front will be 10.5cm x 14.5cm.

I have used some of the Stampin’ Up! Masking Paper to mask off the areas where I didn’t want colour. I didn’t measure it but just worked out approximately how big I want the area to be coloured. It’s approximately 1cm up from the bottom and down from the top and just over 3cm from the left hand side, but you can adjust to what looks right for you.
A quick tip when it comes to using the Masking Paper – it is VERY sticky and can pull up the cardstock when you pull it off. So I stick it onto fabric before I put it onto the cardstock, usually a sleeve of the top I am wearing or jeans. This pulls up some fibres off the cloth onto the masking paper making it less sticky but still sticky enough to be effective.

Once I had the Masking Paper in place, I used a Blending Brush to put down some ink directly onto the card base. I started with some Crushed Curry ink at the bottom, then Peach Pie ink and lastly Pumpkin Pie ink. I then stamped the leaf image from the Changing Leaves stamp set using Memento Black ink, onto the blended area.
The sentiment is again from the Changing Leaves stamp set, and the two sentiment panels were die cut from the Changing Leaves Dies in Basic White and Pumpkin Pie.

The black brads are some of the retired Classic Matt Dots, but I had some left over and they felt just right to add a little extra touch to my card.

I have been busy on Canva recreating the sketches from the catalogue, so they are not exact copies of what is in the catalogue but close enough. And since I have put my time and effort into creating these I would appreciate acknowledgement of where you got them from if you plan on using them.

Happy stamping,
Chris

Annual Catalogue Sketches – Sketch #2

Welcome back to day 2 of our month of Stampin’ Up! Annual Catalogue sketches. Below is today’s sketch.
You can find Day 1 of the month of sketches here.

This could be a very simple card or it could be more complex as I have made mine today. My card features the Changing Leaves bundle which is an Online Exclusive, and a very versatile bundle.

For my card base, I cut a piece of Lost Lagoon cardstock at 21cm x 14.5cm – you should be able to get two card fronts from one full piece of cardstock. Then along the long side, score at 10.5cm and fold, so when it’s folded, your card front will be 10.5cm x 14.5cm.
I have then used some Pretty Peacock cardstock which is 9cm x 13cm, and have run that through the Changing Leaves embossing folder.
The basic white sentiment has been cut with one of the Changing Leaves Dies and the sentiment itself, also from the Changing Leaves stamp set is stamped in Pretty Peacock ink.
The leaves are in Lost Lagoon, Moody Mauve and Copper Clay cardstock. And of course some Linen Thread tied into a large bow and adhered to the back of the sentiment.
If you wanted to keep it simple though, you could leave off all the leaves, and just use the embossed panel with a sentiment and bow.

Happy stamping,
Chris