Annual Catalogue Sketches – Sketch #12

Hi and welcome back.
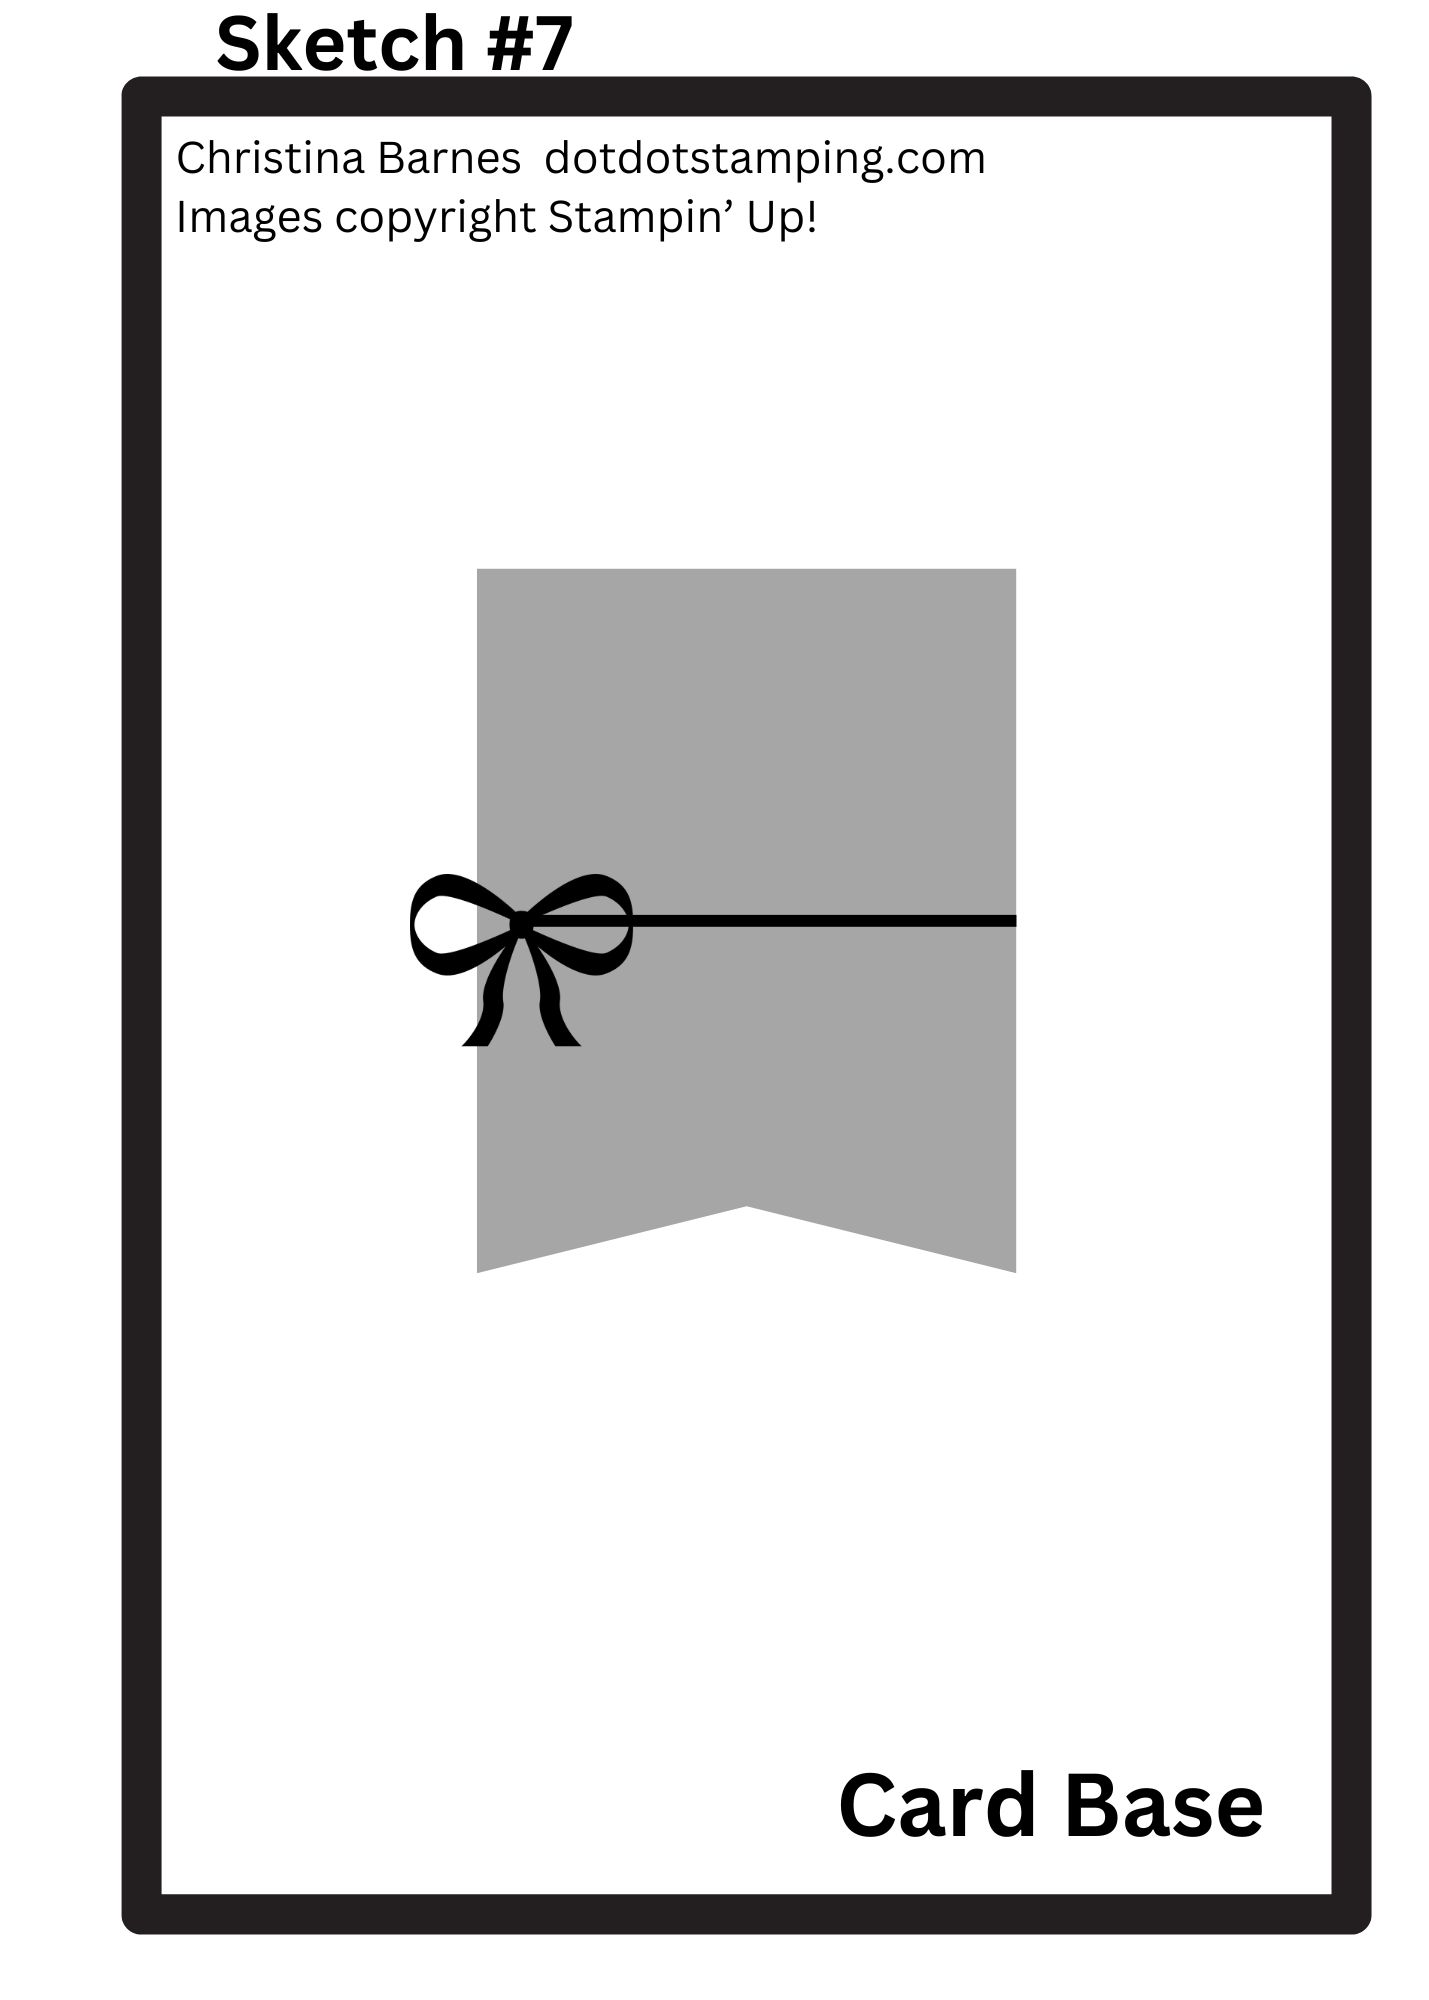
Today I have a Christmas card to share with you, based on the 12th of the sketches on Page 22 of the Stampin’ Up! Annual Catalogue.
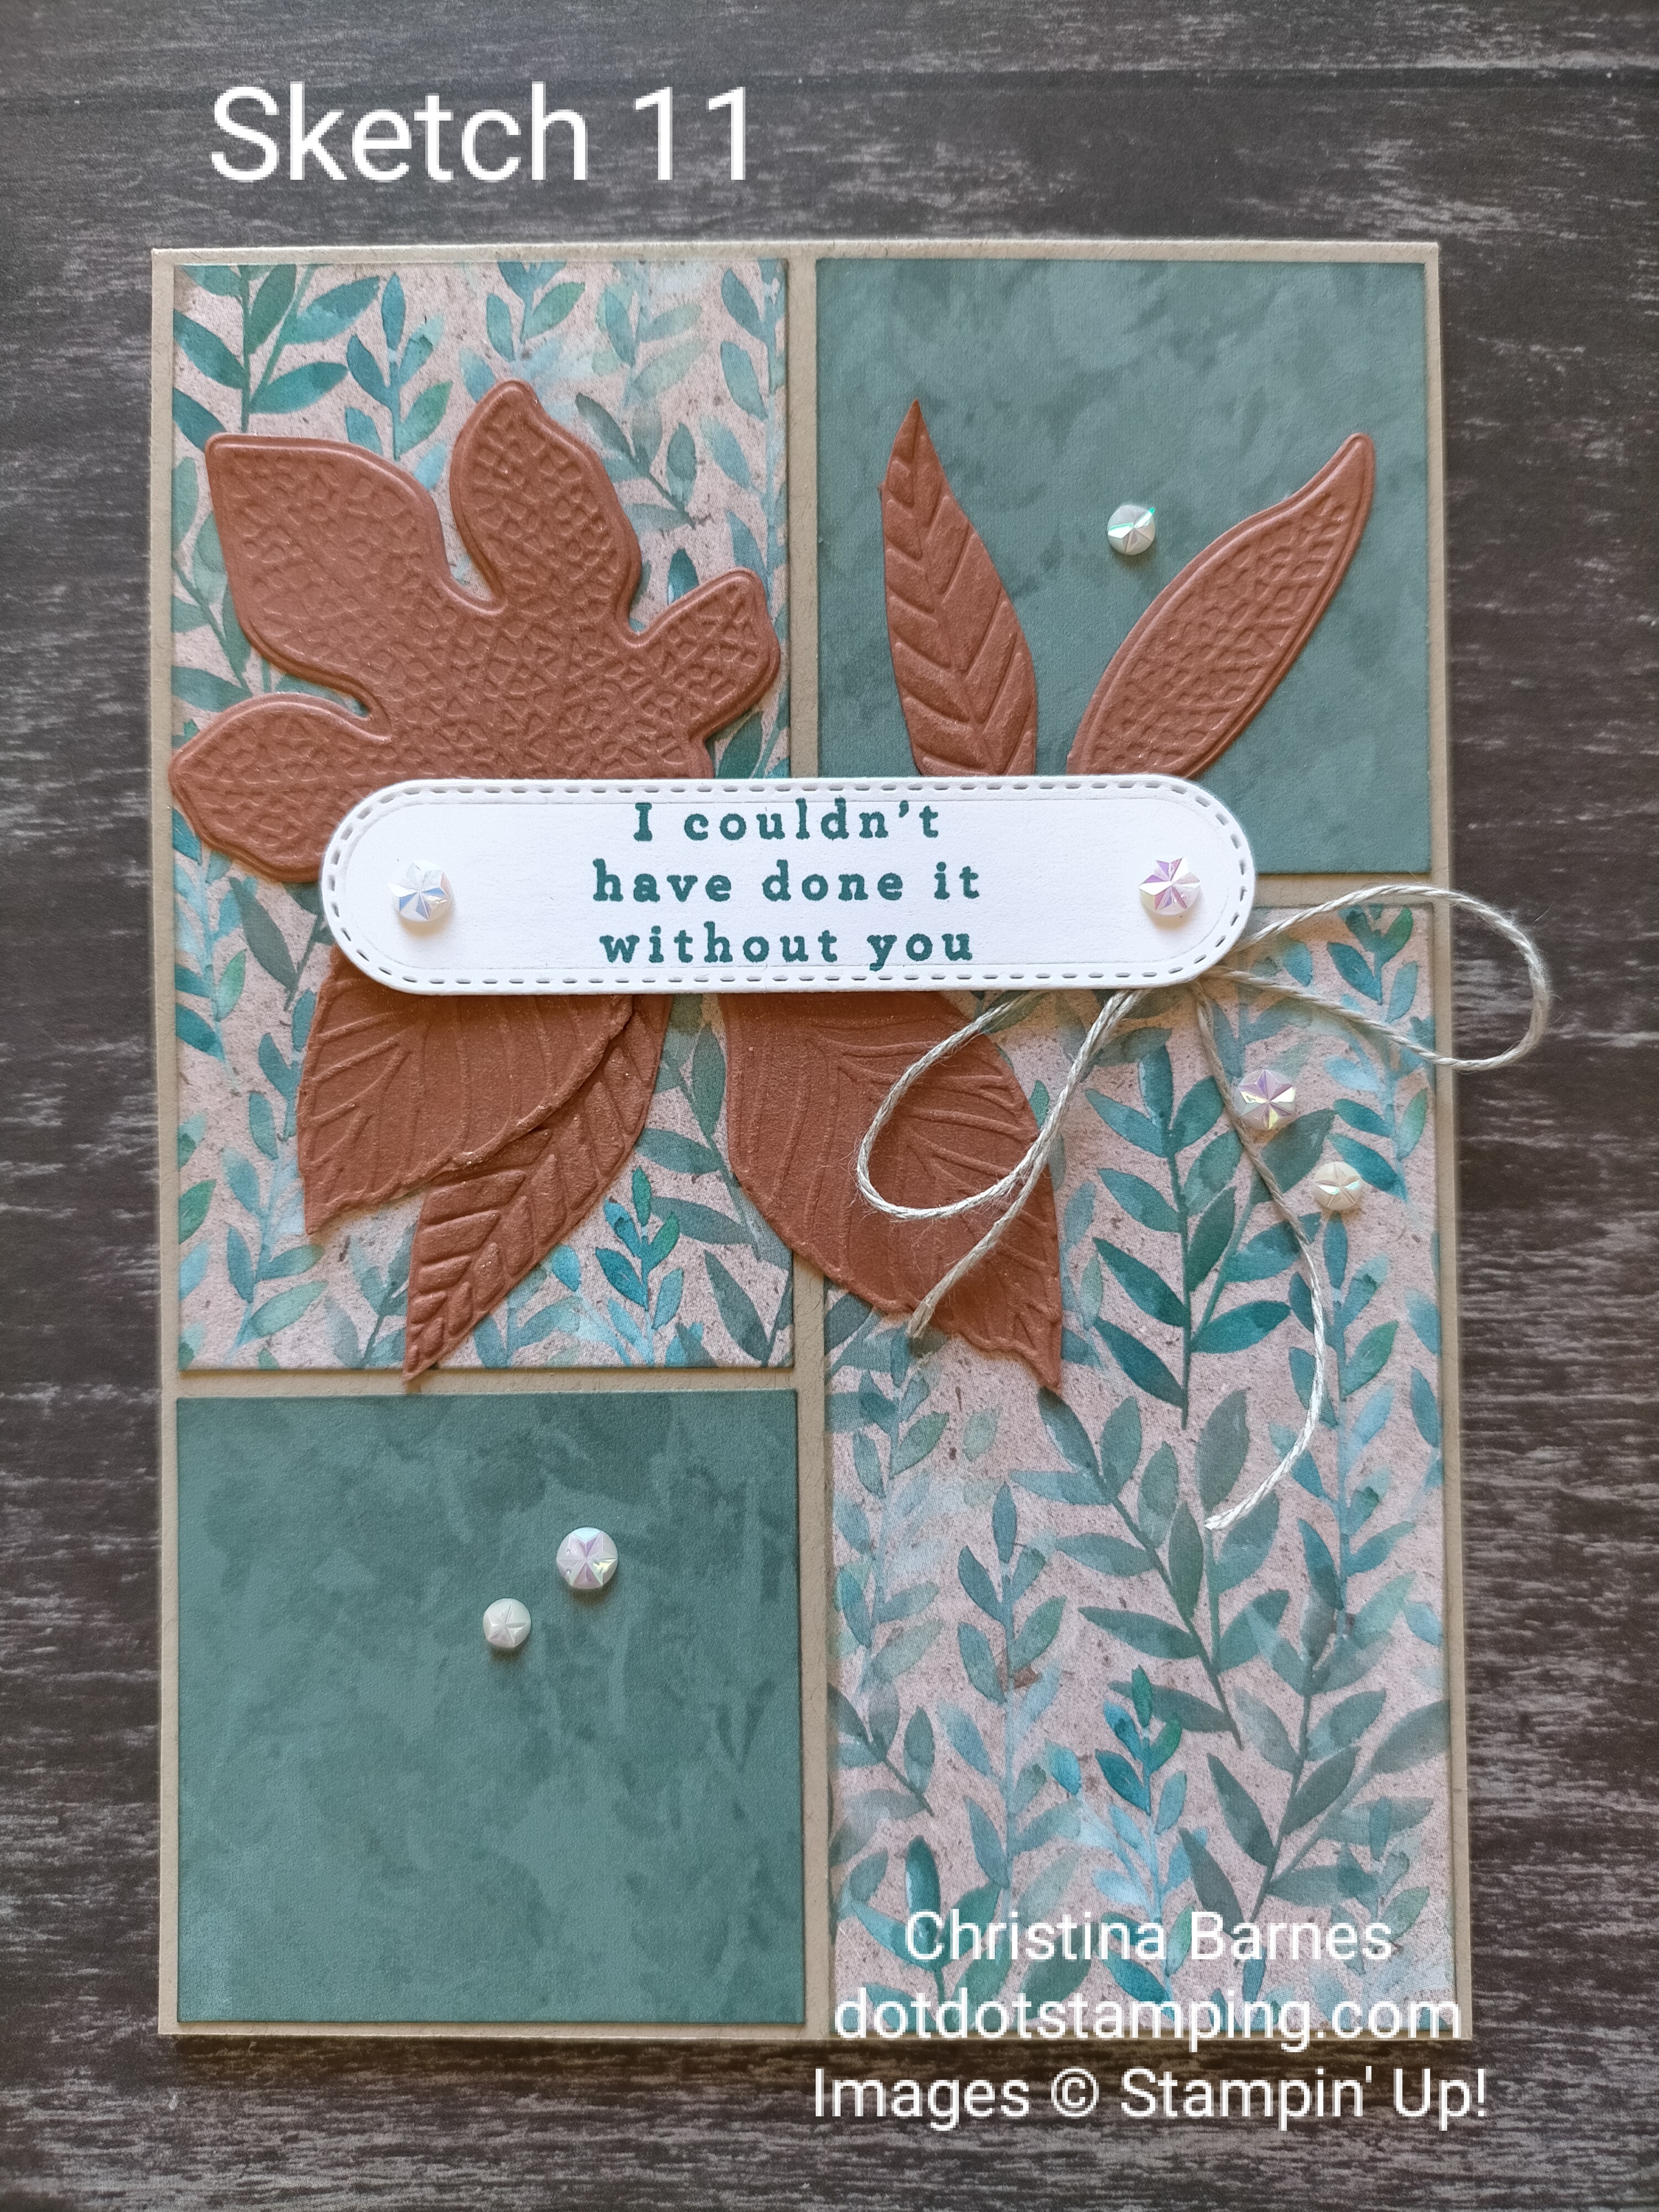
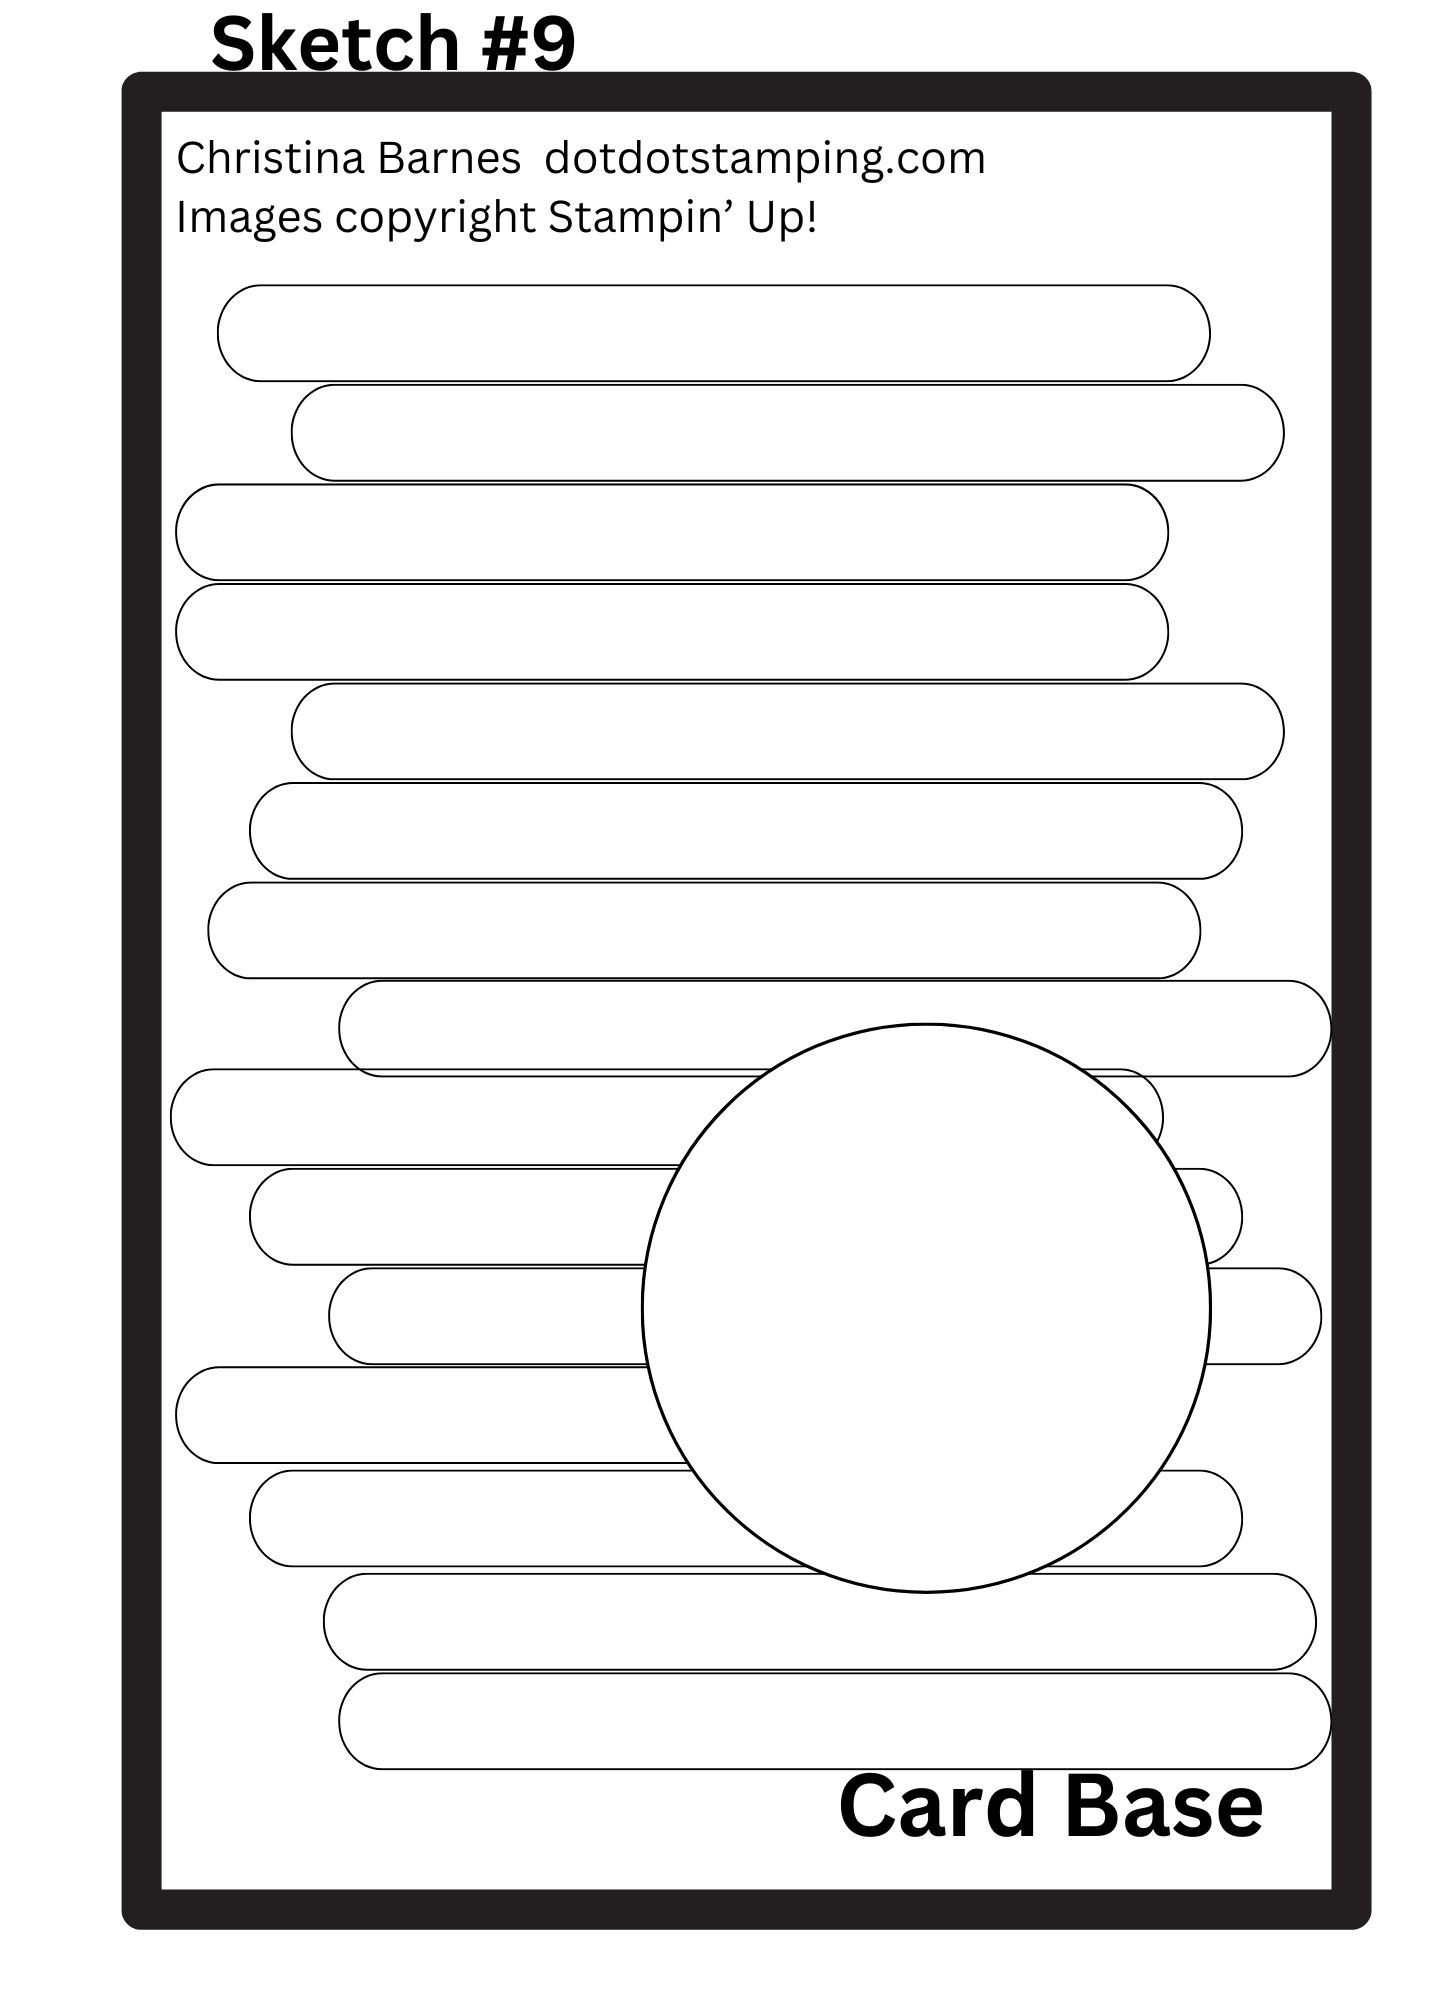
Here is the sketch.

I don’t often start my Christmas cards this early in the year, however I have been offered a wonderful opportunity to have my cards displayed and for sale at a very successful Artisans market, in November, so this year, I need to be creating heaps of Christmas cards and packaging over the next few months.

My card uses a Blackberry Bliss cardbase, such a yummy colour, and one of my favourites in the Stampin’ Up! colour range. The card base is 21cm x 14.5cm, which is then scored at 10.5cm on the long side and folded, so when it’s folded, your card front will be 10.5cm x 14.5cm.
The Basic White panel measures 8.5cm x 14.5cm, and has been run through the Stampin’ Cut and Emboss Machine with the Distressed Tile Embossing Folder, and then I have swiped some Blackberry Bliss ink over the raised areas.
I have cut out the four circles using the Stylish Shapes Dies, in Basic White and Blackberry Bliss cardstock, and some Gold Foil Sheets. The smaller circles have then been embossed with the Changing Leaves Hybrid Embossing Folder. I have also used the Gold Foil Sheets for the die cut leaves from the Changing Leaves Dies, and stamped the leaves on the white circle from the same bundle.
The sentiment comes from the Trucking Along stamp set which is an Online Exclusive which is still available.

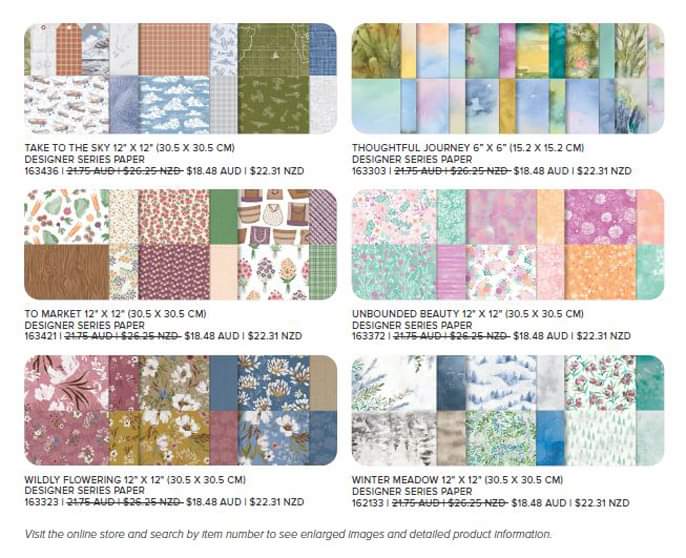
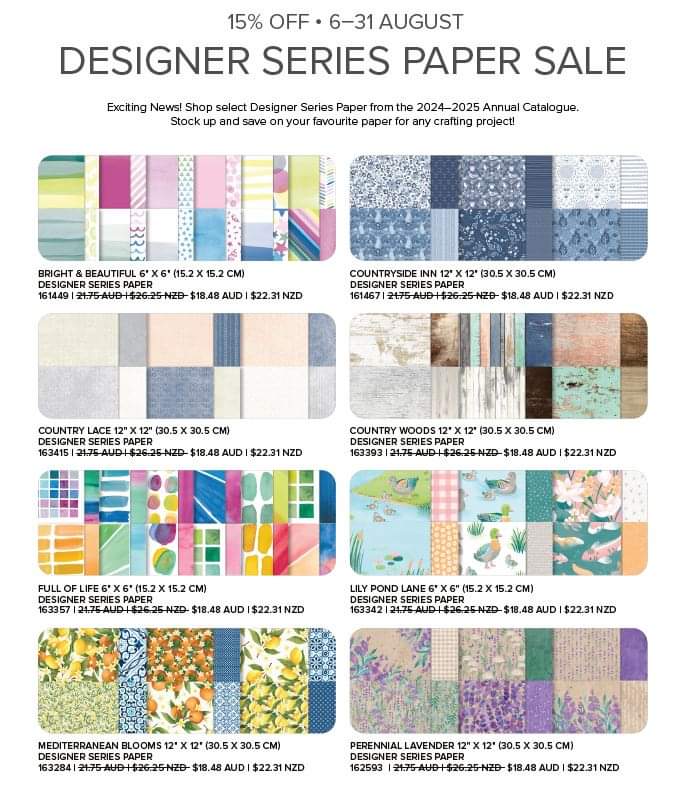
Don’t forget the current wonderful promotion with a discount on Designer Series Paper which you can make the most of in my online store here.

Happy stamping
Chris

Annual Catalogue Sketches – Sketch #11

Welcome back to the Stampin’ Up! Annual catalogue Sketch inspiration, we are halfway at Sketch #11.

I do apologise, I haven’t done a very good job with putting this sketch onto Canva, and it doesn’t quite work here because the background is white and I don’t think I can change. You will see what I have done with the cards though, and it will all make sense. I hope.

Today I have two cards to show you using this sketch, both featuring the Perennial Lavender Designer Series Paper.

Both cards use Crumb Cake cardstock for the card base (21cm x 14.5cm, which is then scored at 10.5cm on the long side and folded, so when it’s folded, your card front will be 10.5cm x 14.5cm), and the layer of Perennial Lavender Designer Series Paper is cut at 14cm x 10cm.
I have then cut the DSP down the centre (lengthwise) at 5cm, then taken each of those strips and cut a 5cm x 5cm square off either the top or the bottom. Those smaller squares are then turned over so that you see the reverse side pattern.
All of the DSP pieces have been sponged around the edges using some Crumb Cake ink and a Sponge Dauber.
For the first card above, I have then placed each piece of DSP so that the sides are pushed up against each other, leaving a larger amount of cardstock around the outside edge.

And for the second card I have moved the pieces of DSP more towards the outside edges, leaving a gap between each piece of DSP.
Which one do you like better?
The leaf elements from both cards are from the Changing Leaves Bundle, and I have also used the Nested Essentials Dies, some Linen Thread, Loose Frosted Dots on the first card, and some Iridescent Faceted Gems on the second.

Happy stamping, and hope you have a crafty Sunday,
Chris

Sketch Saturday #757

Welcome back to another Sketch Saturday Challenge. Here is the new sketch.

I have chosen to use butterflies instead of the square shapes for my card today.

The butterflies are some of the Paper Butterfly Accents, which have been coloured using reinkers. I have dropped a couple of drops of Fresh Freesia, Highland Heather and Pool Party ink onto my Glass Mat, sprayed with water using a Spritzer, and then laid each butterfly into the spreading ink.
I dried the butterflies with a Heat Tool to speed up the drying process but you could just let them dry naturally.
The butterflies have been layered over some Basic White Cardstock which was run through the Stampin’ Cut and Emboss Machine with the Distressed Tile Embossing Folder, with a sentiment stamped in Fresh Freesia ink and some Gems in the same colour from the Purple Fine Shimmer Gems.

That’s all from me today. I hope the sketch inspires you and that you share your projects with us at Sketch Saturday.
Happy stamping,
Chris

Annual Catalogue Sketches – Sketch #10

Hi and welcome back to the daily sketches from the Annual Catalogue, with Sketch 10.

I am in a purple mood today, and have used heaps of inks to create my background and focal layer.

The cardbase is the usual size (21cm x 14.5cm, which is then scored at 10.5cm on the long side and folded, so when it’s folded, your card front will be 10.5cm x 14.5cm) and today I have used some Highland Heather cardstock for the base.
Over that is some Watercolour Paper which is 10cm x 14cm. I would normally use (and highly recommend) the Fluid 100 Watercolour Paper, it is the best I have ever used. However, I ran out, so had to use some that I already had in my stash.
I used the Stampin’ Up! Glass Mat (fantastic tool, if you don’t have one already), sprayed some water directly onto with a Spritzer, then added some drops of Highland Heather ink, Fresh Freesia ink and Petal Pink ink, swirled the ink around in the water, added a bit more water, generally had a play with it until I was happy, and then laid two pieces of the Watercolour Paper directly into the inky mess!
Once I was happy with the spread of colour, I dried it with a heat tool, distressed the edges with my Paper Snips Scissors, sponged some Highland Heather ink around the edges. Before applying the background layer to the cardbase with adhesive, I heat embossed the sentiment.

With the smaller piece of Watercolour Paper, I stamped the small flower from the Poised Peony stamp set using Versamark ink, sprinkled white Embossing Powder over it, and set with a Heat Tool. After distressing the edges and sponging with ink, I then used a Water Painter Brush to paint colour onto the flower – Lost Lagoon ink for the leaves, and some Highland Heather and Fresh Freesia for the flower.
This smaller piece of Watercolour Paper is 5.5cm x 5.5cm, and the Basic White layer behind it is 6 x 6cm, and sponged with Highland Heather ink.
Behind the focal image layer is another layer of cardstock, again in Highland Heather, measuring 5cm x 10cm, which I have cut at each end with Paper Snips to form the flag ends.
Some Linen Thread and Purple Shimmer Gems finish the card off.
Oh, and I almost forgot the splatters, which are done with the Water Painter with some Highland Heather ink on the brush, and I just knock the brush against a hard object such as a ruler or clear block, and the ink splatters – often in places you don’t want it!!

Hopefully I have inspired someone to try out a different layout for a card.
Stay tuned for the next one.
Happy stamping,
Chris

Annual Catalogue Sketches – Sketch #9

Welcome back to the daily sketches, and we are up to sketch #9.

As soon as I saw this sketch I thought it would be an awesome way to use up some of those pesky offcuts that we all have, so I have taken a random bunch of them in no order of colour and tried to make them look pretty. I’m not even going to try to tell you which colours I have used.

I have used a card base in my standard size (21cm x 14.5cm, which is then scored at 10.5cm on the long side and folded, so when it’s folded, your card front will be 10.5cm x 14.5cm) in Thick Basic White cardstock. Then another layer of Basic White Cardstock (not thick this time) which is 10cm x 14cm. I adhered the strips with glue, randomly onto this layer before I put the layer onto the card base.

The circle is cut using the Stylish Shapes Dies, and I have stamped the pile of books and cute bird from the Bird’s Eye View stamp set in Black Memento Ink.
I had originally planned to colour the images, since that’s my favourite thing to do, but I quite like it just as it is, since there is so much colour in the background.

Hope you are enjoying seeing the sketches come to life.
Happy stamping,
Chris

Don’t forget the DSP Sale on until the end of August while stocks last. If you are in Australia, you can shop here.

Annual Catalogue Sketches – Sketch #7

Hi again, welcome back to the daily posts of Sketches from the Stampin’ Up! Annual Catalogue.
Here is Sketch #7.

Today’s card is a fairly simple one, with not too many steps and no stamping.

My card base is in Basic Black cardstock (21cm x 14.5cm, which is then scored at 10.5cm on the long side and folded, so when it’s folded, your card front will be 10.5cm x 14.5cm), the first layer in Very Vanilla cardstock is only slightly smaller this time, 10.2cm x 14.2cm, which has been run through the Stampin’ Cut and Emboss Machine with the Layered Florals 3D Embossing Folder. So pretty!

The main focal point is simply one element from the Labels and Layers Ephemera pack, and one from the Fully Flowering Ephemera pack.
I have layered the tag over some Basic Black cardstock measured at approximately 4.7cm wide x 7.6cm, and I have then used Paper Snip Scissors to cut the flag to match the one on the tag.
Some Linen Thread around this is the only extra I have added.
You could, of course, add a sentiment, but I liked the look of this without.

The Ephemera Packs are on Page 19 of the Annual Catalogue and make gorgeous papercrafting so easy.

And don’t forget the fantastic discount on Designer Series Papers, but only while stocks last. Check it out in my online store.

Happy stamping,
Chris

Annual Catalogue Sketches – Sketch #6

Hi and welcome back.
Today we have Sketch #6 from the Stampin’ Up! Annual Catalogue.

My card today features the Country Woods Designer Series Paper which you can get at a discounted price for the rest of August, while stocks last. And I have combined it with the Country Flowers Bundle to make a Sympathy card.

I have taken a piece of the Country Woods DSP, cut to 10cm x 14cm to lay over the top of my Crumb Cake card base (21cm x 14.5cm, which is then scored at 10.5cm on the long side and folded, so when it’s folded, your card front will be 10.5cm x 14.5cm).
The rectangular elements have been die cut using the Nested Essentials Dies, and the circle from the Spotlight on Nature Dies.
I have stamped the teapot image directly onto some of the Country Woods DSP, then cut using the die, before adding some shading using a Basic Grey Watercolour Pencil. The leaves were done in the same way and again coloured with Watercolour Pencils.

I found this sketch challenging for some reason, but so far I am enjoying creating using different layouts. I have a tendency to use the same or very similar layouts for my cards, so it’s a good challenge to be trying out some different ideas.

Don’t forget that Designer Series Papers are on sale at 15% off between now and the end of August, and you can order simply by going to my Online Store.


Happy stamping,
Chris

Sale on Designer Series Paper starts tomorrow!

Starting tomorrow, 6th August, the always popular 15% off Designer Series Papers.
If you are a papercrafter, you will love this promotion, whether it’s for cardmaking, scrapbooking or any other kind of papercrafting.
Stock up here on your favourites, but make sure you get in early in case they sell out.

Have you got some favourites that you need to get?
I have a couple that I don’t have yet, so it might be time to invest in something different.
If you would like to do the same, you can go right to my Online Store anytime that suits you.
Happy shopping,
Chris

Annual Catalogue Sketches – Sketch #5

Hi and welcome back.
Today we have Sketch #5 from the Stampin’ Up! Annual Catalogue.

Today’s card has a black card base, again measuring 21cm x 14.5cm, which is then scored at 10.5cm on the long side and folded, so when it’s folded, your card front will be 10.5cm x 14.5cm.
The next layer is a Basic White layer measuring 14cm x 10cm which I have run through the Stampin’ Cut and Emboss Machine using the Distressed Tile 3D Embossing Folder. I have then added some ink to the cardstock by dabbing the ink pad lightly across the raised areas, I have used a touch of Poppy Parade ink and some black Memento ink.

The next layer is flagged at both ends. I have taken a piece of Poppy Parade cardstock cut to 6.5cm x 12 cm, cut approximately 1cm up the centre of the short ends and then cut from the corners into the top of the cut to create the flag ends. Once that was done I have run that through with the Distressed Tile Embossing Folder and this time I have turned it over to use the debossed side.

The focal image is on a piece of Basic White cardstock measuring 7 x 7cm with a layer of Basic Black behind it which measures 7.5 x 7.5cm.
The flowers come from the Inspirational Sketches stamp set, stamped in Memento Black Ink and then coloured using Stampin’ Blends in Old Olive, Poppy Parade and Daffodil Delight.

The sentiment comes from the Changing Leaves stamp set and then cut using the Stylish Shapes Dies but you could use any offcut that you have.
And of course we need some of the obligitory bling with some Iridescent Faceted Gems.

I have been busy on Canva recreating the sketches from the catalogue, so they are not exact copies of what is in the catalogue but close enough. And since I have put my time and effort into creating these I would appreciate acknowledgement of where you got them from if you plan on using them.

I would love to know if these posts are helping to inspire anyone, so please leave me a comment if you are liking what I am sharing.

Happy stamping,
Chris

Annual Catalogue Sketches – Sketch #4

Hi and welcome back.
Today we have Sketch #4 from the Stampin’ Up! Annual Catalogue. Here is the sketch that I copied from the catalogue.

For my card I have chosen a single layer of Thick Basic White cardstock with no other layers.

The card base is 21cm x 14.5cm, which is then scored at 10.5cm on the long side and folded, so when it’s folded, your card front will be 10.5cm x 14.5cm.

I have used some of the Stampin’ Up! Masking Paper to mask off the areas where I didn’t want colour. I didn’t measure it but just worked out approximately how big I want the area to be coloured. It’s approximately 1cm up from the bottom and down from the top and just over 3cm from the left hand side, but you can adjust to what looks right for you.
A quick tip when it comes to using the Masking Paper – it is VERY sticky and can pull up the cardstock when you pull it off. So I stick it onto fabric before I put it onto the cardstock, usually a sleeve of the top I am wearing or jeans. This pulls up some fibres off the cloth onto the masking paper making it less sticky but still sticky enough to be effective.

Once I had the Masking Paper in place, I used a Blending Brush to put down some ink directly onto the card base. I started with some Crushed Curry ink at the bottom, then Peach Pie ink and lastly Pumpkin Pie ink. I then stamped the leaf image from the Changing Leaves stamp set using Memento Black ink, onto the blended area.
The sentiment is again from the Changing Leaves stamp set, and the two sentiment panels were die cut from the Changing Leaves Dies in Basic White and Pumpkin Pie.

The black brads are some of the retired Classic Matt Dots, but I had some left over and they felt just right to add a little extra touch to my card.

I have been busy on Canva recreating the sketches from the catalogue, so they are not exact copies of what is in the catalogue but close enough. And since I have put my time and effort into creating these I would appreciate acknowledgement of where you got them from if you plan on using them.

Happy stamping,
Chris